

Get this project tracker as a ready-to-use Notion template at the end of this post.
It was mid-May, and I had just started planning my work for the next two and a half months.
There's no logical reason why I was planning for two and a half months other than it was already mid-May and I wanted to prepare for a quarter including May.
Anyway, as I planned in my head, I quickly realised I needed a workspace where I could solidify my plans and keep an eye on how each project progressed over the next 10–11 weeks.
I needed a minimal project tracker.
In this blog post, I'll discuss why I decided to build a project tracker from scratch in Notion, and how you, too, can build one without spending a dime.
Let's start with:
Why Notion?
It's 2024, and there's no shortage of project management apps in the market.
Linear, Jira and Asana are powerful apps that address almost every aspect of modern project management.
But, for my projects, I wanted something minimal, easy to use and friendly on my wallet.
Having tolerated Jira for years at the various companies I had worked at, I knew Jira was not what I wanted. It was too clunky, slow and bloated with features I would never touch for my personal project planning.
Linear on the other hand is fast, modern and minimal enough for my needs, but heavy on the wallet. I used Linear to plan and track my progress when writing a book, and it was a joy to use the app.
But, Linear's free plan works for up to 250 non-archived issues or tasks in a workspace. While this is generous enough, Linear's task archival mechanism is currently automatic.
This means, that there's no button that I could press to archive a task after it's done. The Linear app would monitor my project's status and automatically archive completed tasks after a certain period as configured in my workspace — the earliest being after a month.
This is enough for small-scale hobby projects, but as you start creating and running multiple large projects, unarchived tasks can pile up to cross the 250-task threshold within a few months.
Then, Linear would cost around $8/month for the starter plan.
I might be overestimating my task count here but I didn't want to set up my entire project planning on Linear only to either migrate everything to another app after a month or pay another monthly app subscription fee.
With Linear and Jira out of the running, I turned to Notion to solve this problem.
I was already using Notion to store materials around my business for a while, so why not leverage what I already use for my project tracking needs?
Notion has all the tools needed to build a minimal project management workspace, and the free plan has no such limits as Linear's. Moreover, I didn't need all the fancy integrations offered by Linear and Jira, so Notion appeared lucrative.
With Notion as my tool of choice for this task, I proceeded to:
Visualising the project hierarchy
The basic project structure I needed was to have a list of projects I wanted to work on in the next few months and see how far a project had progressed as I completed tasks from each.
Something like this:
But, as discussed in an earlier blog post on goal gradients, dividing a project into meaningful milestones increases the probability of finishing it.
Therefore, a milestones feature would be a helpful addition.
This is how it would go:
Each project would contain tasks neatly grouped into relevant milestones.
As I complete each task from a project, I should see the progress of each milestone in the project, and also see an aggregated progress of the project.
This would help me understand how far I'm on a project milestone, and also identify how much work is left on the overall project.
The project tracker would house multiple projects, giving me a neat dashboard to have a bird's eye view of my ongoing work.
So, with the requirements sorted, it was time to get my hands dirty and build this tracker.
Starting with the Projects view
The first step was to create a blank page in my Notion workspace to reflect the planning for the current year:

Now, since I've divided my year into quarters of work, I wanted the same structure on the yearly plans page.
I created a subpage called Mid-May to July to house all the plans for that quarter like this:

In that new page, I added an inline database to store and list all the projects for the quarter:
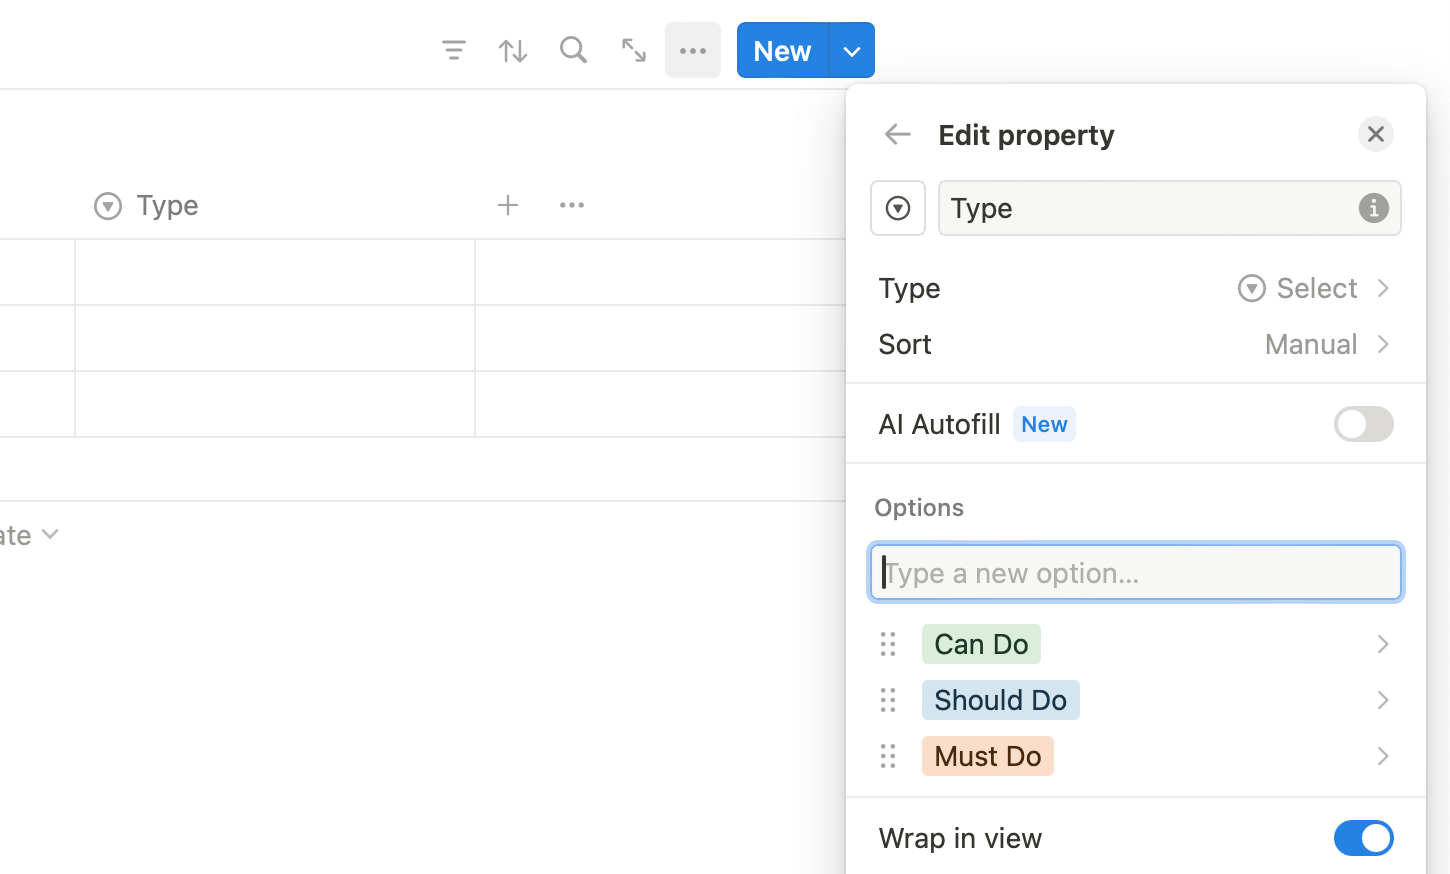
Then, I edited the pre-made Tags property of the database to a Select property with a couple of project priority types:
- Must Do: This project is critical and must be completed by the quarter's end.
- Should Do: This project is essential, but it's not necessary to finish it this quarter.
- Can Do: This project is more of a wishlist and should be done only if I can spare extra time for it without disrupting my critical projects.
This distinction is crucial because it helps me identify what to work on now and what to postpone.
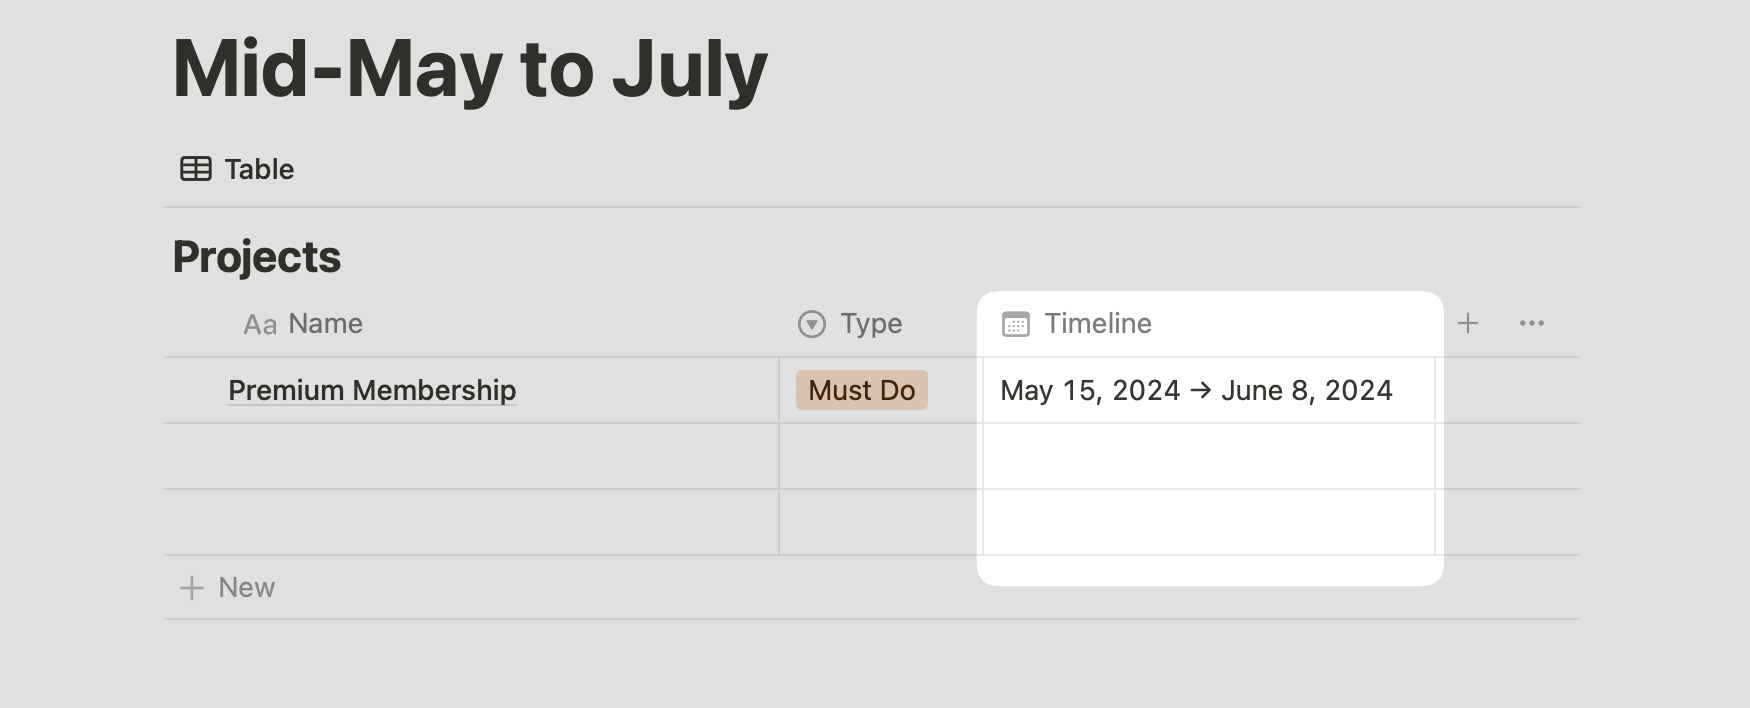
After sorting the types, I added a new Date property to the table to set a timeline for the project:
Instead of picking a single completion date here, I picked a date range by toggling the End Date switch on the date picker:
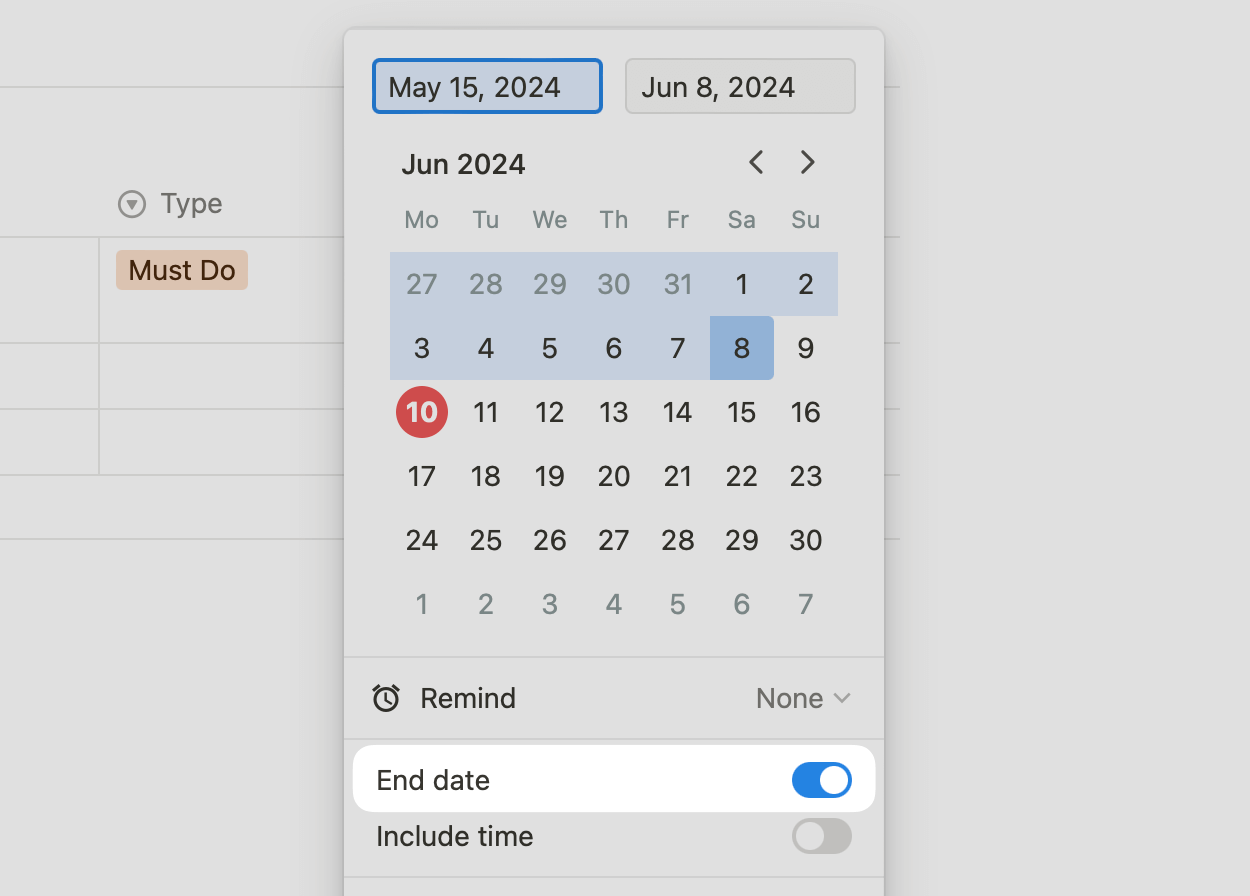
This set a timeline for the project indicating when to start and when to end so that I can visualise each project in a neat timeline view like this:
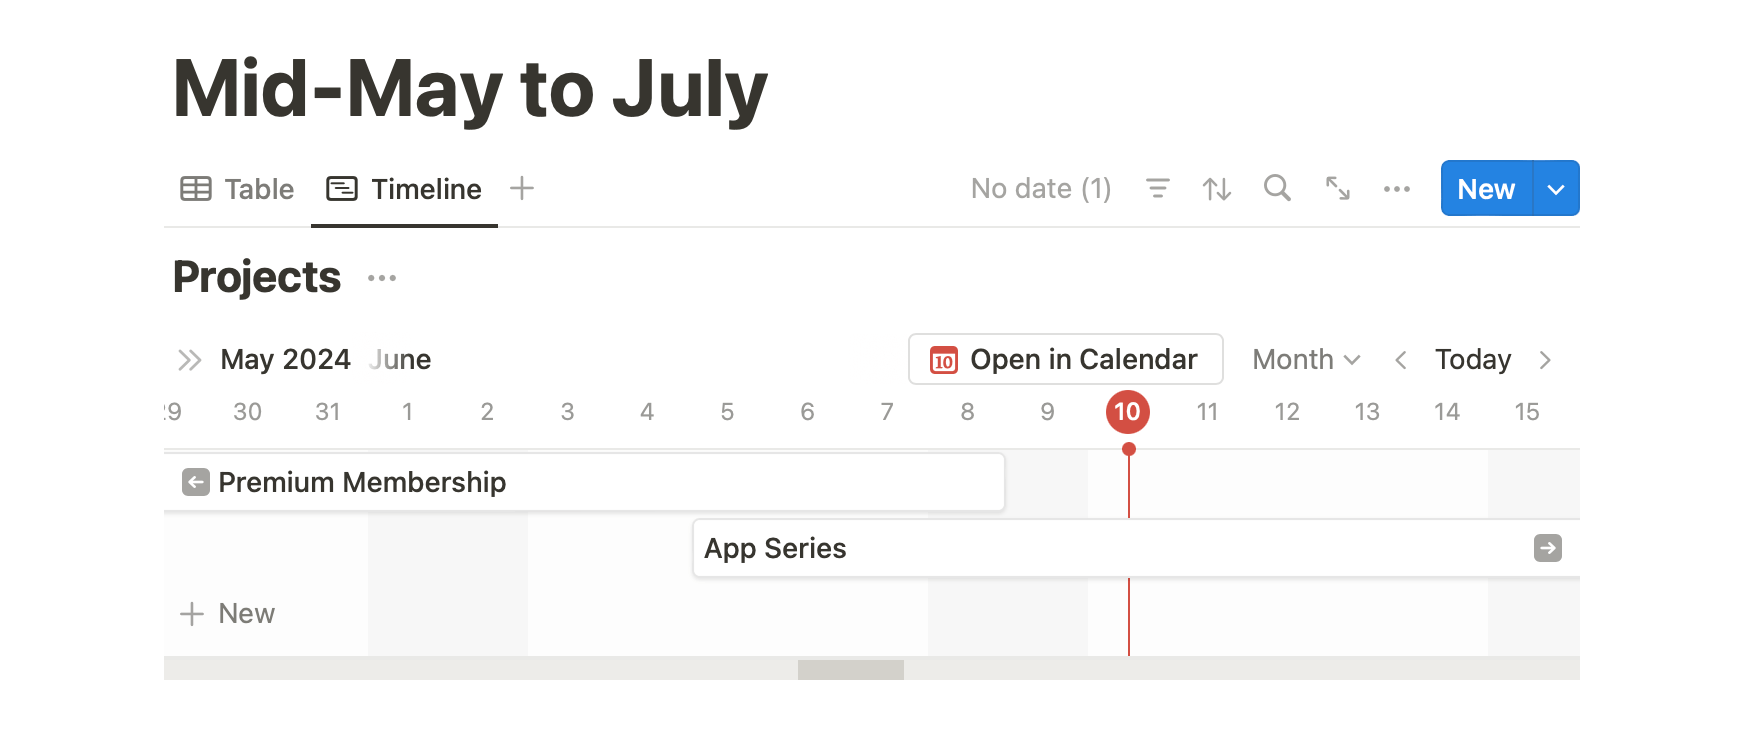
Not every project starts and ends at the same time, so visualising the lifecycle of each project and how they overlap with the timings of one another helps efficiently allocate tasks from each project into a weekly schedule.
You can create a timeline view for your Projects database by adding a new view and choosing the type Timeline:
Now:
A project is comprised of individual tasks which make up the overall job to be done.
For listing tasks, I had two options.
Since each item in the Projects database is an individual Notion page, I could add a simple checklist of tasks for each project inside this page:

However, this format creates a barebones, flat list which I can't use to calculate the progress of the project.
To be able to calculate a project's progress, I needed to be able to count each completed task in the project. For that, I needed to:
Setup a Tasks database
To store tasks across all projects in my plan, I created another inline database in the same Mid-May to July page with two properties — checkbox and name:
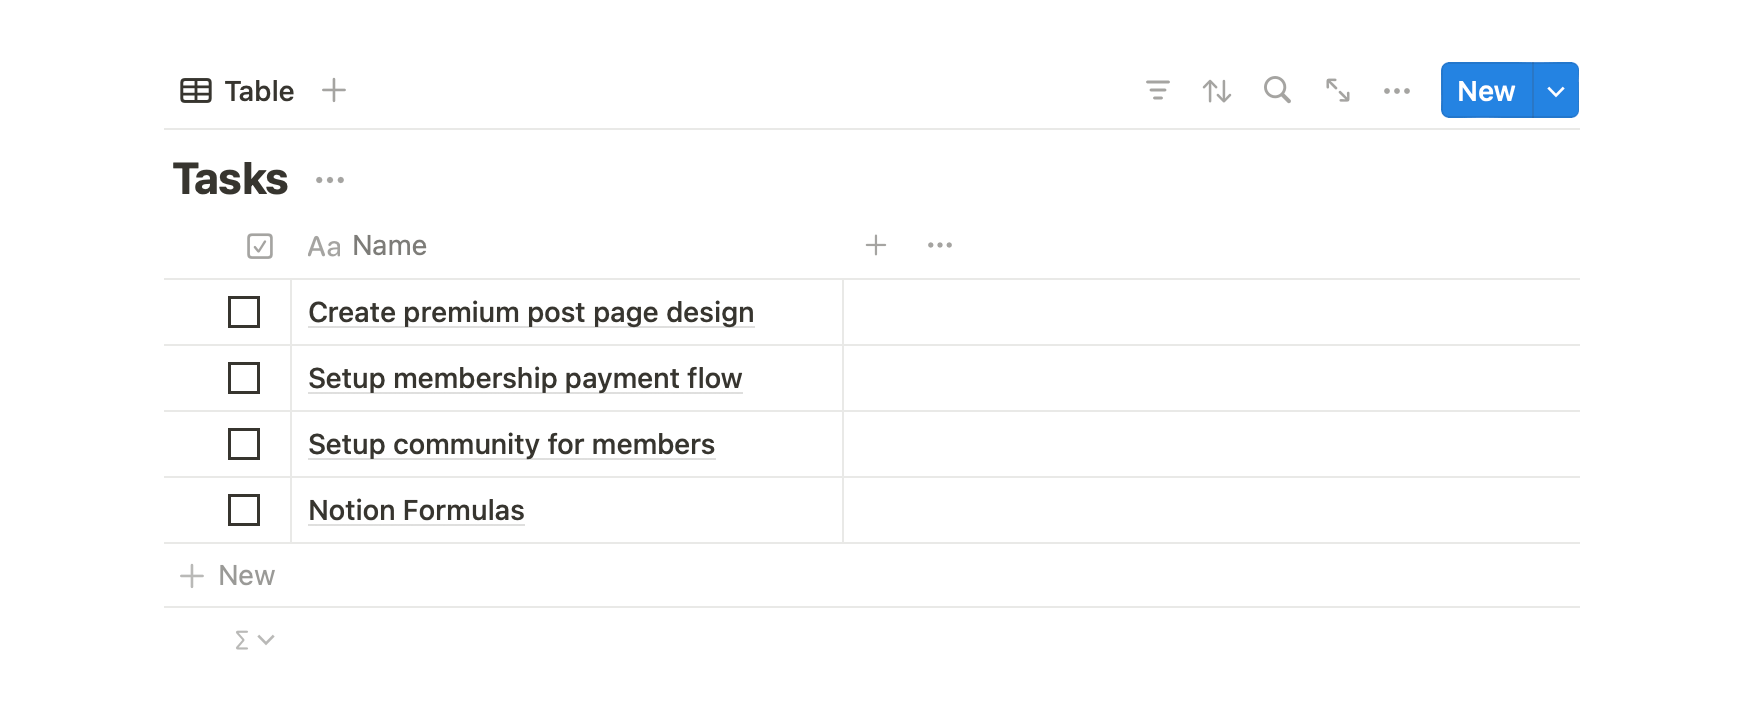
The checkbox property indicates whether a task is complete and will help calculate a project's progress.
I now had two databases on my planning page, Projects and Tasks, but both were independent of each other. I didn't have a way to associate each task with a project and vice-versa.
This is where Notion's database relations came in handy.
If you're from a technology background, database relations are similar to joining two tables in a SQL database.
In non-technical terms, by creating a relation between two databases, we can link items from one to another and perform various operations.
For example, by linking each task with a project, we could filter the Tasks database to show tasks only for a particular project. We could also count the total number of tasks added to a project, etc.
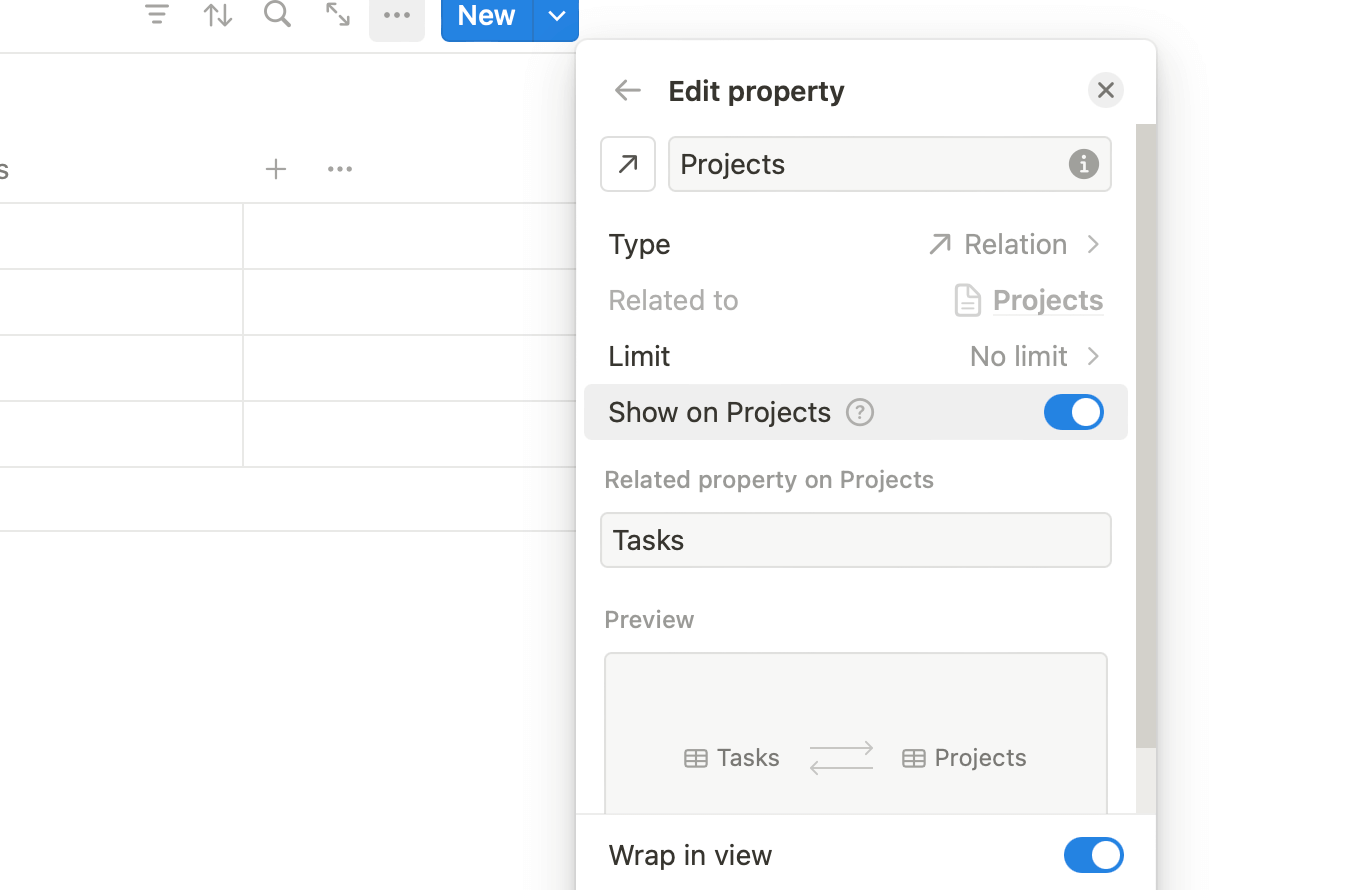
To associate a task with a project, I added a Relation property to the Tasks database, linking each item to the Projects database:
I also toggled the Show on Projects switch to make this relation accessible to the Projects database where I could calculate a project's progress:
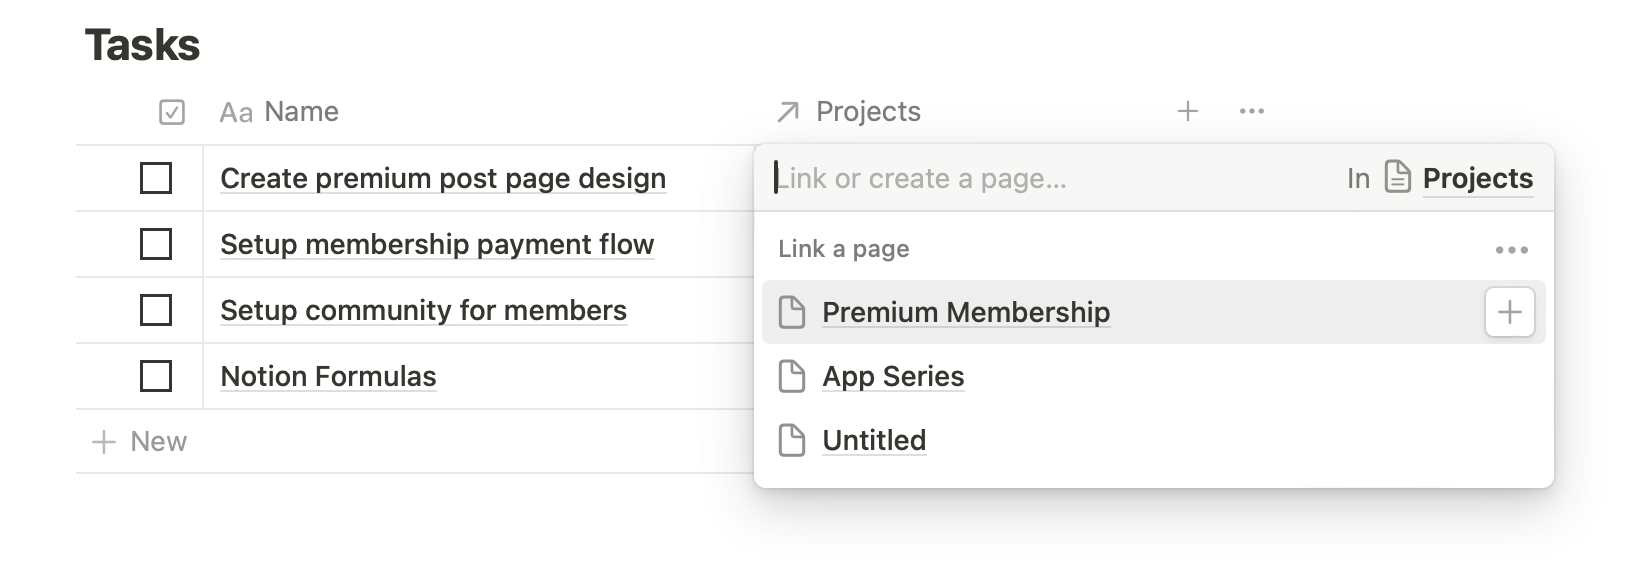
With the relationship between tasks and projects set up, I assigned each task on my list to a project by clicking the Project cell on a task database item and selecting the project:
Like other values in a Notion database, you can drag the bottom-right handle of a cell to copy over its value to the subsequent cells:
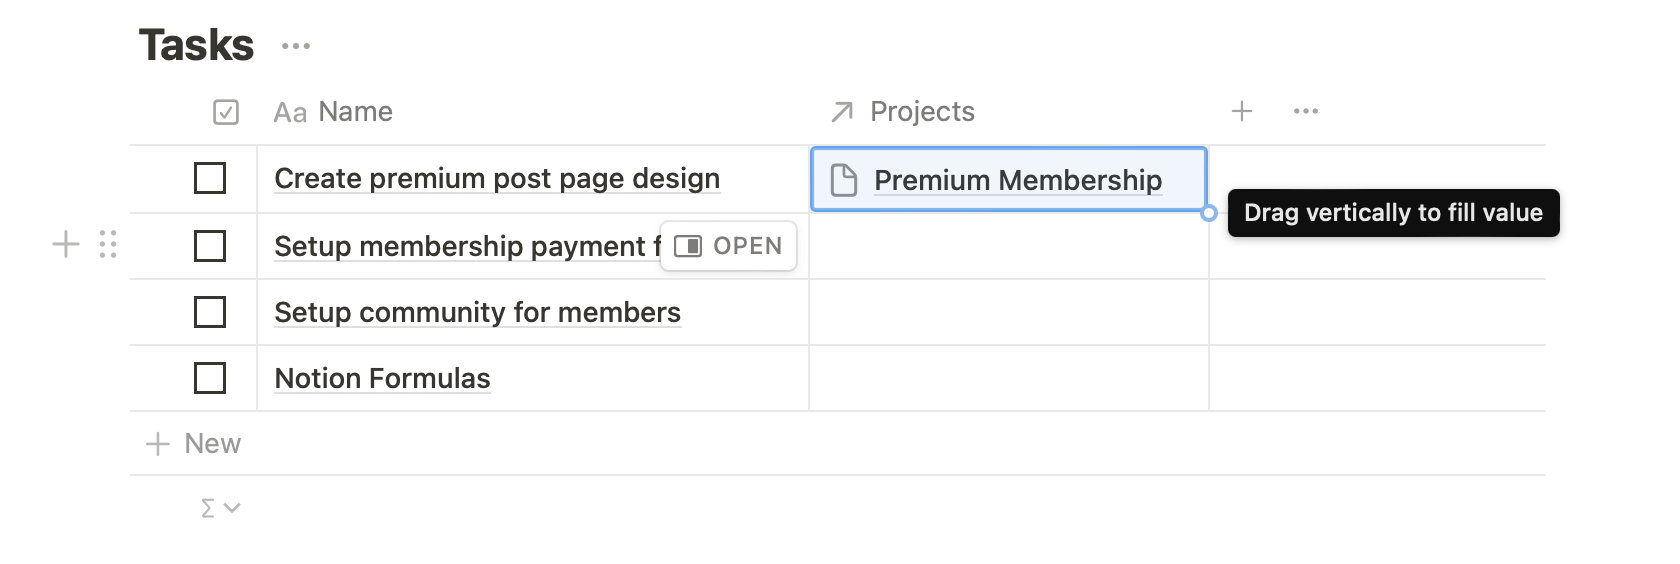
This makes bulk assigning tasks to a project easier.
Once I was done, I had all tasks assigned to their respective projects like this:
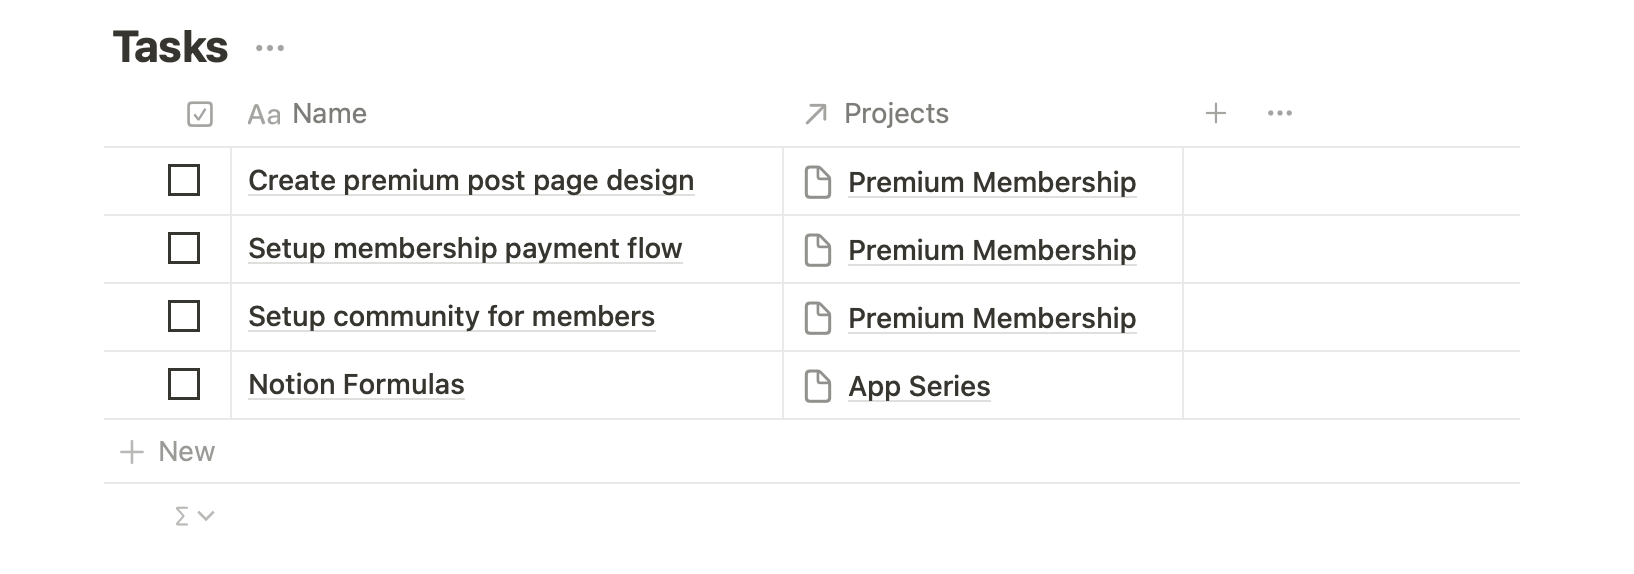
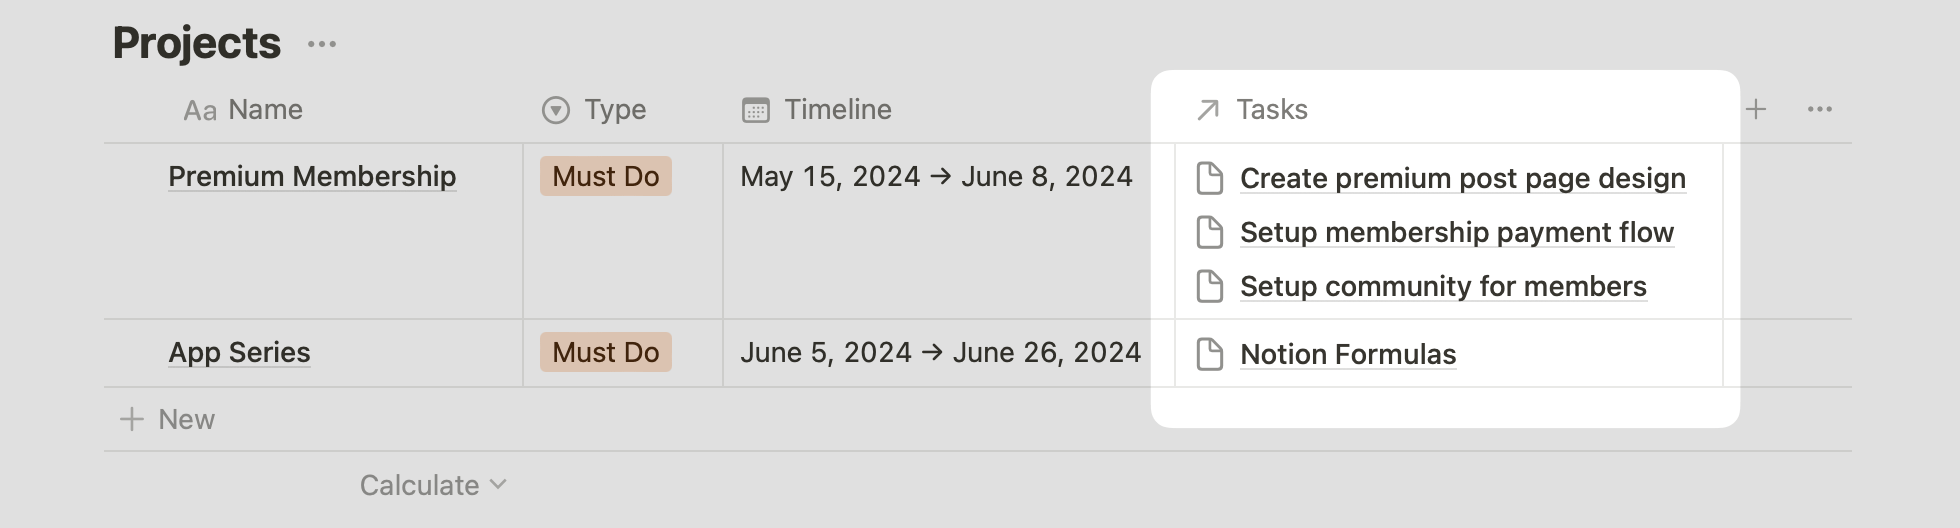
Also, since I toggled on the Show on Projects database switch, the Projects database automatically got a new Tasks property showing all assigned tasks:
Now:
Both Projects and Tasks were located on the same page, and I could have over a hundred tasks spread across projects. The page could get messy quickly.
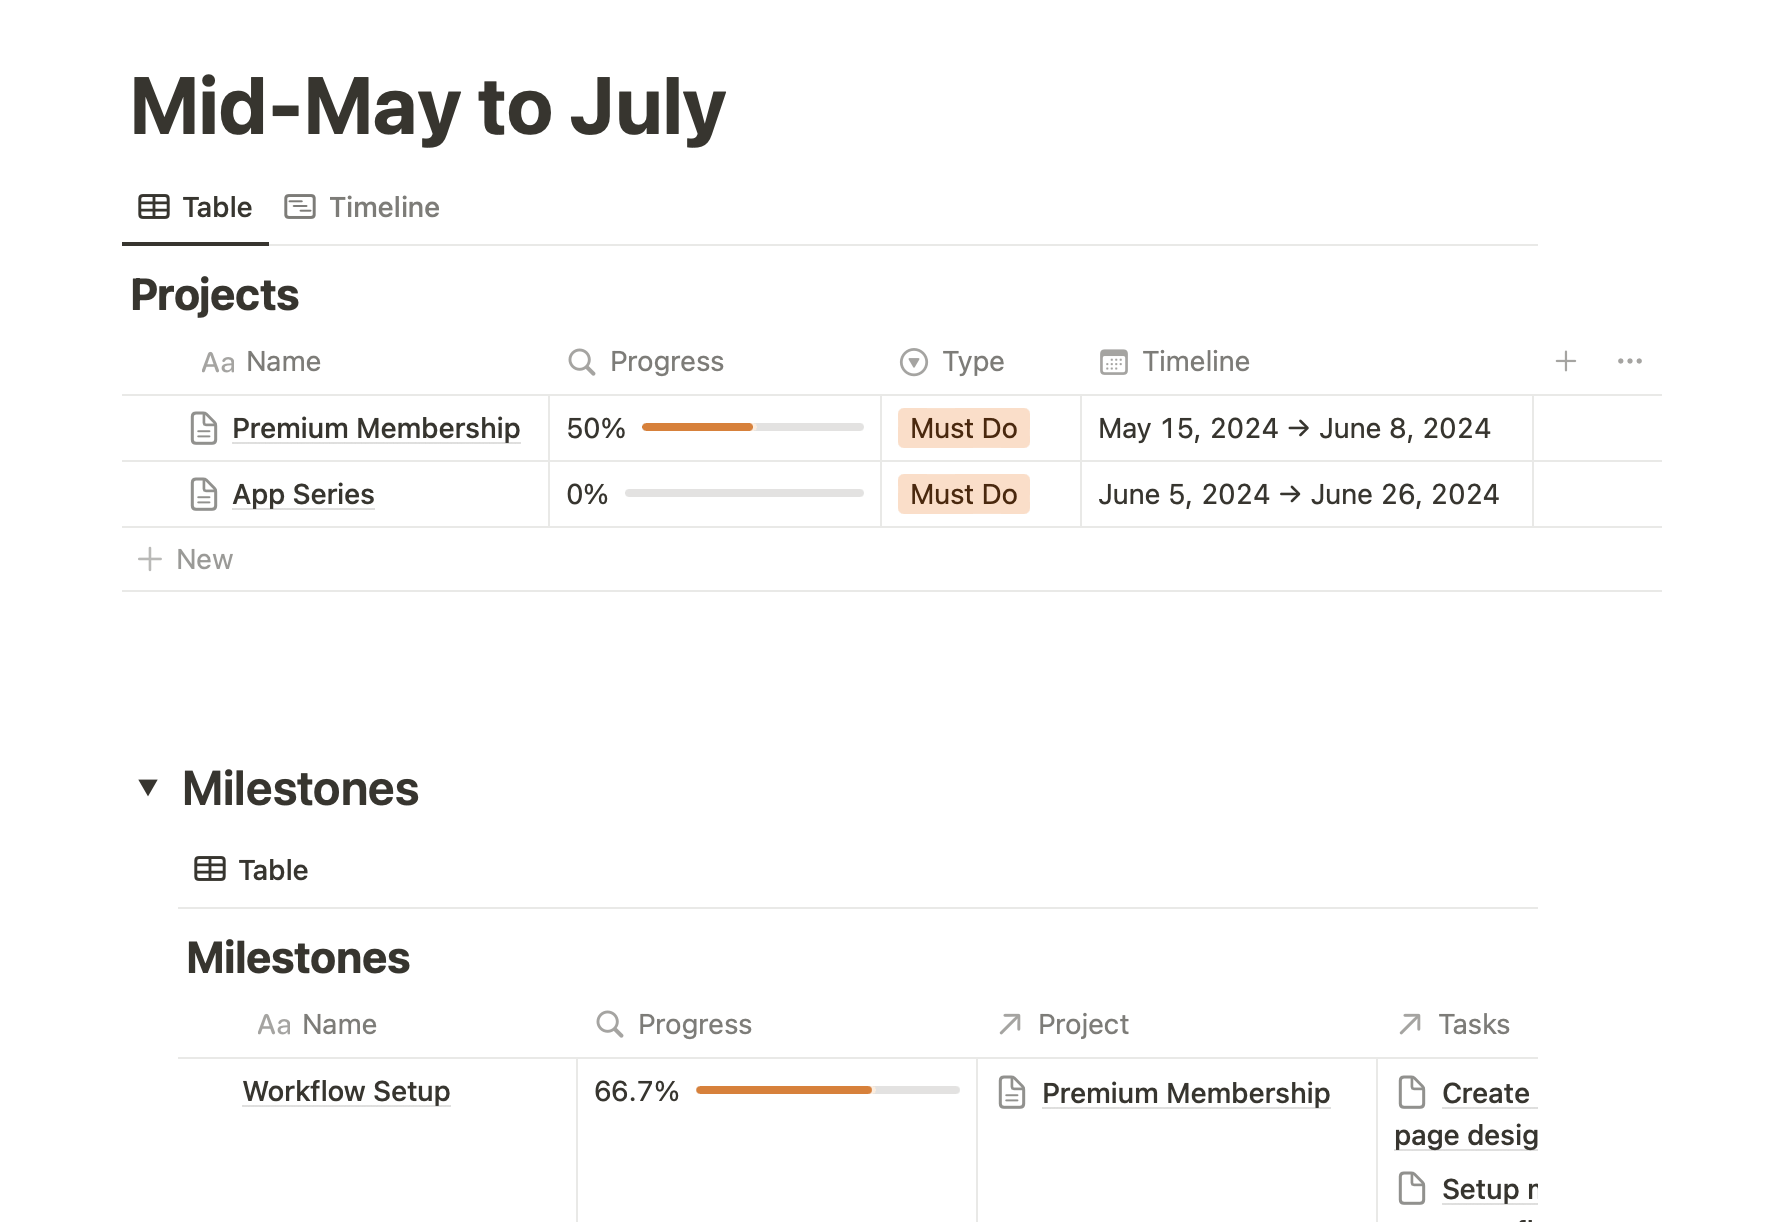
To tidy the view, I created a Toggle Heading 2 on the page and moved the Tasks database under the toggle heading to make it collapsible:
Now:
Viewing tasks assigned to each project was still a challenge.
I could add a filter on the Tasks database to only show tasks for a specific project, but the process felt redundant and tedious.
Every time I want to quickly glance at a project's task or mark a task as done, I have to update the filter on the Tasks database to show tasks for a single project.
Since each project item on the Projects database is a full-fledged page, a better approach was to add a table view of the Tasks database on each project page like this:
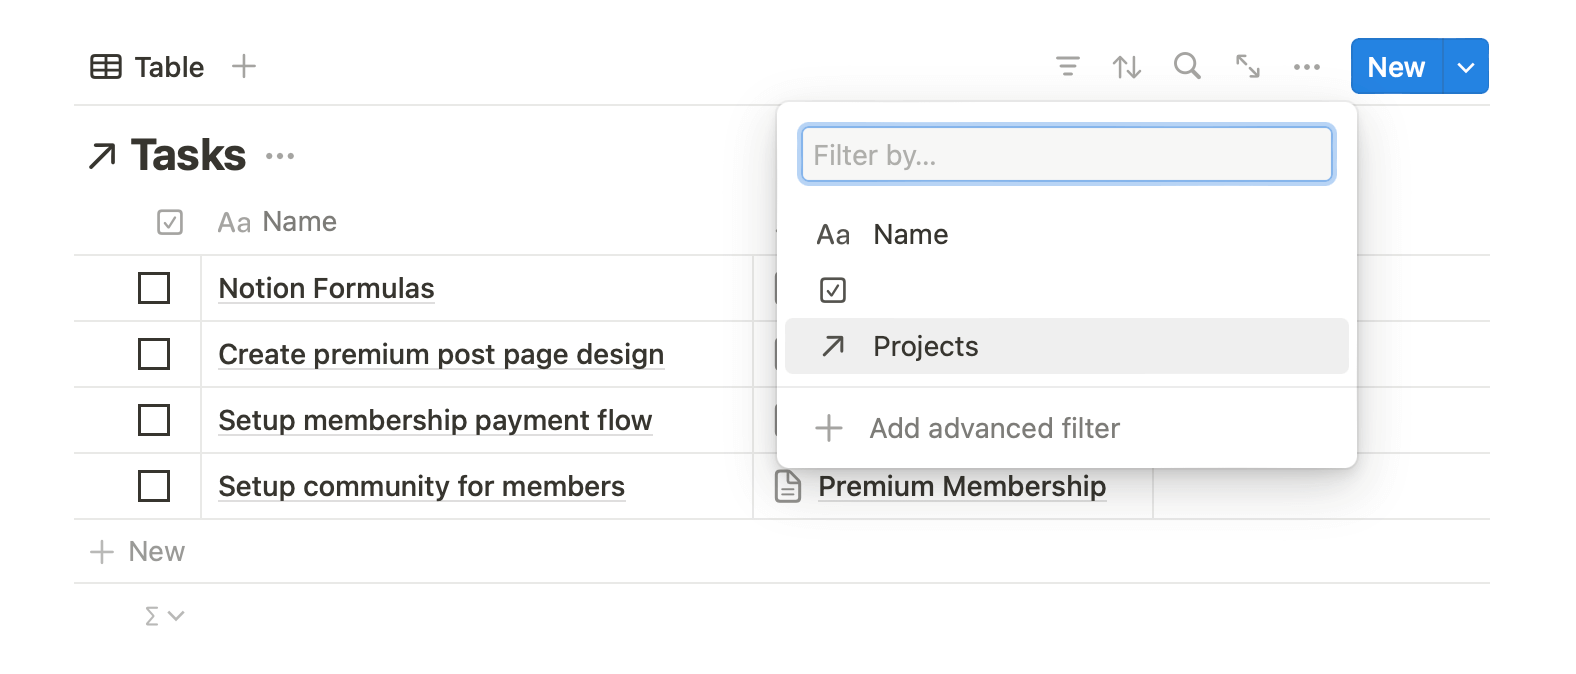
What we now have is an unfiltered view of all tasks in the database, regardless of which project it's assigned to.
To show tasks relevant to an open project page, we can add a filter to the table view to show tasks only for a project:
With the filter added, we can now see all tasks relevant to a specific project:
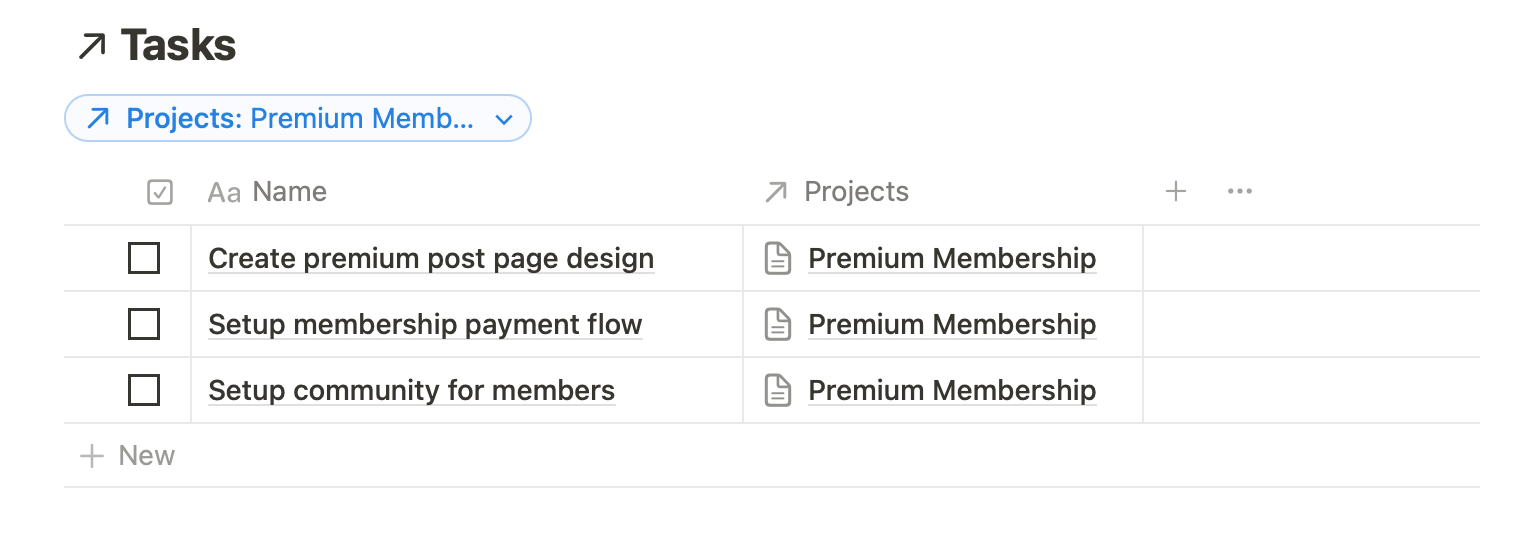
This is a handy addition because now, opening a project page would list all tasks related to that project instead of having to tweak filters on a top-level Tasks database repeatedly.
The project tracker was already taking shape and was ready for use.
However, it still lacked a crucial element we discussed earlier — showing a project's progress.
So, the next task was to:
Automatically calculate a project’s progress
Any decent project tracker can display the progress of an ongoing project.
Without a progress display, it's difficult to estimate where we're at in a project and whether we'll get it done in our estimated time.
Building this feature is feasible since Notion supports showing progress bars in databases.
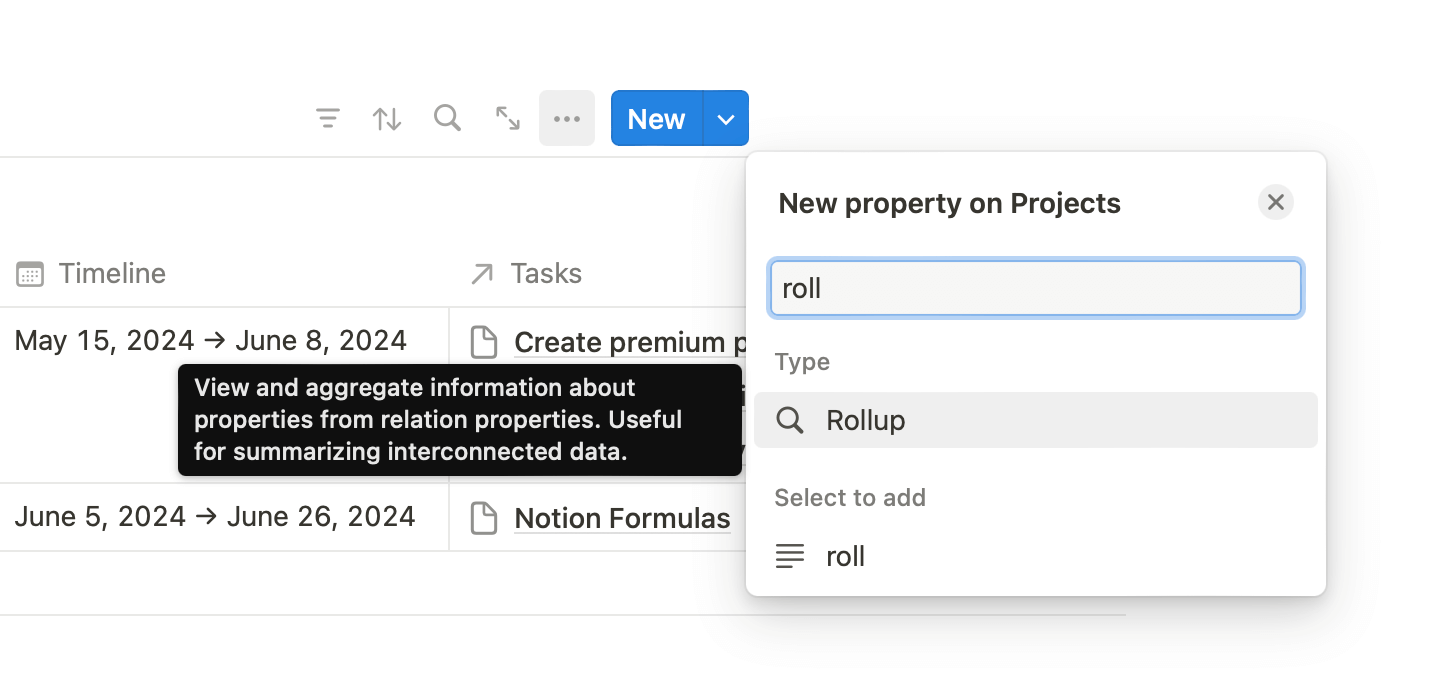
Now, we could render a progress bar by writing a complex formula to calculate the percentage of tasks left in a project, but thankfully, Notion has a built-in property for this purpose — Rollup.
Think of Rollups as a way to aggregate linked database items into a sum, count and other functions.
For the Project → Tasks relation, we could automatically calculate the percentage of unchecked tasks in a project with minimal configuration.
Here's how:
First, I added a new property of type Rollup to the Projects database:
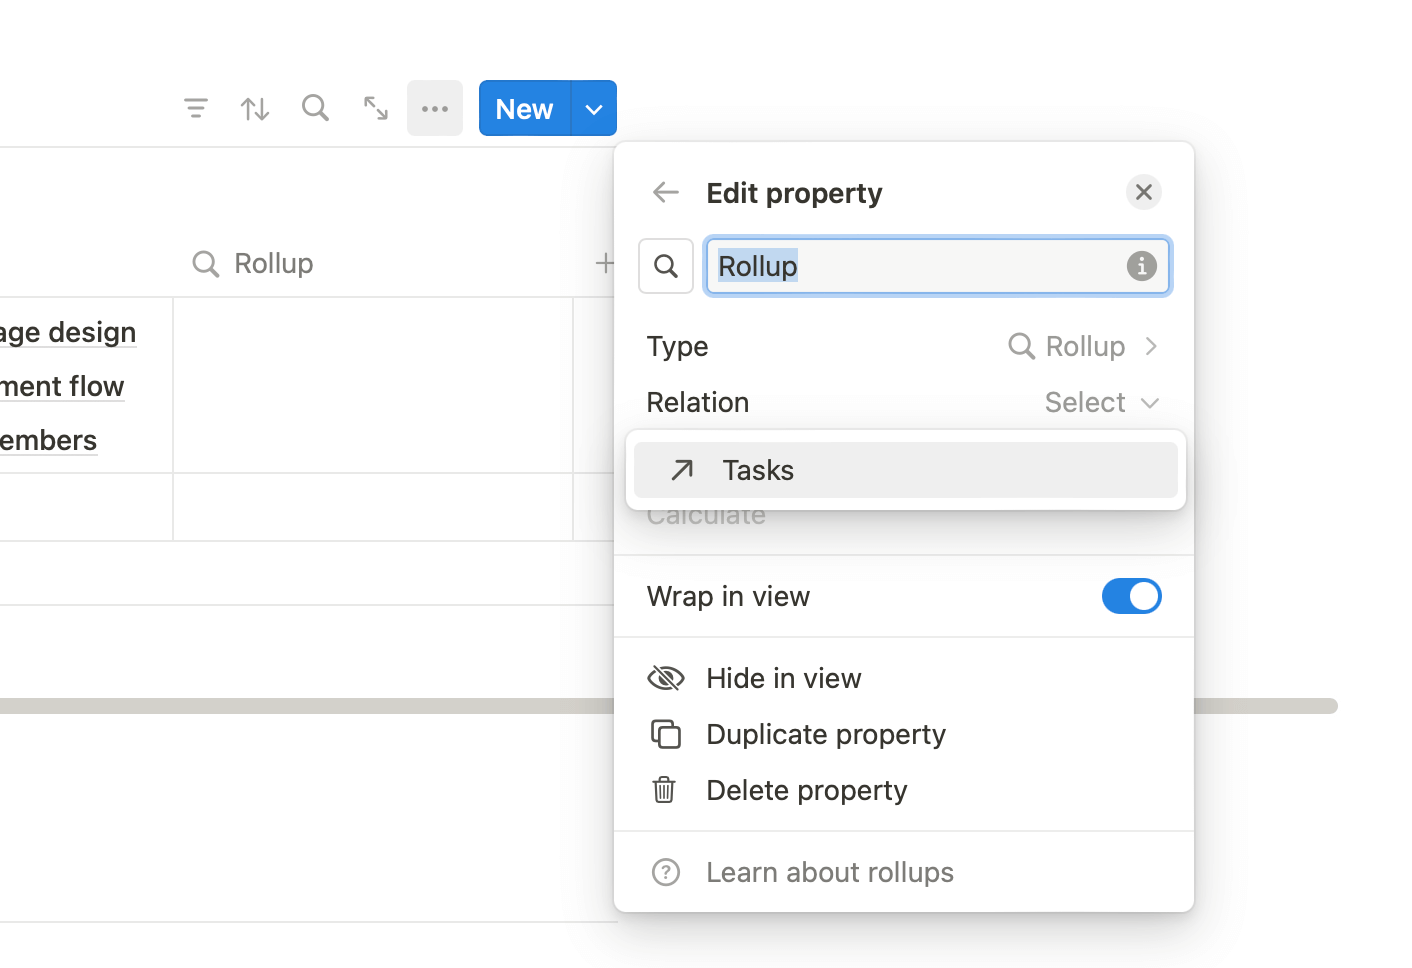
Then, I set the relation to use for this rollup to the Tasks relation setup earlier:
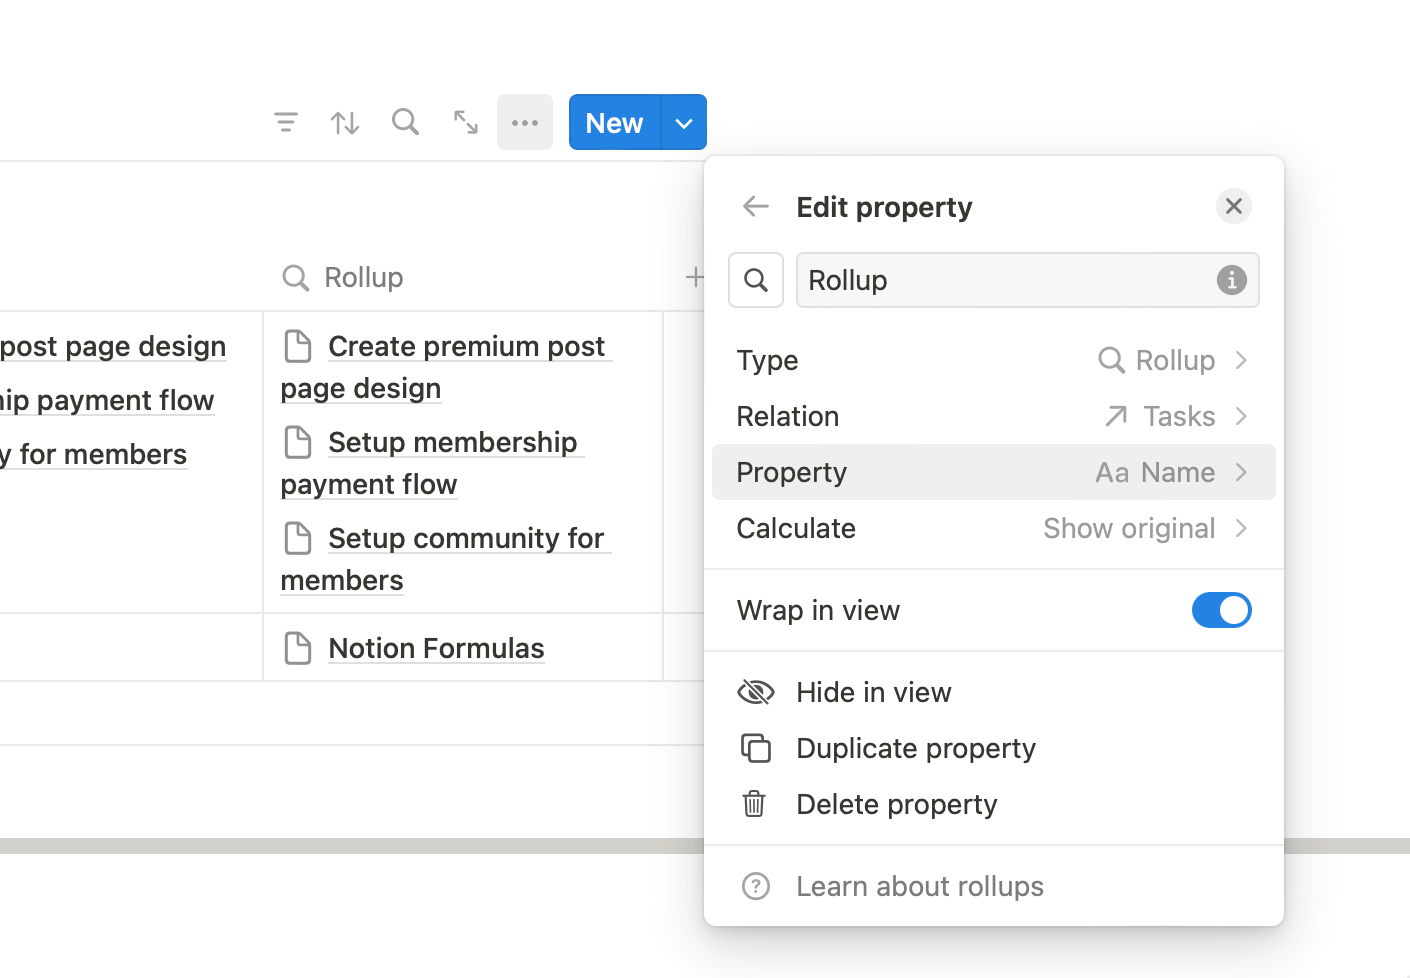
This revealed a couple of more options to choose from, such as a property to fetch data from, and how to calculate the retrieved data:
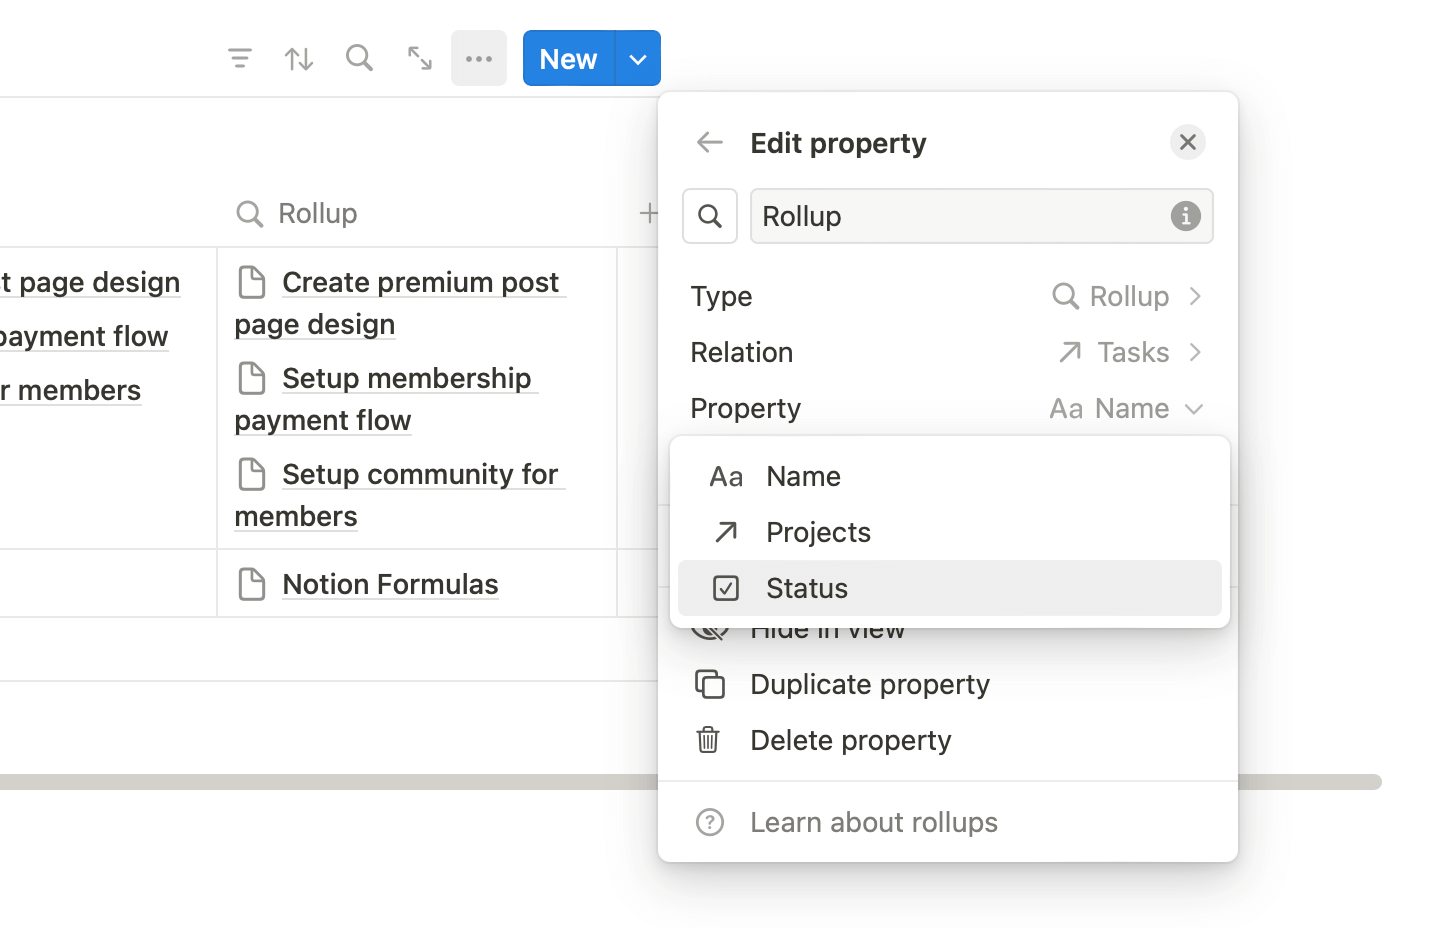
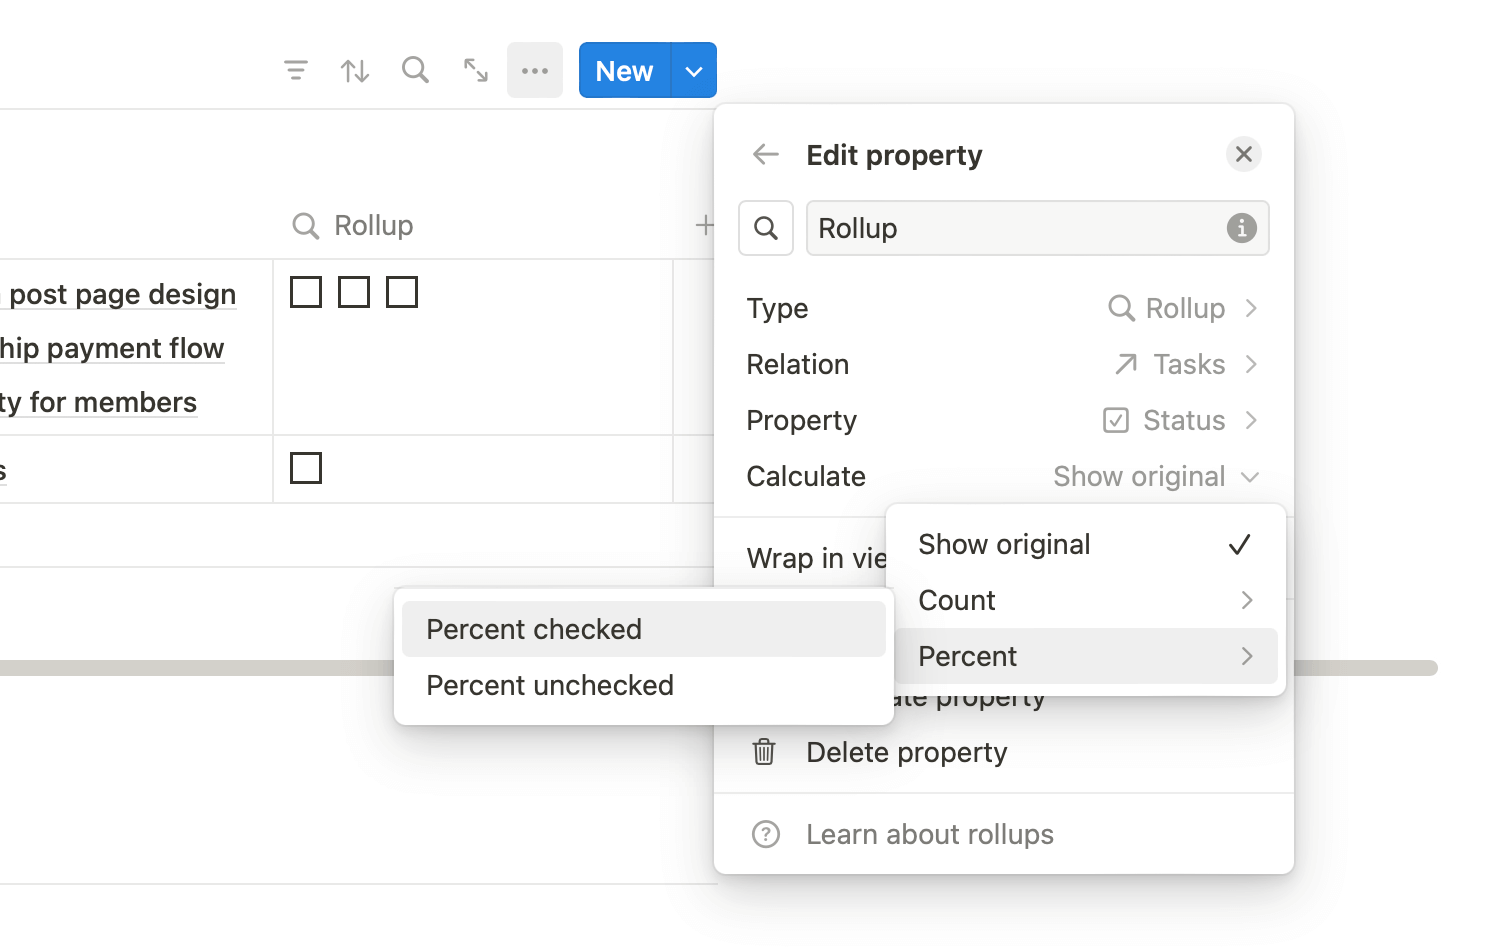
I selected the Status property for calculation:
And chose to calculate the percentage of checked items:
With this setup, I already had a percentage progress in the new Progress column which changed as I checked off a task in the list:
This gets the job done, but I wanted to make this column a bit more visual and fun.
To do that, I edited the Progress column property to show the calculated percentage as an orange progress bar instead of a simple number:
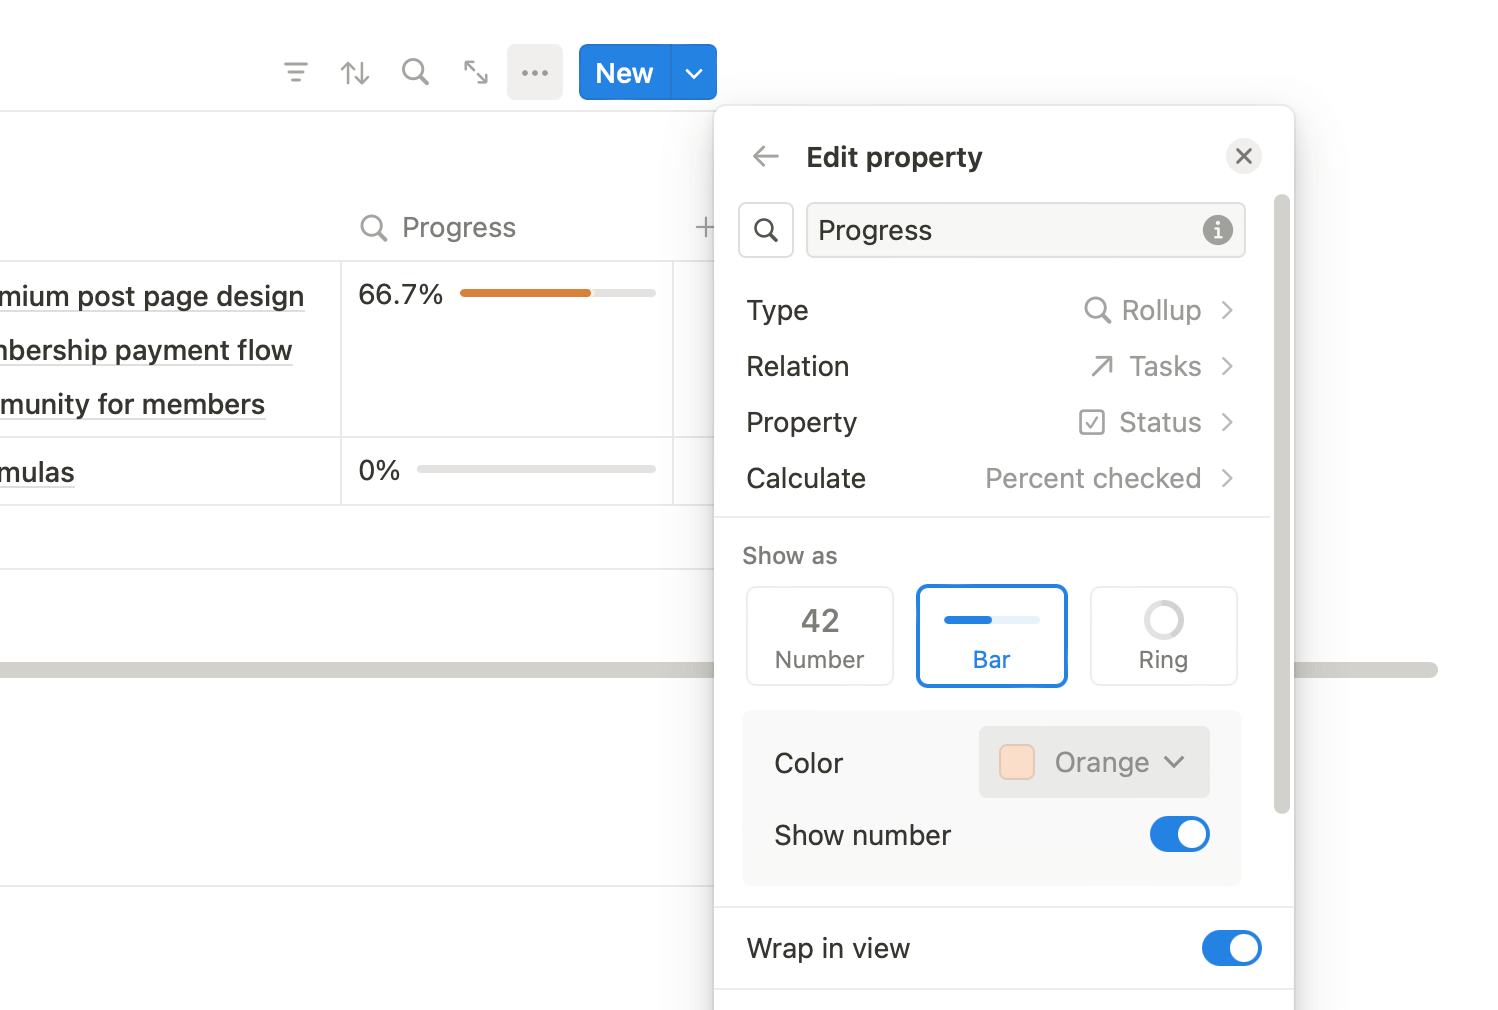
This created a beautiful progress bar that updates as I check off tasks from the project:
Now, while the Tasks column in the Projects database is a nice indicator of all tasks added to a project, the database view quickly gets messy as more and more tasks are added to each project.
Also, I didn't need to see the tasks here, since opening a project page already shows all the linked tasks.
To make the Projects database look cleaner and compact, I hid the Tasks column from the database view through the database options menu:
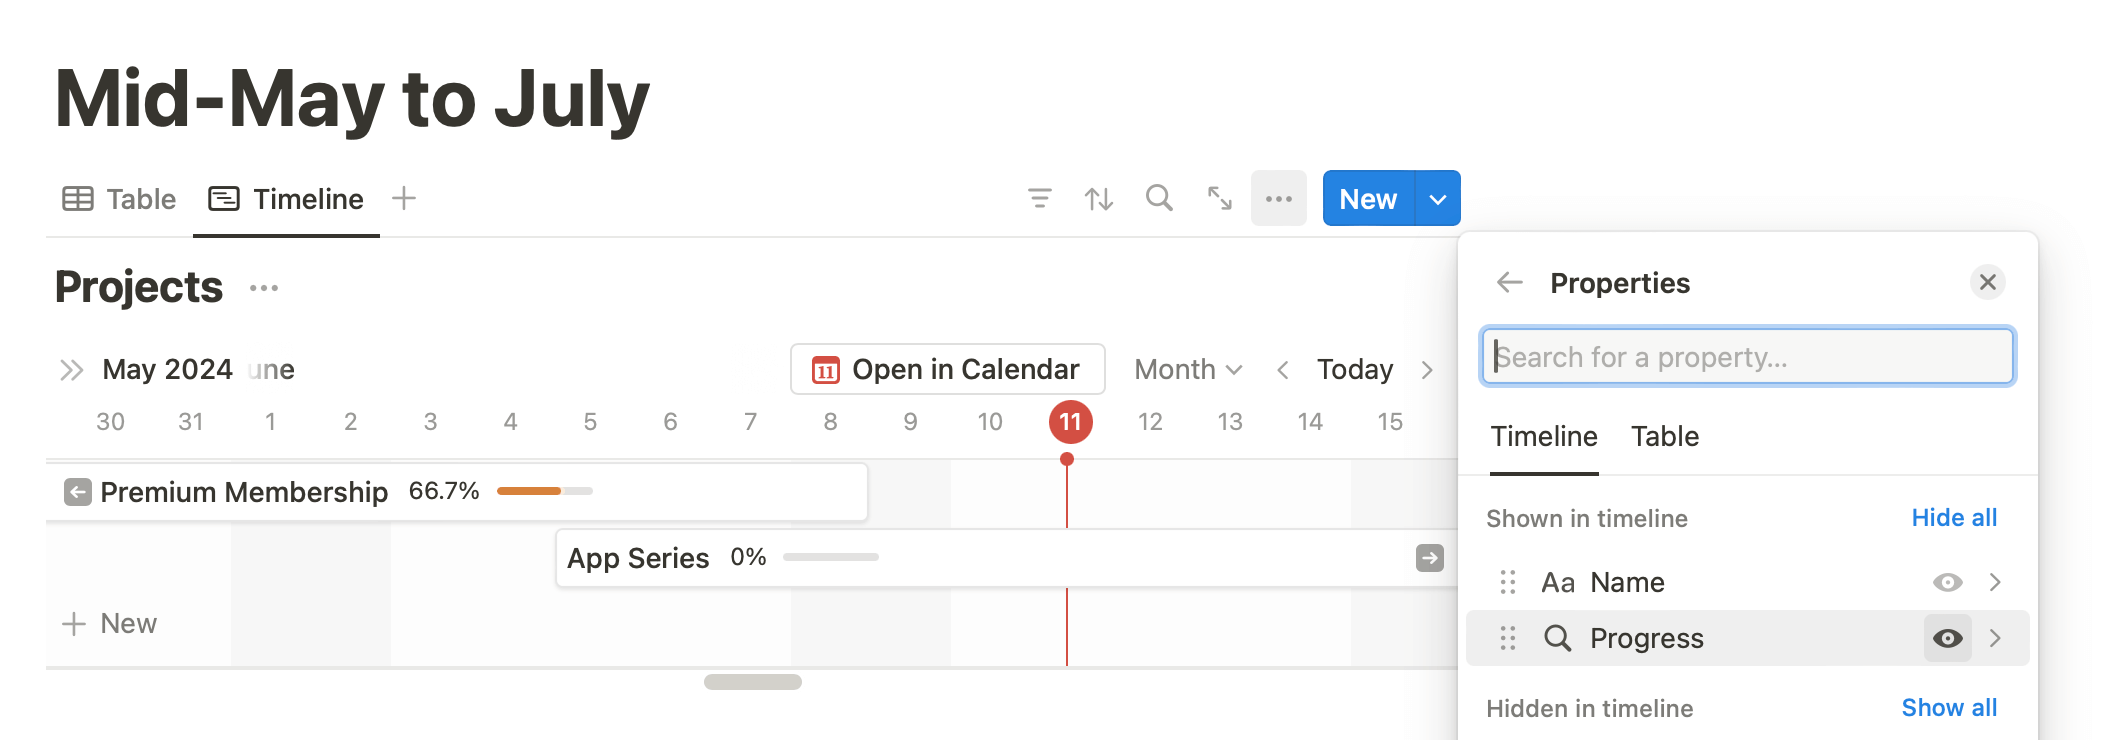
While on the subject of making the Projects database look visually appealing, I switched over the Timeline view and chose to show the Progress property on each timeline element:
I now had a well-oiled, functional project tracker ready to be used for planning live projects.
But, it was still missing the last piece of the puzzle — milestones.
Milestones help tackle long projects more easily by grouping related tasks into meaningful phases.
Here's how I:
Added milestones to each project
Milestones could be considered as mini-projects grouping a subset of tasks from a project.
Therefore, each milestone needs to be a separate row on a database, linked to a project and many tasks.
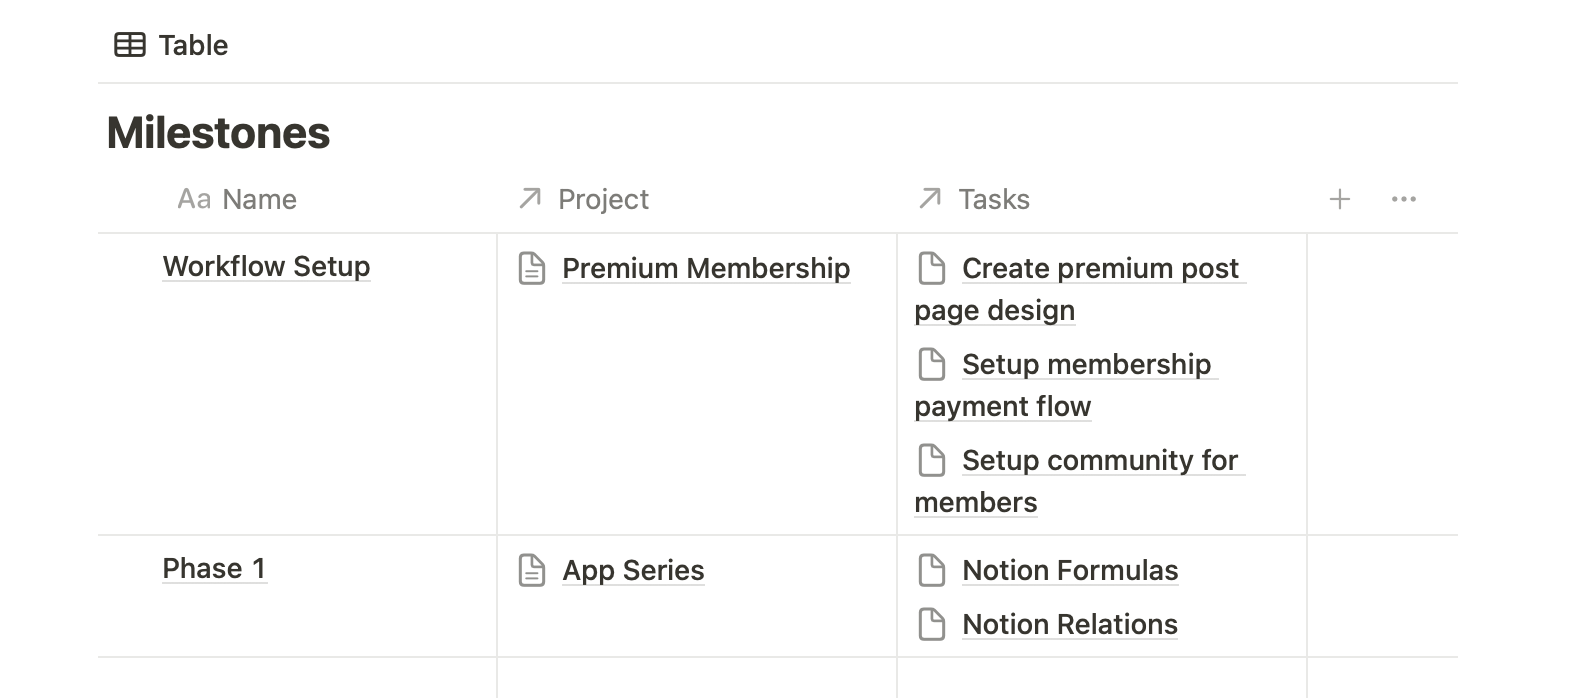
To do this, I created a new database called Milestones with two Relation properties linking each milestone to a project and many tasks:
Similar to the Projects → Tasks relation, I chose to show the milestones relation on both the Projects and the Tasks database so that I could use this relation on those databases:

With the basic setup done, I created a few milestones and linked them to a project and some tasks:
Now, although I had an overall project progress setup, I wanted to go granular and see the progress of each milestone as I finished tasks in it.
Using the same process as before, I added a Rollup property to the Milestones database and configured it to show the percentage of checked tasks in a progress bar style:
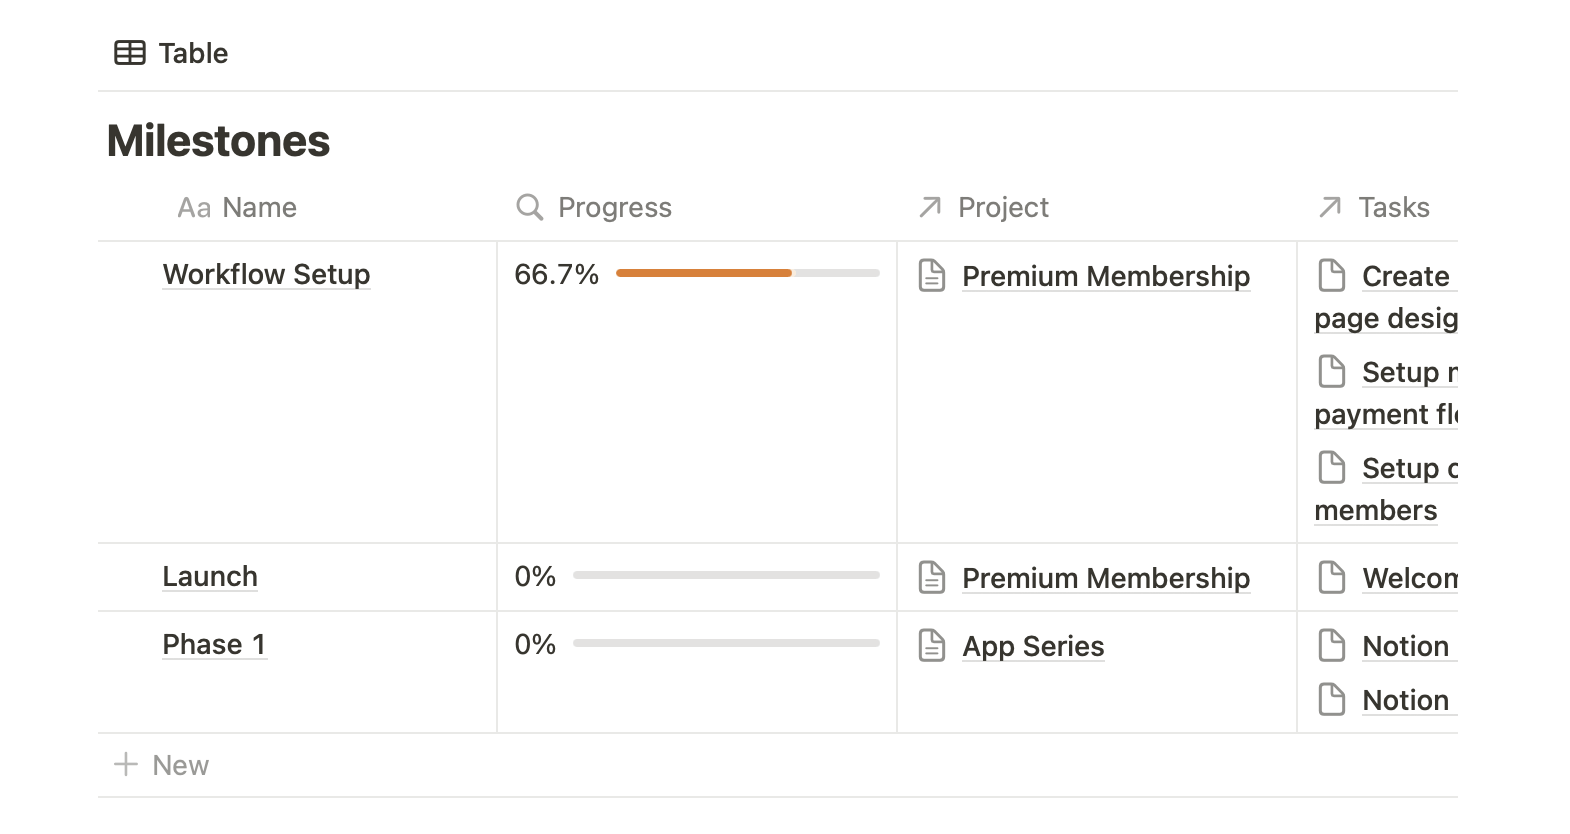
The beauty of this setup is that now, each project progress reflects the progress of the entire project, across milestones, whereas each milestone reflects granular phase-wise progress:
The project is only done when all tasks across all milestones are finished.
With this last workflow setup, I had a fully functioning project tracker built using Notion where I could plan and monitor each of my projects, neatly divided into tasks and milestones.
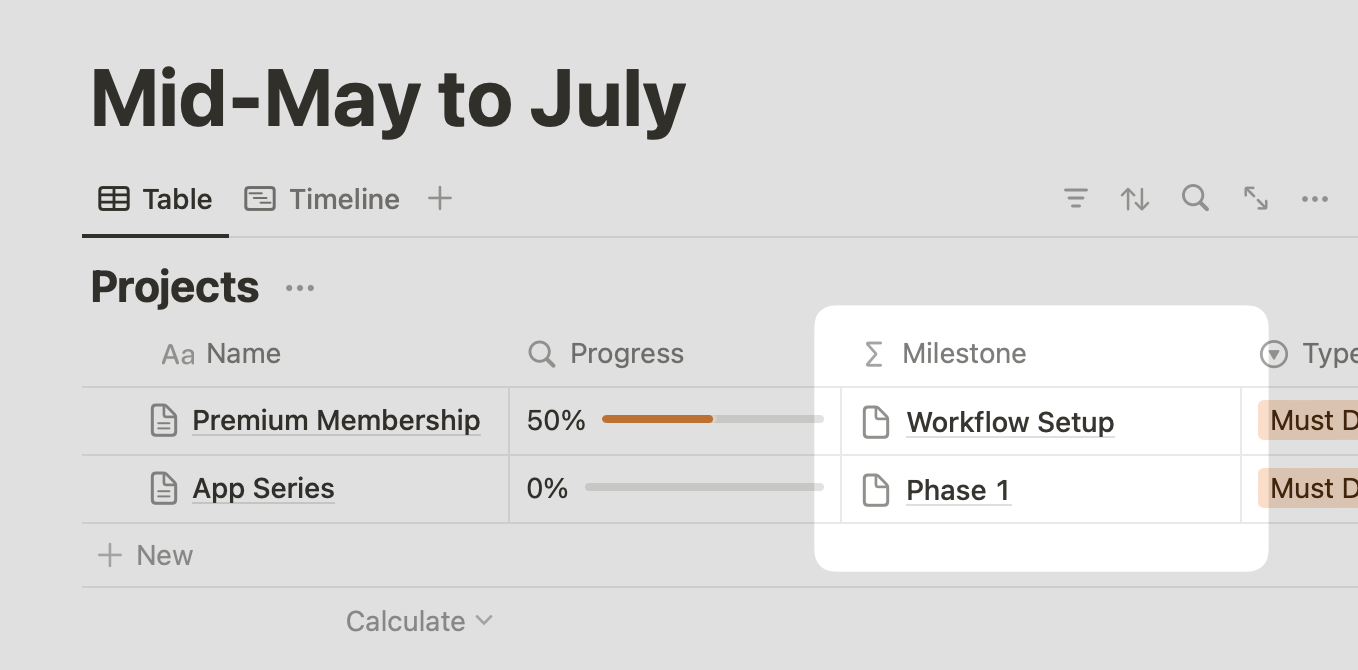
But before calling it a wrap, I wanted to add one more tiny visual indicator — the milestone in progress beside each project:
This wasn't a massively helpful feature, but it was a good quality-of-life improvement that would help me understand which phase of a project I'm currently working on.
To do this I added a:
Formula to show the active milestone
In the Projects database, I added a new property of type Formula:

Then, edited the property to run this formula:
prop("Milestones").filter(current.prop("Progress") < 1).first()
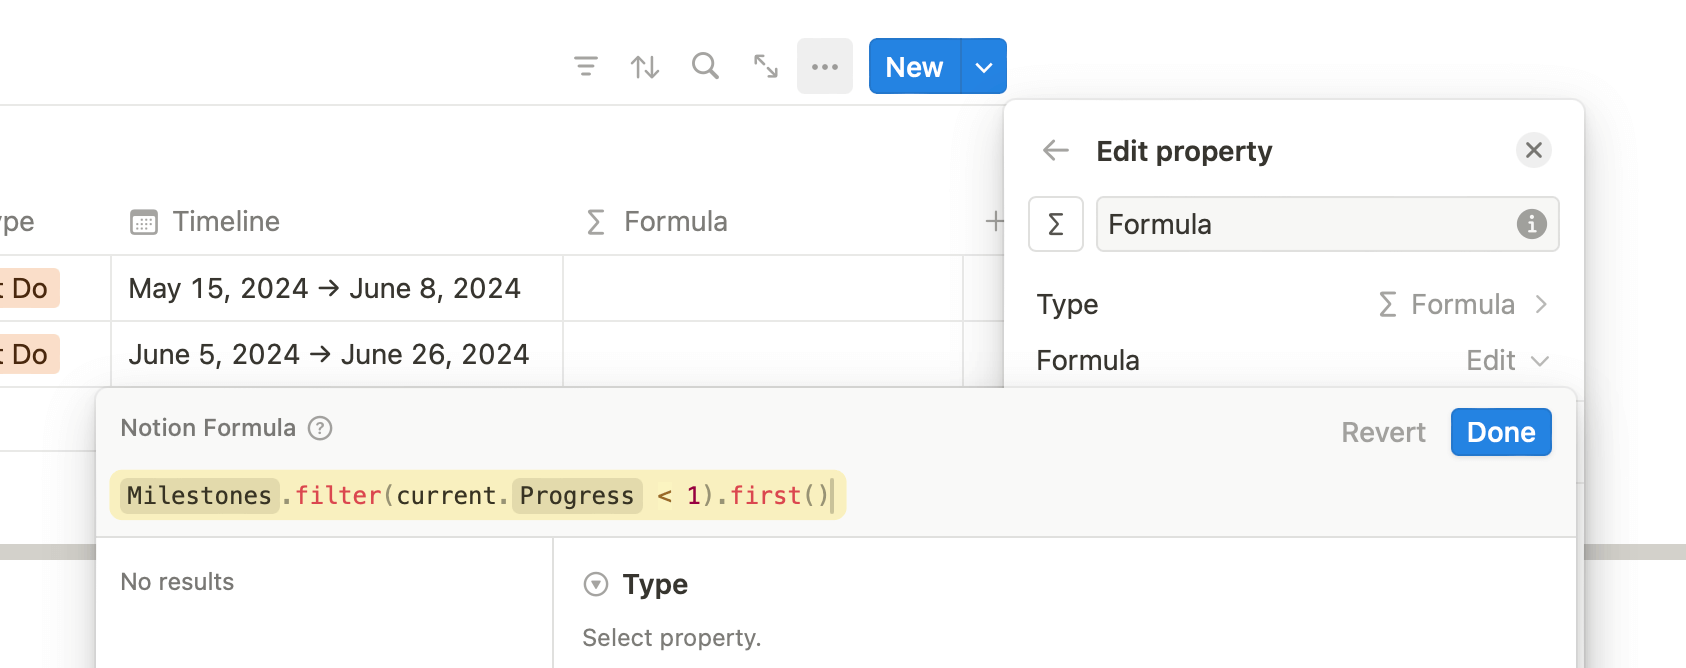
This is how the formula works:
We get a list of all the Milestones of a project through the prop("Milestones") function. Then, we filter the list to only include milestones which are not completed, using the milestone's Progress property.
Notion calculates the percentage value of checked tasks in the range of 0–1, hence, we can filter completed milestones if their progress percentage value is 1.
Once we have a trimmed list of all pending Milestones, we limit the list to show only the first item on the list.
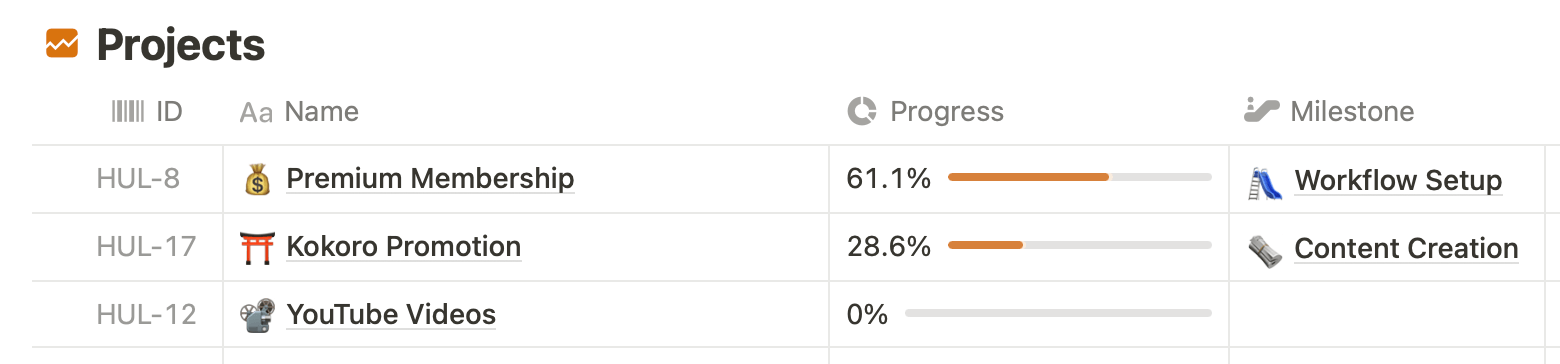
If you've sorted your milestones according to order in the Milestones database, this formula will always show the next unfinished milestone:
With this final detail implemented, the project tracker was ready.
I've been using this tracker to plan and monitor my projects, and I've never once thought of using a separate app.
It's minimal, fast, available on my laptop and phone and gets the jobs done.
Most importantly, I can customise the layout, add new features and make customisations that are otherwise restricted on other apps such as Linear or Jira.
Now, it's time for you to:
Make this project tracker work for you
While the tracker we built in this guide might be all you need to monitor your projects, feel free to tinker around to make it more suitable for your workflow.
This is the beauty of a tool like Notion. You get a huge range of customisation options to build your optimal workflow.
A small starting step could be changing the icons in your database properties to something meaningful to you.
You can do this by clicking on a property name and choosing a new icon for the property like this:
To serve as a ready-to-use project tracker, or a quick starter to building your custom project tracker, I've enhanced and polished this entire tracker into a Notion template that you can buy for $2.99 and get started right away.
You save the time and effort needed to get the tracker set up for a small one-time fee.
Nevertheless, I hope this guide has helped you build a minimal project tracker and also be familiar with some of the advanced features available in Notion.
Try using this tracker for your next projects.
