


 In-depth articles, series and guides

Ever since I recorded the first high-res video for my YouTube channel last year, storage has been a burning question.
A 7-minute edited and processed 4K video took around 3.4GB of space.
Where do I store these videos as I make more of them?
Cloud storage has been my go-to solution until then, but it's not always optimal, especially for large files. I'll discuss why in a minute.
After watching countless YouTube videos on how other creators store their raw and processed footage and exploring various options, I landed on a hybrid solution that has worked well for me.
In this blog post, I'll explain why I didn't go full cloud, how I decided on my storage system, and how you can use this idea to set up your own.
Let's start with:
The drawbacks of cloud storage
Cloud storage is robust and is the go-to choice for most personal storage needs.
I've heavily relied on cloud storage for the past 4–5 years for my thousands of photos, files and documents, first via Dropbox and later on iCloud. They're available anywhere and on every device I own, making cloud storage a fantastic option.
So, cloud storage was my first instinct when I wanted to archive my YouTube videos safely.
After shooting my first long-form video for my YouTube channel last year, I transferred all the raw footage to my cloud storage drive and deleted the files from my MacBook to clear up working space on my machine.
Those were heavy media files, and I ran low on local storage.
Unfortunately, this was a bad idea for two reasons:
- Cloud storage is expensive. Storing 4K raw video footage, processed videos, and Final Cut Pro projects takes up an average of 15–20GB of storage space per project. I already pay ₹749/month (~ $9/month) for a 2TB iCloud storage space. Upgrading to larger storage spaces becomes astronomically expensive.
- Network speed becomes a bottleneck. With cloud storage, my workflow speed is limited by my internet connection bandwidth and the speed of the cloud storage server. I remember needing a raw footage file from my Dropbox folder while editing a video, and it took over an hour to download the entire file because the Dropbox app downloaded the file astonishingly slowly.
Even if I strategically used my local and cloud storage space to ensure that my working project files were present locally on my laptop and pre-downloaded any dependent footage from other projects, pricing was still a crucial factor.
Upgrading to the next iCloud storage tier, 6TB, would've cost me ₹2,999/month (~ $35/month), which is a ridiculously expensive deal in the long run. Google Drive and Dropbox offered similar pricing, so switching cloud providers wasn't a choice.
But:
What if I didn't use any of these personal cloud storage services and instead used a commercial one such as AWS S3 or Backblaze B2?
It was feasible, and with FTP clients like Transmit, I could access my cloud storage buckets directly from my laptop.
Unfortunately, they were even more expensive.
I did a rough calculation on the AWS Pricing Calculator, and storing 2TB of data on S3 would cost me ₹ 4,300/month (~ $51/month):
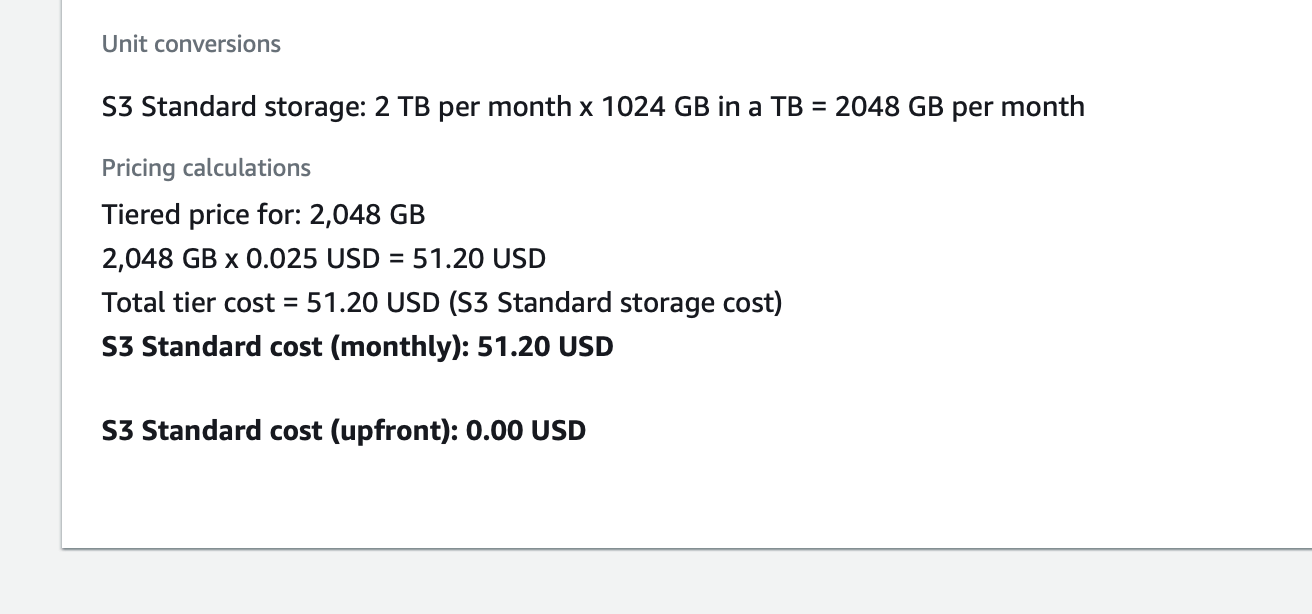
Nevertheless, cloud storage for large video and photo files was not a viable option for me — personal or enterprise. It was too expensive to justify the benefits.
Convinced, I started exploring cheaper alternatives, which brought me to:
The good old external storage drives
External storage drives, such as portable HDDs and SSDs, are excellent choices for stowing away large files like 4K videos and raw photos from a professional camera.
They're inexpensive compared to cloud storage plans and are fast at reading and copying over files, often at speeds of 100–400MB/s.
However, the downside of having your data on a local hard drive or SSD is that these devices often fail and can lose your precious data. Repair and data recovery are usually possible, but you might not always be that lucky.
I have had a lightly used Samsung T7 SSD stop working out of the blue, and attempts to repair the drive resulted in losing everything on it completely.
Cloud storage providers are much more reliable because they use an array of hard drives to store whatever is uploaded to their servers. They make backups and keep copies of the same data over multiple drives to avoid losing your data.
Even if one of their drives fails, your data remains safe because a copy of your entire data lives on multiple drives. This arrangement, known as a Redundant Array of Independent Disks or RAID, is the backbone of all cloud storage.
Fortunately, we can have a similar arrangement with two or more local hard drives at home. We'll return to that later when I demonstrate how I set up a RAID 1 arrangement on my local machine.
Before that, I had to choose between the different types of external storage drives available on the market — SSD, portable HDD, and desktop HDD.
Solid-state Drives, or SSDs, are the most compact, durable, and fastest of the bunch, but they are expensive.
A 4TB SSD drive sells for around ₹31,000 (~ $370).
I needed at least two drives of equal capacity to form a redundant storage system, so I would've had to shell out at least ₹62,000 (~ $740) for a 4TB local storage system.
It's a bargain if you compare it to the long-term costs of paying a cloud storage provider, but it was out of my price range.
External HDDs, portable and desktop, cost around ₹10,000 (~ $119) for a 4TB drive, one-third the cost of an equivalent SSD, and have been reliable storage devices for decades.
I work at home, and these drives will comfortably sit on a desk. I didn't require the extra compactness, durability, or portability of an SSD.
Also, speed was not a massive concern for me.
Although SSDs read and write files at blazing speeds, 400–500MB/s, I was happy operating even at 100MB/s.
Even at a 75MB/s average speed, copying a 10GB video project would take around 3 minutes. I could work with that.
With SSDs out of the equation, I had two options: a 2.5-inch portable HDD or a 3.5-inch desktop one.
Perplexity helped me conclude by illustrating both drives' different pros and cons.
The 2.5-inch option was more portable but operated at lower read-write speeds than the 3.5-inch desktop counterpart.
I didn't need portability, but that extra speed would be helpful.
After watching a couple of reviews on various 3.5-inch external HDDs, I ordered two of the 4TB Western Digital My Book drives:
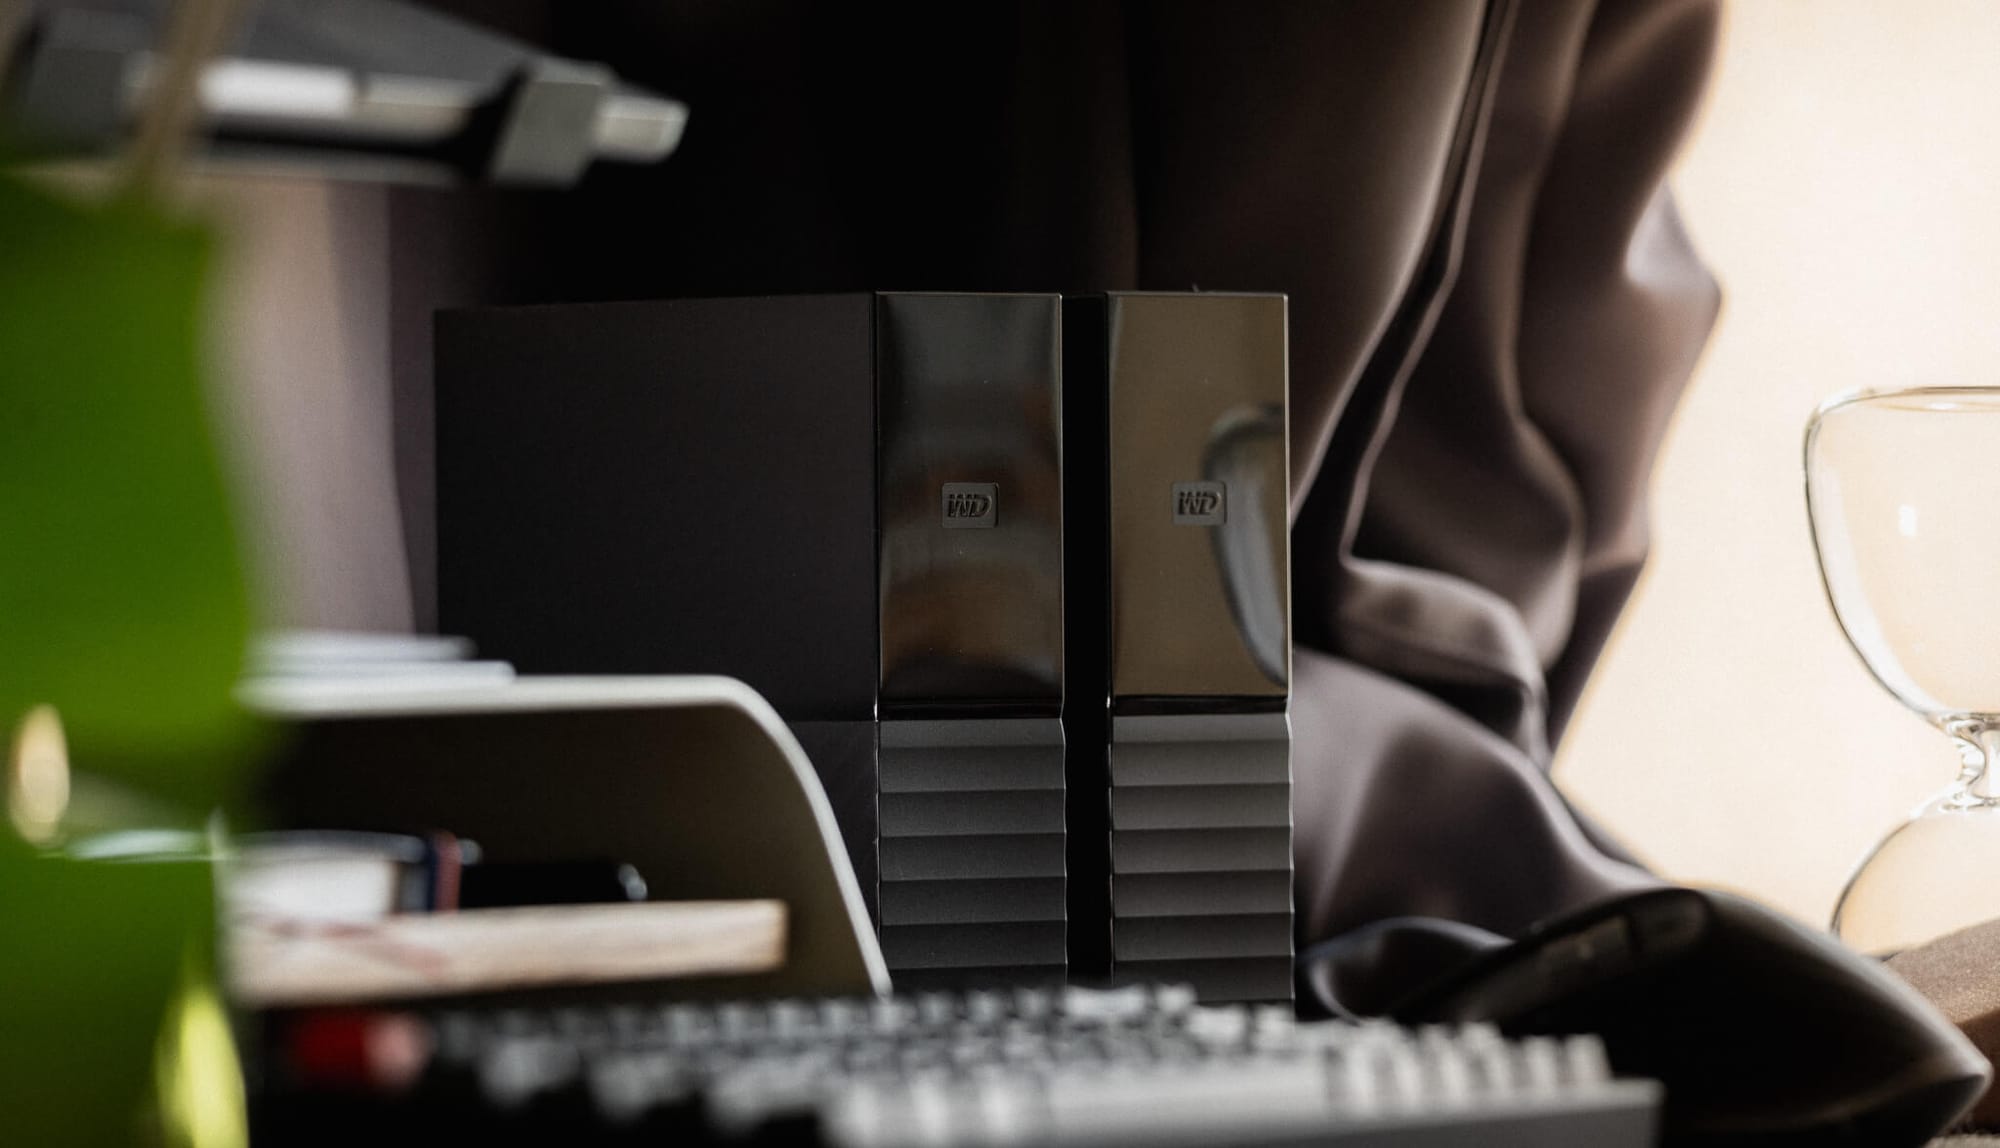
They cost me ₹8,499 (~ $101) each and have been an excellent storage system for my large files, videos, and raw photos.
Now:
I sorted the storage space, but I needed my local storage system to be reliable and not lose important files.
To make my local storage system fault-tolerant, I:
Setup a redundancy configuration
I bought two 4TB HDDs not for a total of 8TB storage but to have a redundant 4TB drive as a backup for the primary drive.
Everything I copy to the primary drive gets copied to the secondary backup drive. Everything I delete from the primary drive also gets deleted from the backup drive.
The backup drive is a mirror image of the primary HDD.
This setup ensures that even if one of the drives fails or dies, I still have a full copy of whatever I've stowed away on the other drive. Nothing gets lost here unless I lose both drives simultaneously, which is unlikely.
Now:
I didn't want to manually mirror file changes on my primary drive to the backup one.
To make this job easier, I set up a backup task via an app called Carbon Copy Cloner:
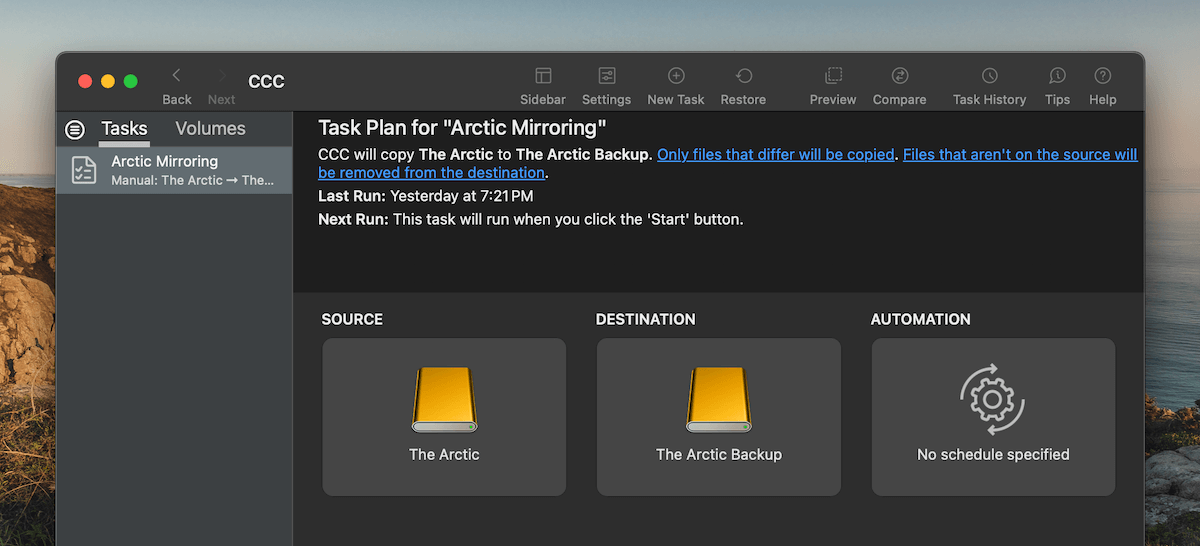
This is how it works:
I only copy or delete existing files on my primary drive, which I call The Arctic.
Then, once I'm done copying everything, say a whole folder of photos or an entire video project, I run a task on Carbon Copy Cloner to mimic the changes on the backup drive called The Arctic Backup:
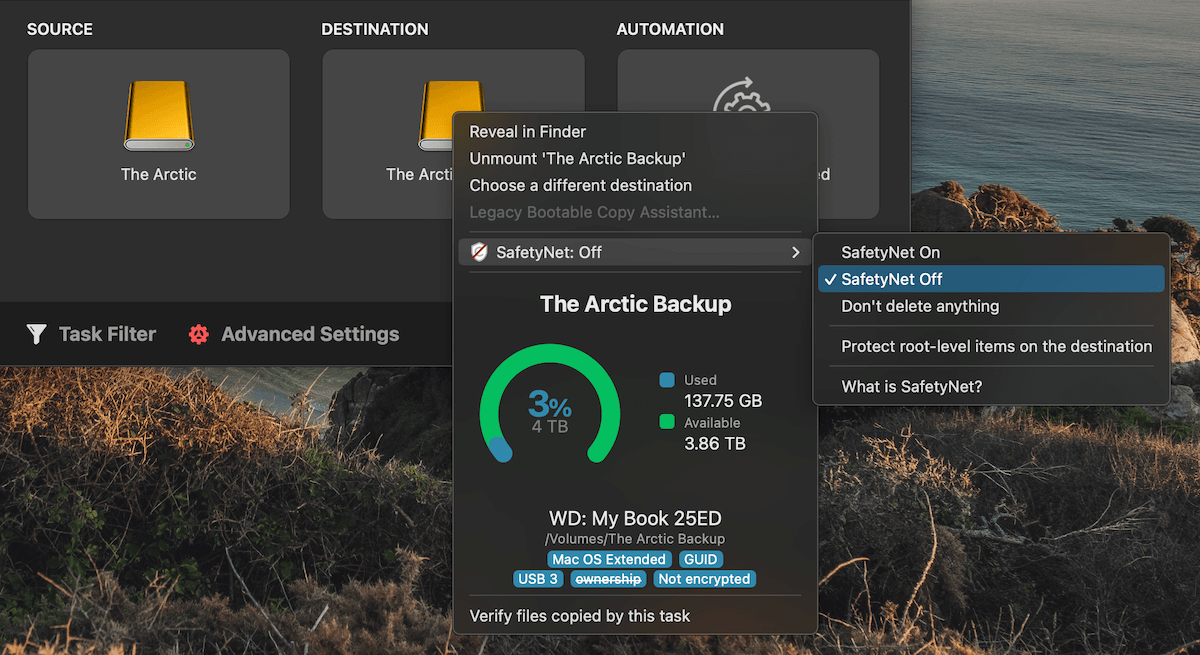
Turning off the Safety Net feature on my backup drive ensures that any files I delete from the primary drive get deleted from the backup drive as well:
This is a low-effort manual intervention, but it is better than copy-pasting and verifying files individually across both drives.
Carbon Copy Cloner ensures the backup drive is a replica of my primary drive and also verifies files for corruption before finishing the task.
With this setup, I have a low-cost, fast and reliable RAID 1 data storage system at home without a monthly subscription fee.
But, it doesn't eliminate the need for cloud storage.
Cloud storage is much more accessible than a local HDD setup. If stored on a cloud storage drive, I could access all my important files, photos, and videos on any device, anywhere on this planet.
So, to strike a balance between the two, I:
Use a hybrid model
Instead of dumping everything on my local HDDs like in the 2000s, I keep a subset of my files in my local storage and the rest on a cloud storage drive.
Apart from being readily accessible, cloud storage is also more secure than my local storage system. If I lose both my HDDs due to an accident or theft, I lose all my data. However, with cloud storage, my data is tucked away in a secure facility and is nearly impossible to lose.
Cloud storage is still my first choice for any lightweight and frequently needed file.
For example, this article I'm drafting is being backed up in real-time to my iCloud drive. Any business assets, important documents, and finished products, such as edited photos, videos, and blog post backups, are stored in my iCloud drive for maximum reliability and accessibility.
I could easily open up the iCloud folder on any of my devices and access any of these files in a snap.
Larger, unfinished files usually make it to my local storage drives.
For example, every photo I shoot with my professional camera is around 50MB. Having these raw photo files on cloud storage doesn't make sense because they will quickly exhaust my expensive cloud storage space. Moreover, the raw photo files are stored more as an archive rather than something I would need on every device.
The same goes for any raw footage I shoot for my videos. I keep the heavy video files on my local drives and upload only the finished video on my iCloud drive.
I see my local storage as an archival system rather than an always-accessible storage drive.
Whatever I need frequently makes it to the cloud, and whatever I need to preserve for later is backed up and replicated across my local drives.
Out of the 4TB of local storage space, I've used up around 130GB, and most of the space is occupied by hundreds of raw photos and videos that I took on my trips and for my YouTube channel.
This strategy has been working well for me, as most of what I need and work with daily is on my iCloud drive and easily accessible. When I need to edit past photos or videos or access some less-frequently used files, I connect my hard drives to my laptop and copy over the files I need.
The best of both worlds in a cost-effective manner.
This setup is robust, affordable and works, but it's still not optimal.
I could upgrade my local storage system to behave more like a cloud storage drive by:
Using a NAS system
Network Attached Storage (NAS) makes local storage more accessible and fault-tolerant.
With a NAS, I could have an array of HDDs connected to my local Wi-Fi network, replicating any file changes over multiple HDDs for backup.
This NAS system automates the manual Carbon Copy Cloner step I discussed earlier. It ensures all files are backed up on multiple hard drives, and I get an iCloud-like folder on my devices without connecting any HDDs directly to my laptop or other devices via cables.
Also, a NAS offers faster read-write speeds than cloud storage since it operates on a local WiFi network. I could copy files at 100+ MB/s on a NAS without breaking a sweat.
Most professional YouTubers, photographers, and anyone needing robust, sizeable local storage space use a NAS for daily work.
But NAS systems are expensive.
A two-disk 4TB NAS storage, equivalent to my current storage system, would cost around ₹60,000 (~ $717).
That's more than three times what I spent on my local storage system. A NAS system would be handy but an overkill for my current needs.
However, your mileage may vary.
So, before you set up your data storage system or revamp your existing one, take a step back and understand your goals.
What do you need from this storage system?
Do you deal with lightweight files and need a safe place to store photos and videos you've captured on your phone?
A cloud storage plan from any provider, such as iCloud, Dropbox, or Google Drive, is the easiest and lowest overhead route for such cases.
But you might need to store large files readily available on all your devices at home or work.
In such cases, a NAS could be a viable option if you have the budget.
If you need to find a middle ground, like me, the hybrid setup I did with a pair of good old HDDs and cloud storage might be all you need.
There are plenty of storage options available today. Choose one or mix and match two for a more tailored setup based on where and how you want the data to be.
Thanks for reading. Articles like this one take hours to write and publish. If you've found this article helpful, consider supporting my work by buying me some coffee.


