I grab screenshots pretty often. Although, macOS’s native screenshot tool is decent for most cases, it’s still a very basic one.
That’s why, to make screenshotting and sharing easy, I use a fantastic app called CleanShot X.
In this article, I’ll take you through my CleanShot X workflow and tell you how I grab pro-level screenshots with negligible effort.
A little backstory
CleanShot X is the successor to the hugely popular CleanShot app.
One of the main motivations behind getting a copy of the CleanShot app around four years ago was to quickly record a part of my screen and turn it into a GIF.
I remember the native screenshot utility on macOS was already decent enough to grab screenshots and videos. Still, for cases like the one above, it needed some extra work.
Also, CleanShot at that time seemed like an excellent macOS app to have for a $15 one-time fee.
CleanShot is one of those apps that fit so seamlessly into my workflow that I forgot about it down the road. I hit ⌘ 4 and CleanShot highlights an area of my screen to capture.
When I got an email from MakeTheWeb, the creator of CleanShot, that their next version CleanShot X is available, I upgraded swiftly.
To make the deal sweet, they even offered me a 50% discount because I had already paid for the previous version.
Using it for a few days, I knew CleanShot X was a fantastic upgrade.
Now that you have seen what CleanShot X can do, here are:
Some features of CleanShot X I love and use daily
CleanShot X has loads of features. Out of them, I find myself using a handful very frequently.
One of them is the:
Capture and edit feature
I love how CleanShot X gives me in-house screenshot editing tools which are simple to use.
Whenever I take a screenshot or record using CleanShot X, the result appears in a preview layout at the bottom left corner of my screen. Here, I can hover on the preview window and click edit to bring up a screen like this:
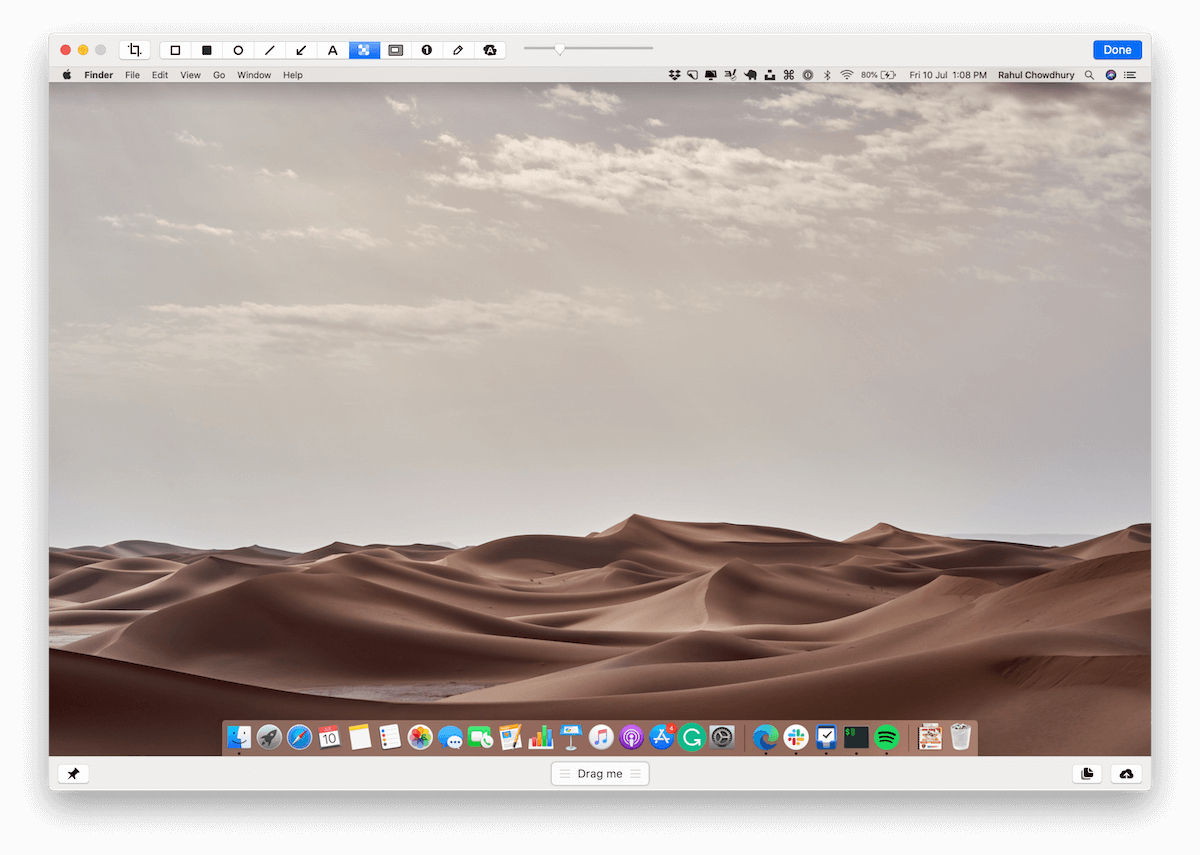
Although macOS’s screen utility has a similar editor, CleanShot X has a couple of easy editing features like the:
Quick pixelating option
It’s dead simple to pixelate an area of my screenshot using CleanShot X. Check this example:
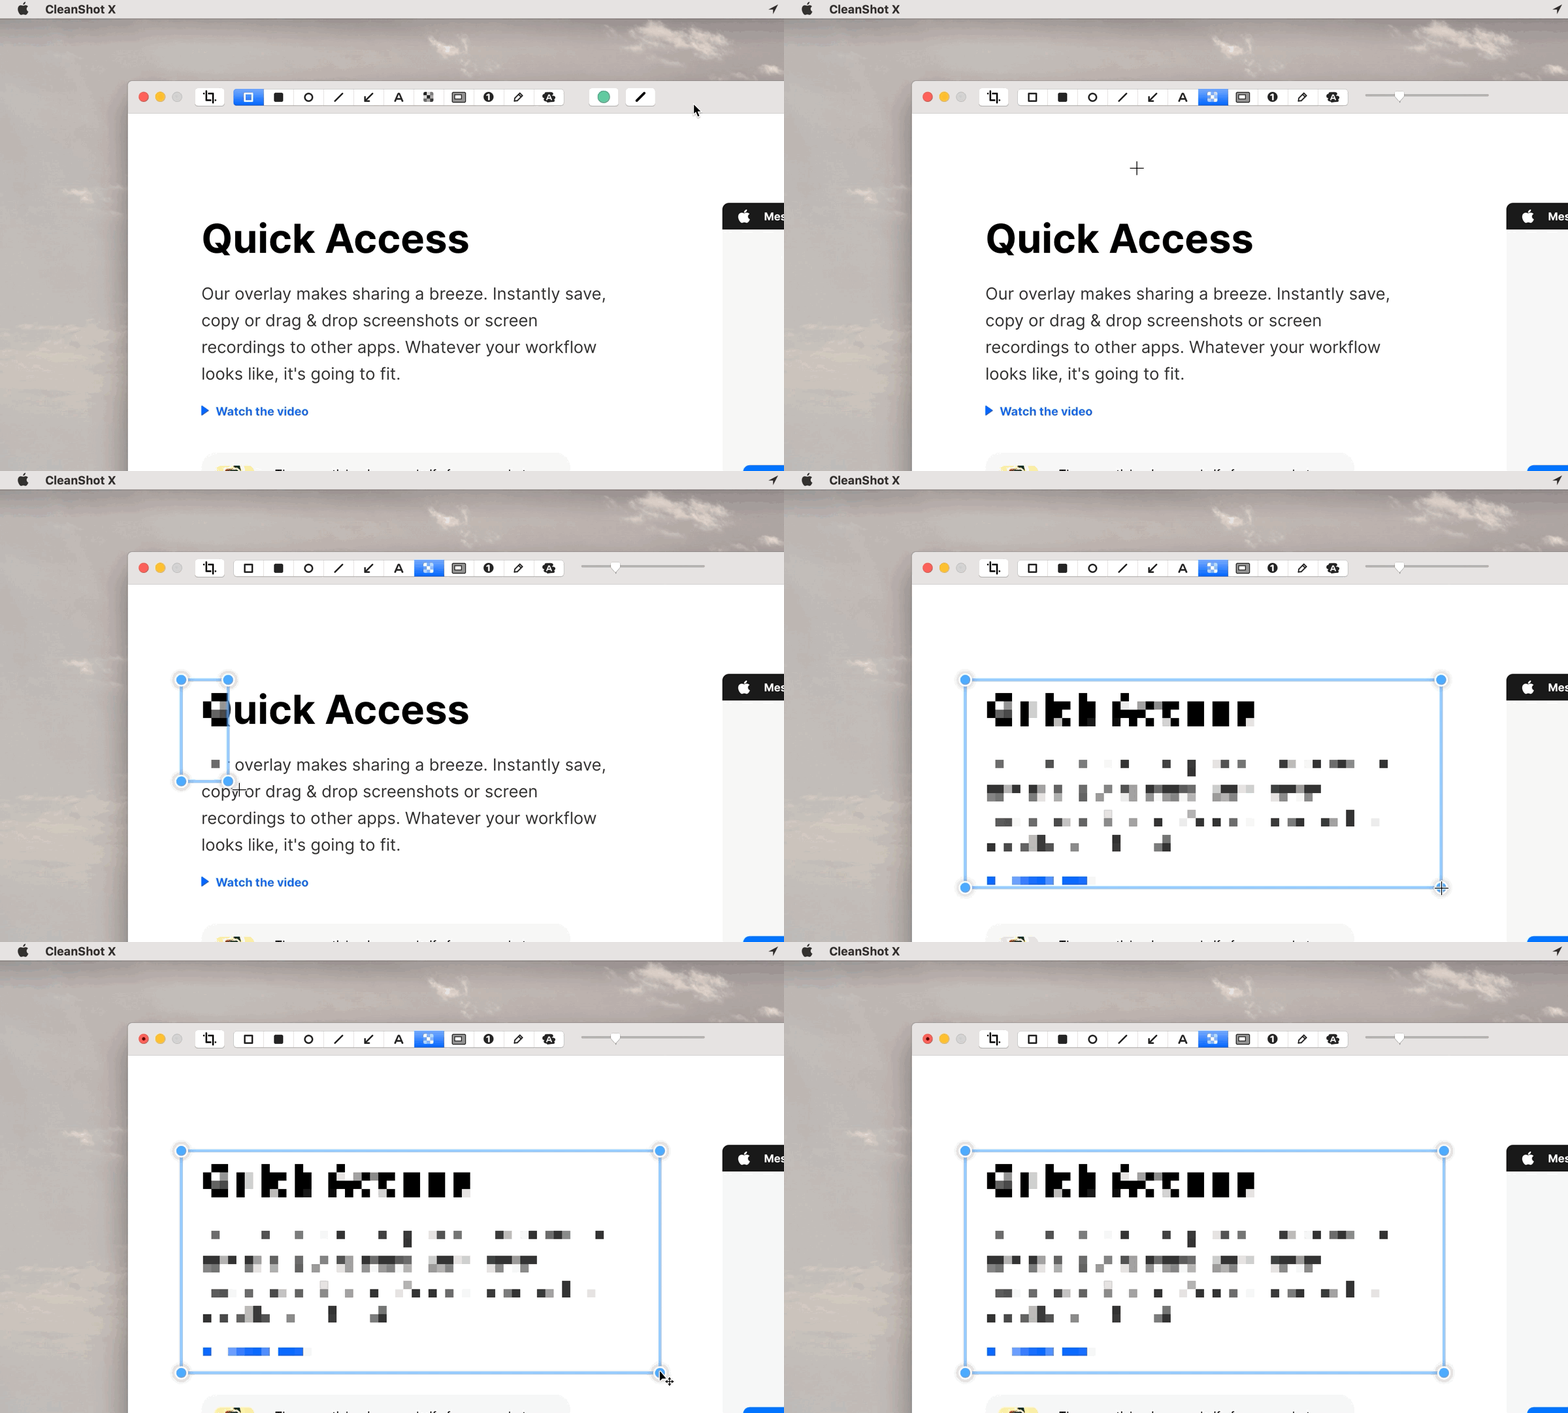
See how easy it is to hide sensitive information from your screenshots?
I used this feature extensively while grabbing screenshots for my HEY email review post.
Another editing pro-feature is the:
Auto-numbering tool
I can quickly number spots in my screenshot and point out the exact areas while explaining the screenshot to someone.
Feeling lost about what I just said? Check this out:
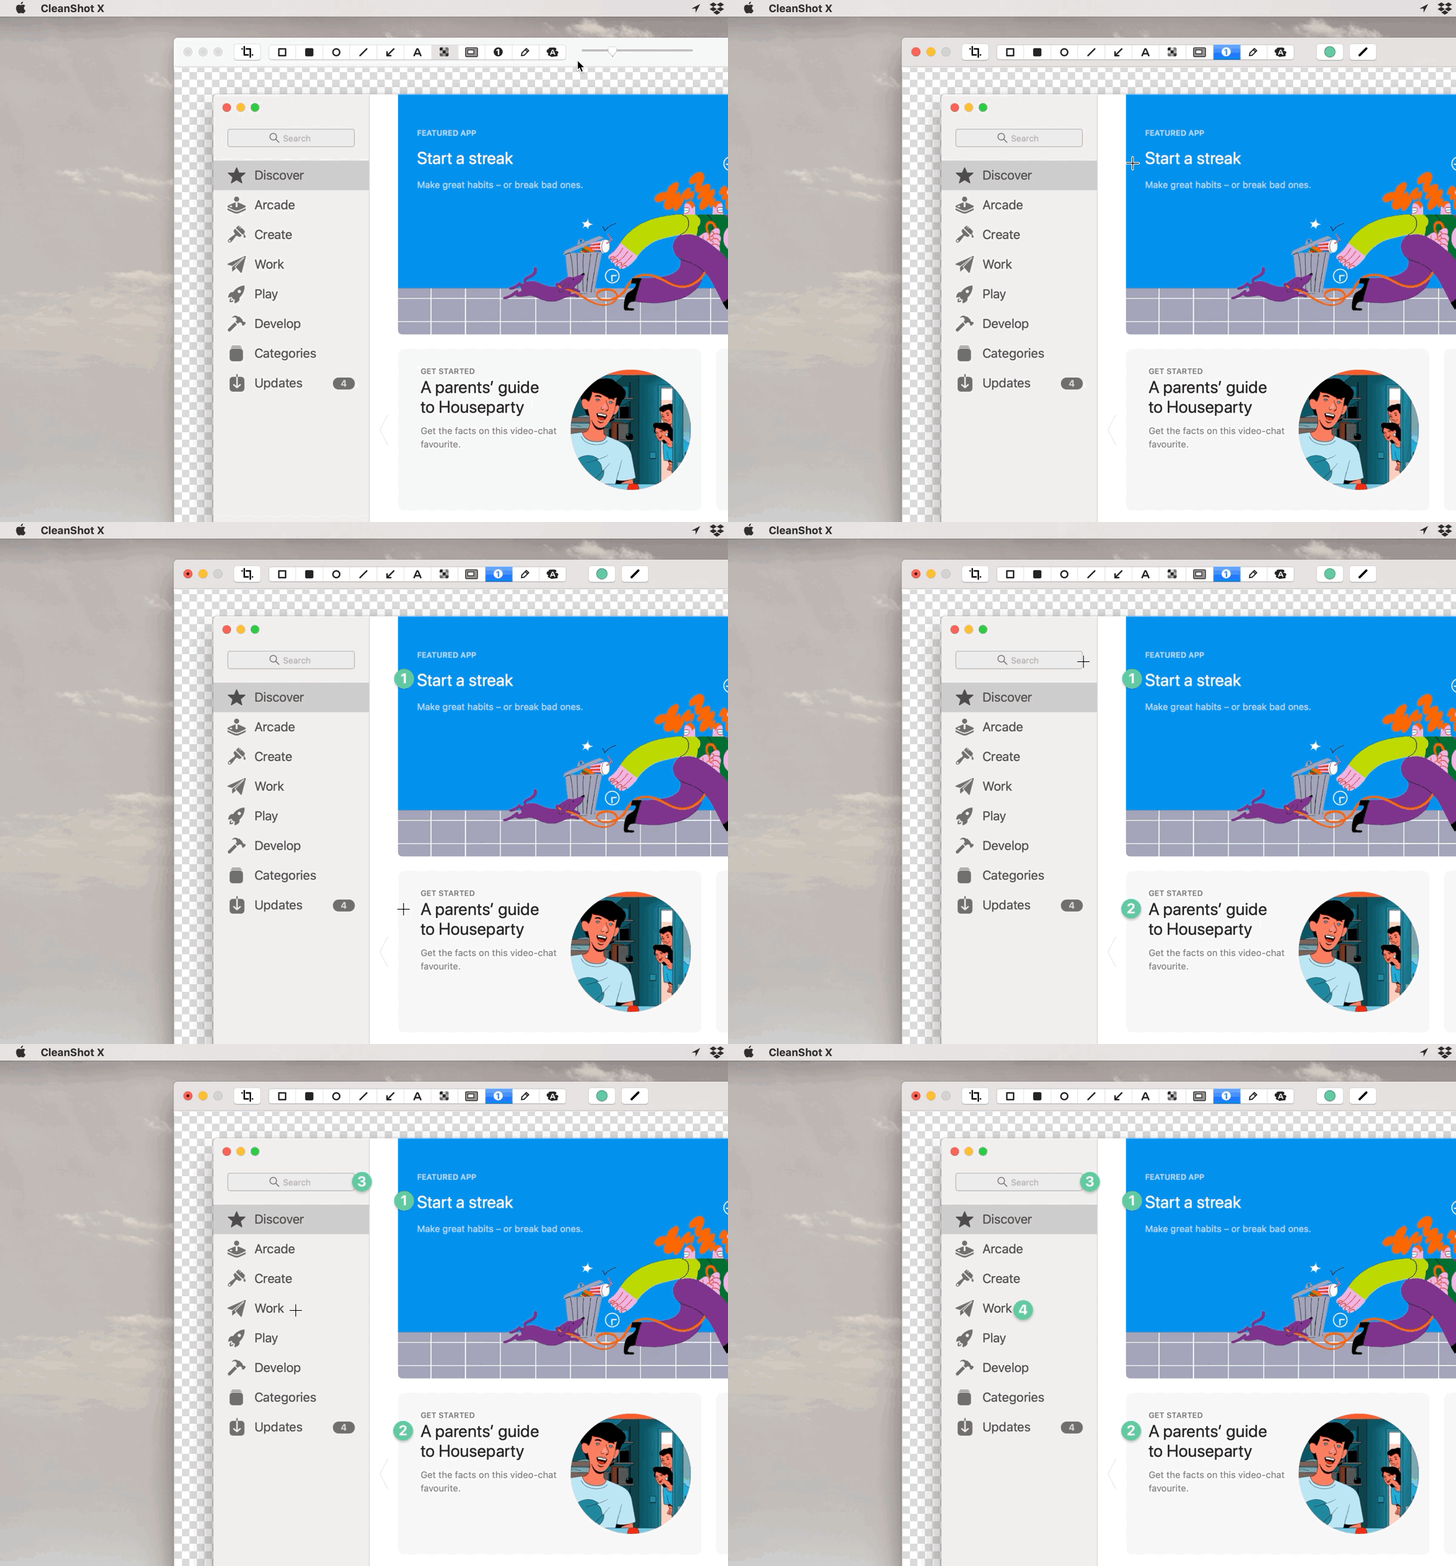
Now, when I share this screenshot with someone, I can easily list down explanations for the areas of interest like this:
- This is the hero section of the App Store
- Here are some of the recently highlighted apps
- We can search for apps here
- Here are the app categories
See how easy it is rather than explaining with some abstract sentences like, “notice the blue rectangle on top?”?
Apart from these two cool editing features, I also enjoy:
Getting instant shareable cloud links
I had been missing this nifty little feature before CleanShot X came into the picture.
There were a couple of tools like LightShot and Droplr, but I never tried them out because I was so satisfied with CleanShot’s overall feature set.
With CleanShot X, I can now get a shareable link to my screenshot with a single click. Like this:
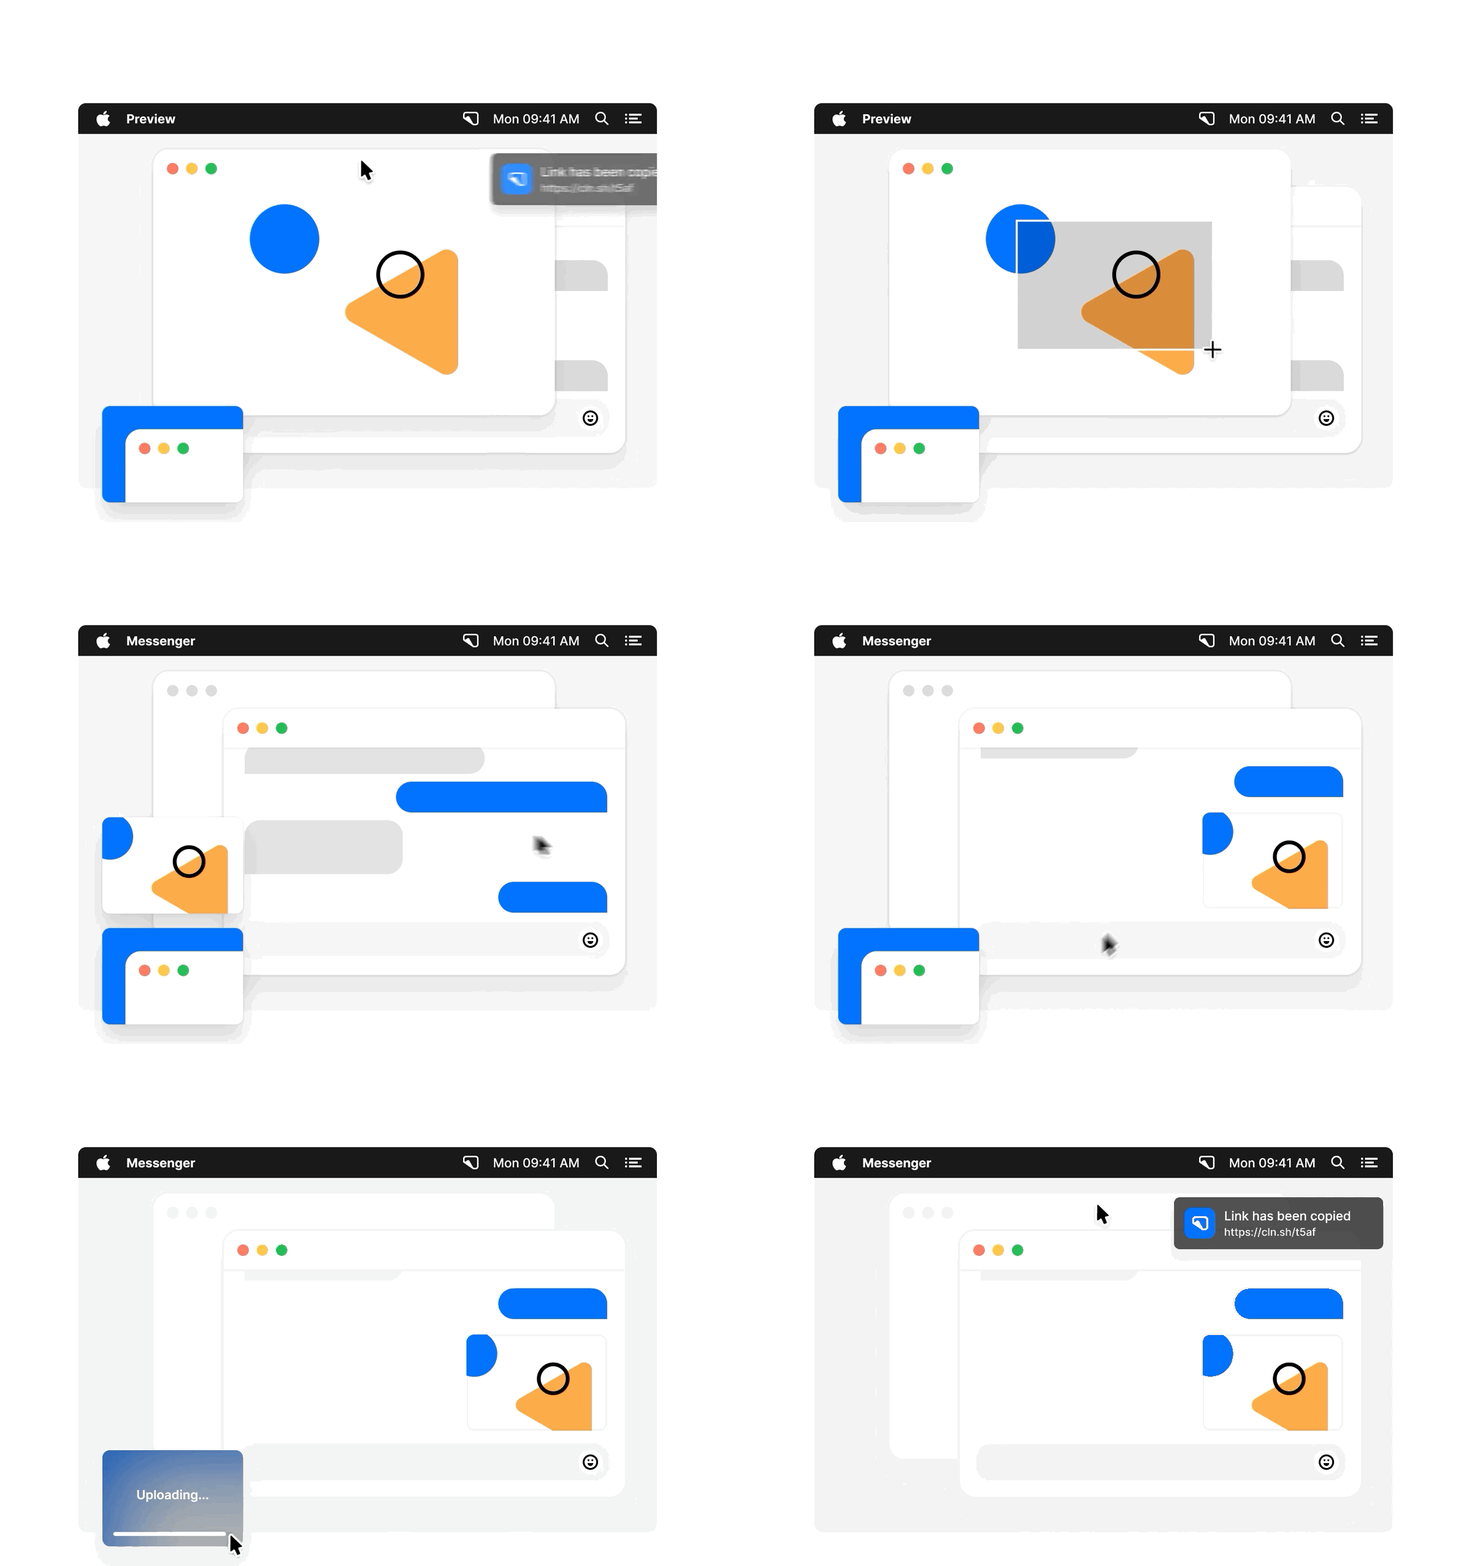
This feature works for video recordings as well which is sweet.
About two weeks ago, I had to share screenshots on the WordPress.com support chat window which didn’t have an attachment upload feature. CleanShot X’s cloud links came in super-handy that day. 😁
A quick note here: With a free CleanShot X cloud account (which comes bundled with a one-time license purchase), you get up to 1GB of cloud storage space.
Talking about cloud storage, you can view all your uploaded screenshots on your free CleanShot Cloud dashboard.
One last feature that I’m excited to talk about is the ability to:
Hide desktop icons automatically when taking a screenshot
This feature has been a life-saver on multiple occasions and has been present since the early days of CleanShot.
Here’s how this works:
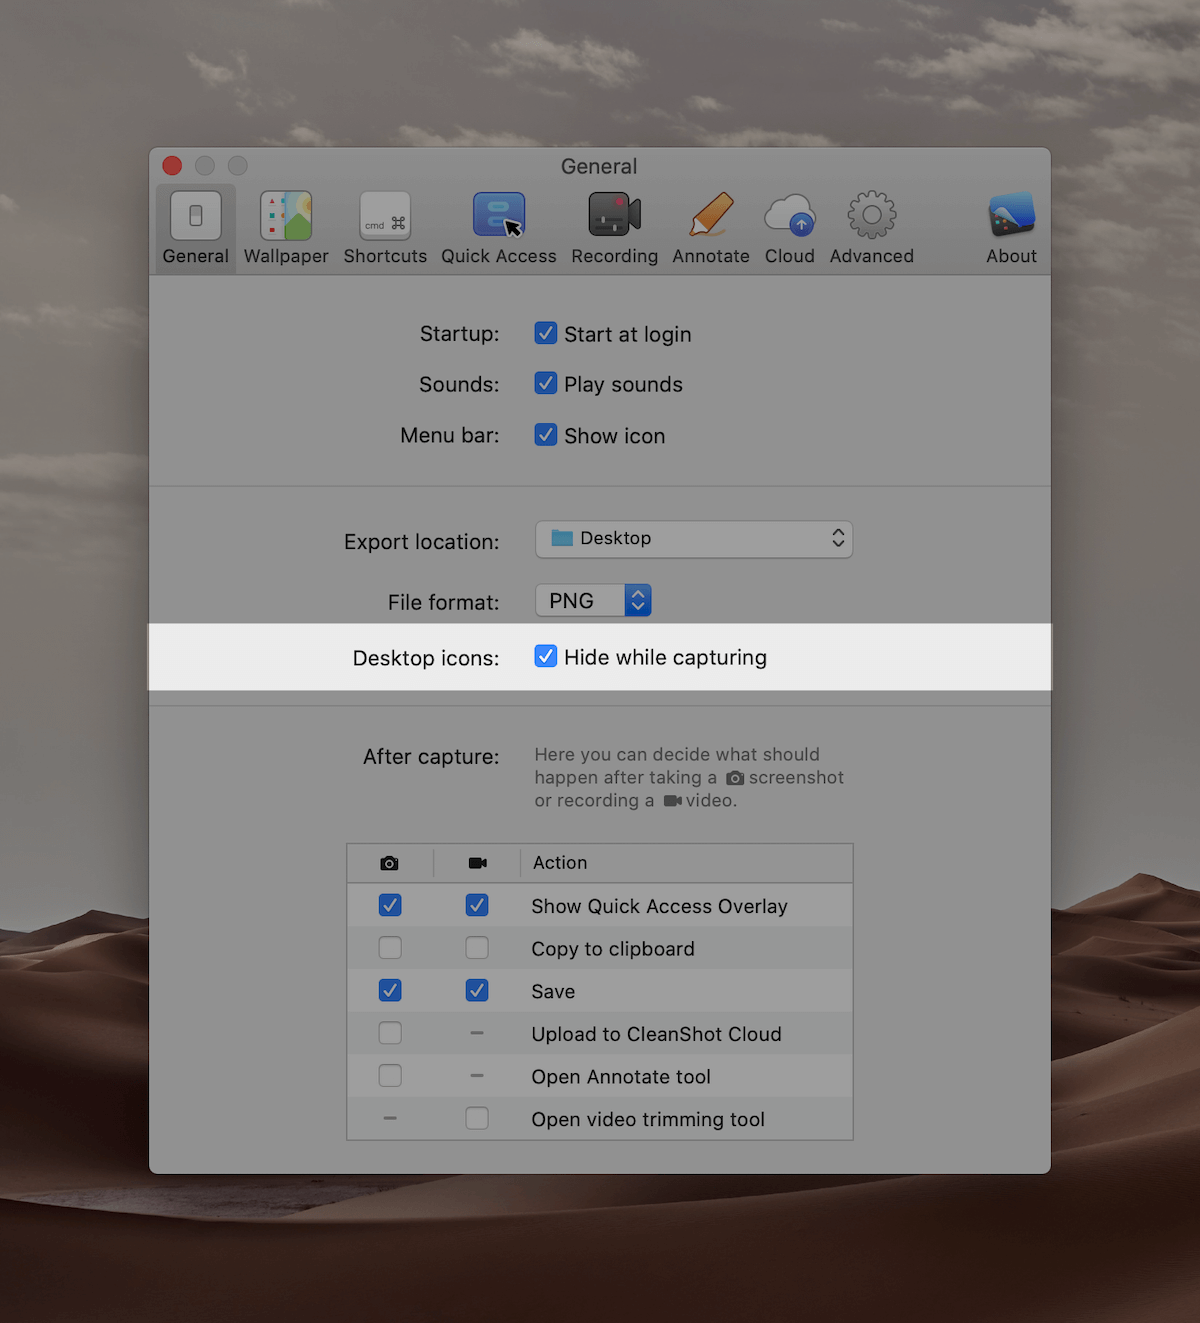
Although I like to keep my desktop uncluttered, this option allows me to expose a clean desktop every time I take a screenshot. Even if I have a couple of files laying around on my desktop. 🤫
But hang on:
Cool features aside, is this tool worth $29?
Well, it depends on your usage
When I bought CleanShot, I didn’t overthink how this tool will improve my workflow. I just went ahead and paid $15 for a cool Mac app.
However, after continuously using this tool for over a year, it has earned every penny I paid for it.
That is why I quickly upgraded to the new version by paying an additional $14 when it came out.
If you screenshot a lot and need to share them as part of blog posts or just for explanation, this tool can save you a lot of time.
Bonus?
Your screenshots will look pretty professional.
Feel free to check out the entire feature set on CleanShot’s website.
Now, let’s talk about how you can bag yourself a CleanShot X license without paying a dime.
Take part in the giveaway
I have partnered up with MakeTheWeb to give away three licenses for CleanShot X, worth $29 each.
To take part in this giveaway, all you need to do is:
- Subscribe to my newsletter. Don’t worry, I will never spam you, and you can unsubscribe anytime if you decide it’s not for you.
- Leave a comment below. Share your opinion on CleanShot X, and why would you like to have a license. Make sure you use the same email for both subscription and commenting.
If you’re feeling generous, please share this post on your social media profiles or with a friend. ❤️
Winners picked
Thanks to everyone who took part in this giveaway. We have had an amazing response.
As promised, it’s 25th July 2020 today, and here are the winners:
- Ross
- Sukriti
- Vitaliy
Congratulations to all the winners. 🎉 I have emailed all three winners with a CleanShot X license code. 🎟
Enjoy CleanShot X. Also, to everyone else, keep an eye on Hulry for future giveaways. 👀



 In-depth articles, series and guides
