I have been a fan of Adobe Lightroom for years. It has excellent apps on mobile and for my laptop.
Although I’m not a full-time or professional photographer, I do love to shoot photos with my trusty Nikon D3200 occasionally. Lightroom helped me bring those photos to life.
You read that right. It helped, because recently, I switched to Pixelmator Pro and I couldn’t be happier with my decision.
In this post, I’ll talk about why I made my move and how it has been saving me about $10 every month.
Let’s start with:
Why I chose Lightroom in the first place
Photography is a competitive space. There are tons of good software out in the market, which helps us jazz up our photos.
From instant filters to professional-grade photo editing, there’s an app for everything.
I remember starting my photography journey by touching up my RAW photos on Photoshop with the help of beautiful presets I bought from places like Creative Market.
The process was easy. Open up a RAW photo, experiment with presets until I was satisfied and finish off with some minor touches.
Some of the best selling stock photos on my Creative Market shop came from this process:

The problem with this approach was that I became dependent on the collection of presets I had at that time.
I wasn’t doing much customisations on my own.
Presets are great and can save you a ton of time. However, when you’re looking for that personal touch, you need to go beyond automated editing.
That is when one of my friends introduced Lightroom to me.
The main selling point was that it was powerful, like Photoshop but with less work to do.
And it’s true.
Lightroom is like a very newbie-friendly subset of Photoshop, which makes editing photos a breeze.
I was already subscribed to the Creative Cloud Photography Pack, which got me access to both Lightroom and Photoshop. I started editing my photos with Lightroom.
Then, my photos started to look this these:

You can see that there’s a lot of retouching involved on these photos.
Lightroom made it easy and fun to apply those retouches.
But, the problem was:
I was neither shooting nor editing photos very often
This meant, I had to pay for Lightroom every month to have it parked on my laptop.
I paid for over a year where I maybe used Lightroom for about 20-25 times.
$10 a month for an app that’s used rarely is not a great use of anyone’s money.
However, I wasn’t willing to give up on Lightroom because of those occasional “let’s edit a photo” moments.
Free tools like Snapseed were fine up to a level, but nothing beat Lightroom’s power and flexibility.
That was until:
I met Pixelmator Pro
The friend who recommended Lightroom to me, suggested I give Pixelmator Pro a shot.
Banking on the fact that his recommendations are usually solid, I downloaded the trial copy of Pixelmator Pro and took it for a test drive.
I was amazed at how well this tool was built. It’s available only for the Apple ecosystem, but that works for me.
I got a copy of Pixelmator Pro from the App Store for a one-time fee of $39.99 even before finishing up the trial period.
Since I was not a Lightroom Pro, I adapted to Pixelmator’s editing flow quite fast.
With Pixelmator Pro, I like:
How I can have the best of both worlds in a single app
Lightroom is great for retouching and colour grading photos. However, when it comes to tweaking stuff, we need to import a half-edited photo into Photoshop to finish the job.
Now, you might think:
Why not edit the photo directly in Photoshop?
That’s true, but as I said earlier, Lightroom has some easy tools for retouching a photo. I used to spend way less time editing photos in Lightroom than in Photoshop.
Pixelmator Pro shines in this department by providing both super easy ML-driven retouching tools and also advanced photo manipulation capabilities like Photoshop.
For example, check out this awesome:
Quick selection tool in Pixelmator Pro
I love how cool the quick selection tool works in Pixelmator Pro.
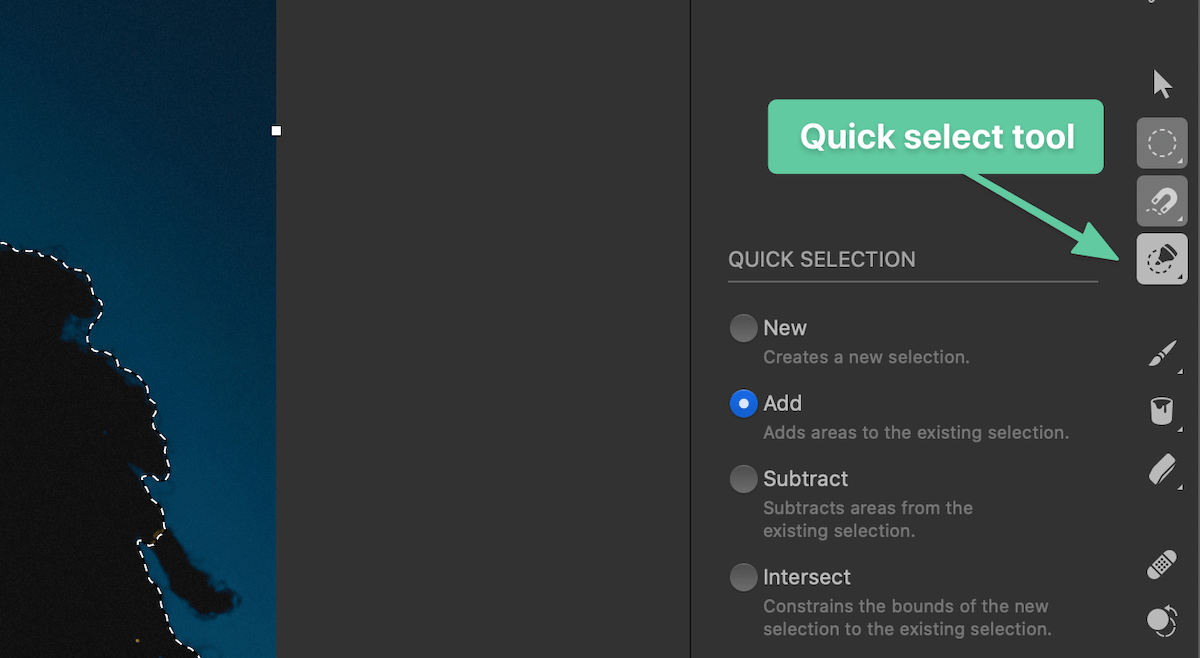
Just select the quick selection tool from the toolbar, select the selection mode as “Add” and rub the areas on the photo you want to select.
Let’s try out the quick selection tool on a wonderful portrait I downloaded from Unsplash:
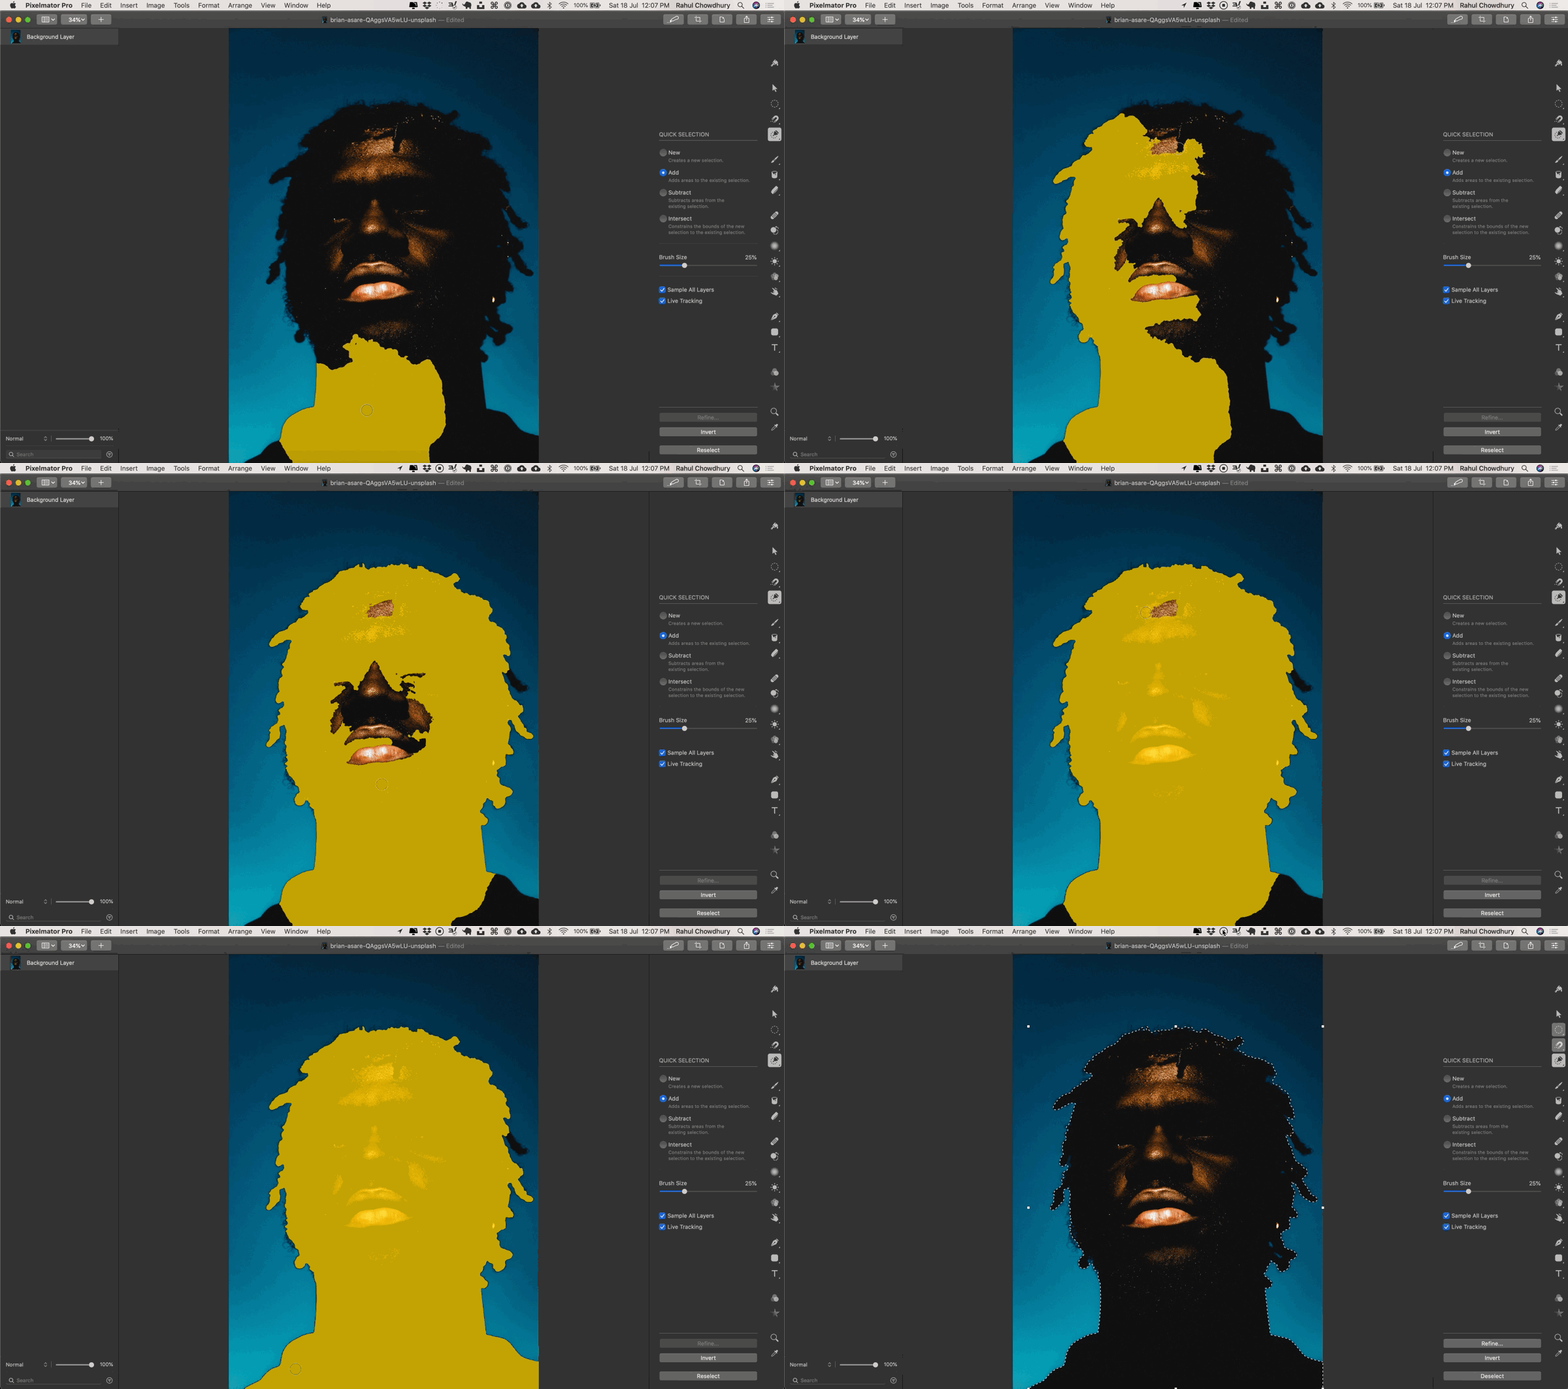
Although apps like Photoshop also have easy quick selection tools, but what I like about Pixelmator’s tool is how it adapts to object boundaries.
Also, this tool is super fun to use. Just look at that cool mouse hover effect.
In case you’re wondering which one’s the Quick Selection tool in the toolbar, here it is:
One of my most used tools in Lightroom was to apply local adjustments to a photo.
Although, Pixelmator Pro doesn’t have a tool called “local adjustments”, it does have some retouching tools which do the job.
Here’s how I:
Apply local adjustments to my photos
Unlike Lightroom, where you select an area using the radial tool or the linear gradient tool and then apply adjustments to the area, Pixelmator Pro allows local adjustments in two ways:
- Use quick retouching brushes: Pixelmator Pro has retouching brushes to soften, smudge, lighten and darken parts of a photo by rubbing a brush over the area. This is faster because I don’t need to select anything and can apply preset brushes quickly.
- Selecting area to retouch: Using a selection tool like the quick selection tool I talked about, I can select an area and apply adjustments to that area. This technique offers fine controls over the selected area, pretty much like Lightroom.
The guys behind Pixelmator Pro made a fantastic video on how to use all the retouching tools in the app.
Another fantastic thing that I like about Pixelmator Pro is that being a macOS optimised app, it leverages Apple’s CoreML technology to provide a ton of:
ML-driven features
Pixelmator Pro is full of ML-driven tools that make my editing process a little faster.
Some of the ML-driven features I enjoy are:
ML enhance
This feature gives me a great starting point for my editing workflow. I can open up a RAW photo, and press ML Enhance to let Pixelmator Pro make some adjustments for me.
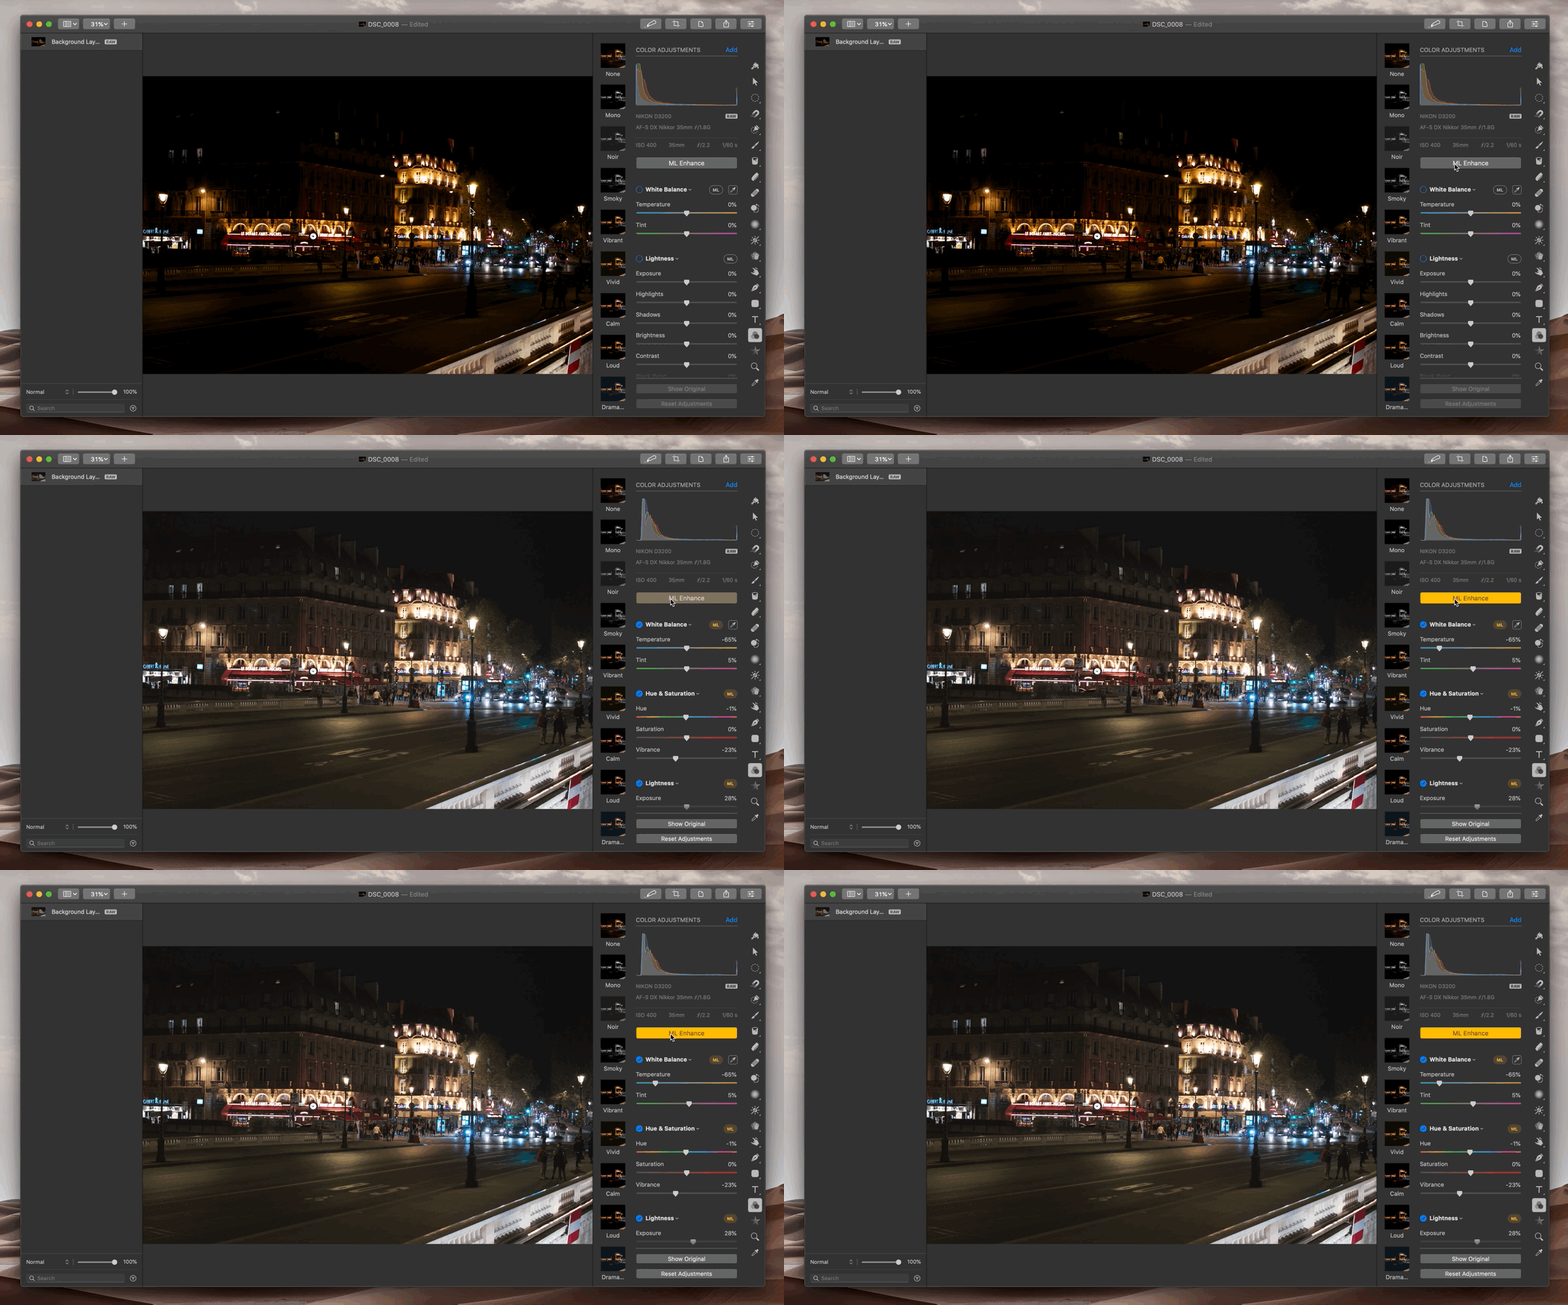
After the initial automated adjustments are made, I can continue from where Pixelmator Pro left off and add some finishing touches of my own.
But here’s the kicker:
This tool is not a silver bullet.
Although it works on a majority of photos, for some of my photos I prefer starting from scratch on my own.
To those who are thinking what’s the big deal about auto-adjustments, it’s a common feature in every photo editing tool:
Pixelmator Pro is the first app, where I even considered using auto-adjustments because it’s quite good.
Apart from this, I also love the:
ML Match Colours feature
This is a life-saver when it comes to taking colour grading inspirations from other awesome photos.
Pixelmator Pro can automatically apply colour adjustments based on a reference photo that I choose. For example, see this:
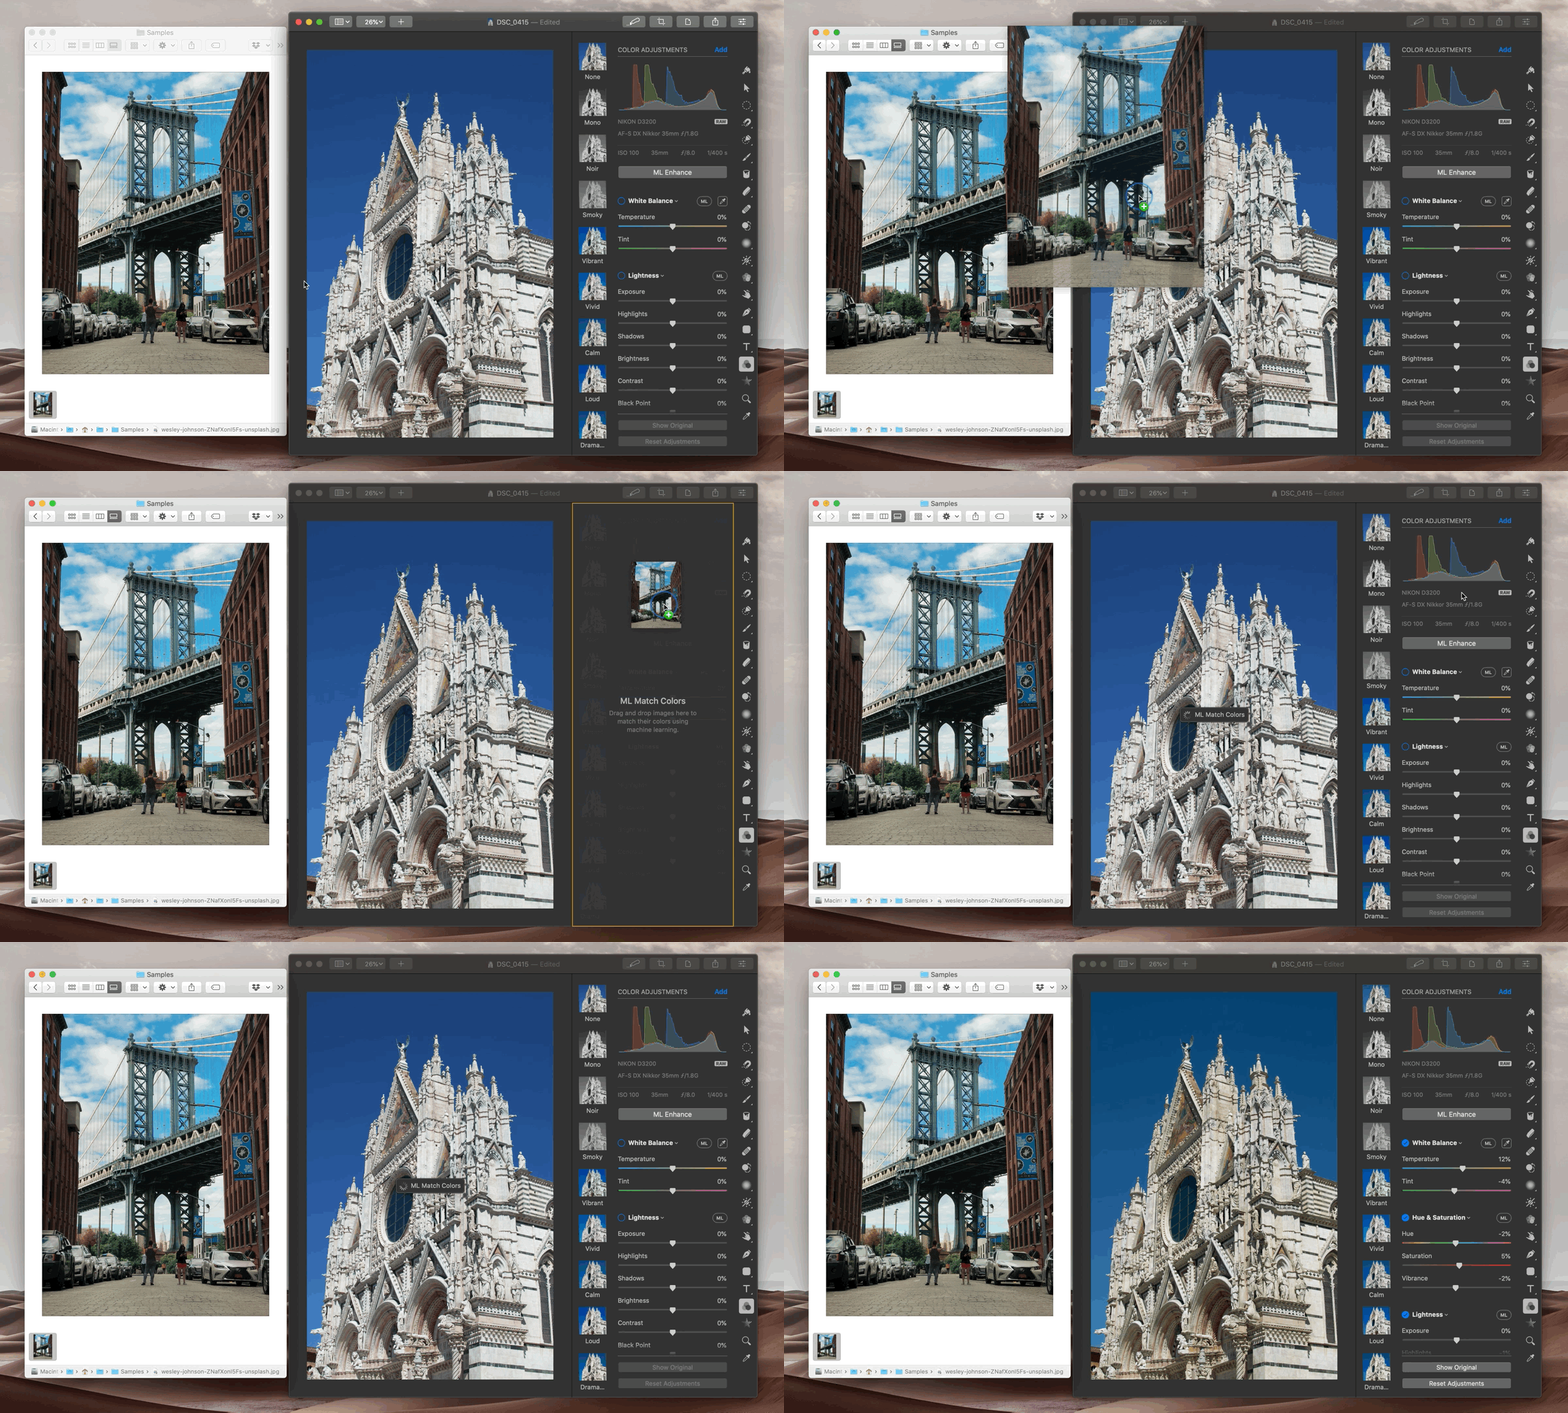
I brought in the warm tones from a reference photo to my photo with a simple drag & drop.
Some might argue that presets do a better job than this.
True. However, not every photographer shares their presets. This feature allows me to harness colour grading from every photo present on the internet.
But, I treat this feature as a starting point and then calibrate accordingly to add my touch.
That said:
I do miss a couple of things about Lightroom
Adobe Lightroom is an insanely popular photo editing software. With popularity, comes a boatload of tutorials and courses.
Pixelmator Pro is relatively new, and it’s catching up with the photography world. Therefore, right now:
There are very few video tutorials on Pixelmator Pro
I’m not a pro photographer. I shoot and edit photos in my free time as a hobby.
One of the impressive aspects of using Lightroom was that I could watch tons of how-to videos on YouTube and get better at my photography game.
I can’t say the same for Pixelmator Pro.
Although there are a couple of official tutorials from the Pixelmator team, the number is meagre.
There’s one silver lining here though:
Photo editing and photography, in general, is based on core concepts which can be applied to any tool regardless of how they are structured.
I was able to apply most of my photo editing knowledge from Lightroom to Pixelmator Pro almost immediately.
For some features like the local adjustments, I got used to the new way in a couple of days.
Also, I don’t like that:
I have to add adjustment controls to my workspace every time manually
I don’t know what the thought process was behind this UX, but it’s pretty annoying.
Unlike Lightroom or even Apple Photos’ edit mode, Pixelmator Pro does not show up all adjustments options automatically.
I have to add each adjustment control to my images like this manually:
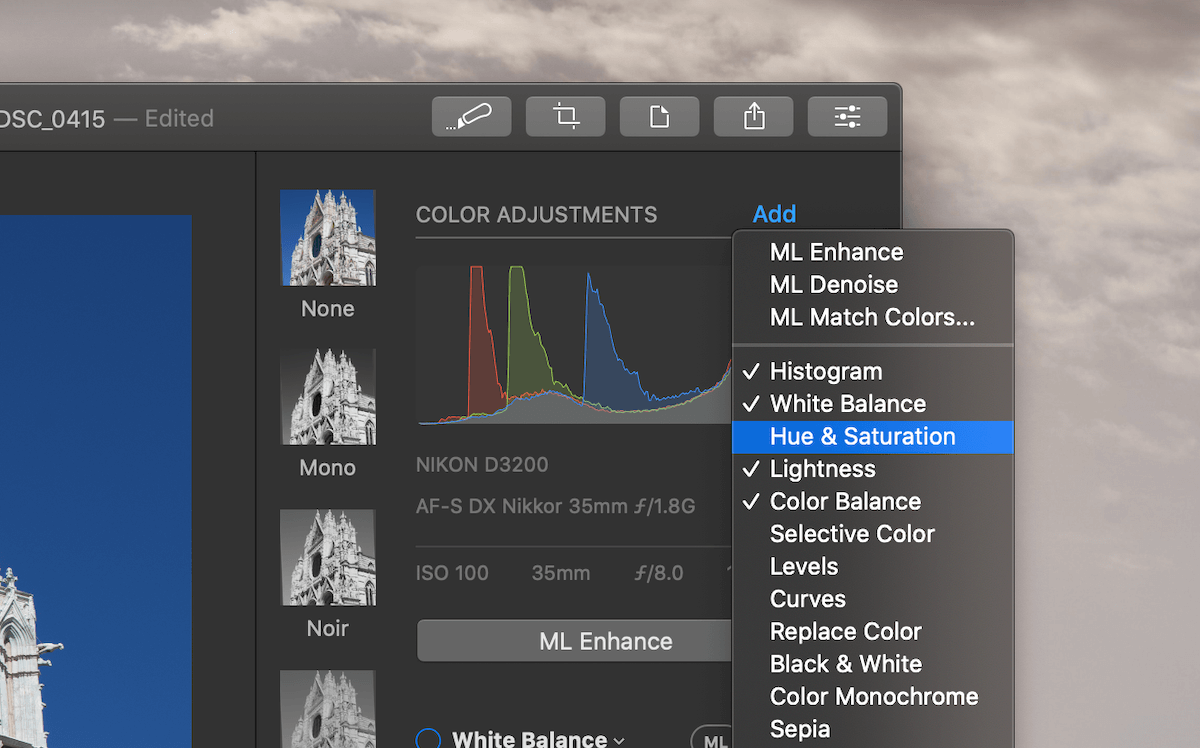
I checked out the preferences section and didn’t find any setting that would allow me to add a preset adjustment control on every new photo I open.
This tiny little UX problem adds some manual effort for every photo I edit. Not a good thing to have.
Apart from this:
I miss Lightroom’s album feature
I liked how I was able to organise my photos in an album in Lightroom.
Till now, I couldn’t find such a feature on Pixelmator Pro.
The album feature helped get a snapshot of all my processed photos in the app and anything that I had queued up for processing.
With Pixelmator Pro, it’s about opening up photos one by one and processing them.
But then again, it’s a tiny inconvenience that I can easily overlook.
Now, the question is:
Whether moving to Pixelmator Pro is a good idea
If your photography workflow is anything like mine, then absolutely yes. It’s a switch you’ll not regret.
Mainly, for these two reasons:
- All-in-one app for all photo editing needs
- One time payment
One lifetime copy of Pixelmator Pro on macOS is worth just four months of Lightroom subscription payment.
That’s a fantastic deal.
Also, the iPhone and the iPad apps are extra one-time purchases which don’t cost that much. Overall, you’ll have plenty of savings if you switch to Pixelmator Pro.
However, if you’re deeply rooted into the Lightroom editing flow and use the app very frequently, you might want to stick with Lightroom.
There’s no point in switching software without any visible gain.
Choose what works best for you.


 In-depth articles, series and guides


