


 In-depth articles, series and guides

Tracking expenses has been one of the most constructive habits I've built over the years.
It has, on many occasions, helped me keep my spending in check and audit past expenses for accountability.
Now:
When we speak about tracking expenses, the most common image that pops into our heads is crunching numbers on a spreadsheet, running complex functions and deciphering messy charts to understand our spending.
Some people prefer handing off this task to an automated expense tracker app, but that comes with its own set of problems, and that's not how I do it.
The process I use is relatively simple, takes two minutes, and only depends on making it a regular habit.
In this blog post, I'll talk about why tracking expenses manually is an excellent habit and how I make the process less tedious.
Let's start with:
Why track expenses manually
Why would someone manually track their expenses in this age of automation and seamless 3rd-party connectivity?
I was in the same boat when I started tracking my daily expenses.
At the time, Android apps could read texts from banks to credit and debit transactions into my local records without supervision.
This made tracking automated and one less thing to worry about. However, it also made me ignorant of my financial situation.
I was tracking my expenses for sure, but I was still blissfully unaware of how I was spending my money because everything happened without me being in the loop, and I barely bothered to open the app to see the state of my finances.
Even with all this tracked information, I failed to make any change in my spending habits because I was out of touch with my financial reality at the time of spending.
And within a few months, I completely forgot that I was even tracking my expenses.
Also:
Automated tracking works on guesswork where an app categorises your expenses based on the merchant name.
But an app can only deduce so much from the payee's name and amount.
For example, spending ₹2,500 (~$26) on books from Amazon and spending an equivalent amount on a pair of sunglasses are not the same thing. One could be an investment and well-intended purchase, whereas the other a heat-of-the-moment, advertising-propelled impulse buy.
An automated tracker app can't tell the difference just by looking at the merchant name. It only sees Amazon as the merchant and marks the purchase as, say, Shopping, which is vague when you're reviewing your last month's spending.
And:
This is where consciously tracking expenses helps.
First, as we track our expenses as they happen or at the end of the day, we stay in touch with our financial reality. For example, where we've been spending money lately, how much we've spent, and what our overall financial health looks like.
This is largely what has kept me financially disciplined over the last 8 years.
Every time I open the app where I track my expenses, I see this information front and centre:
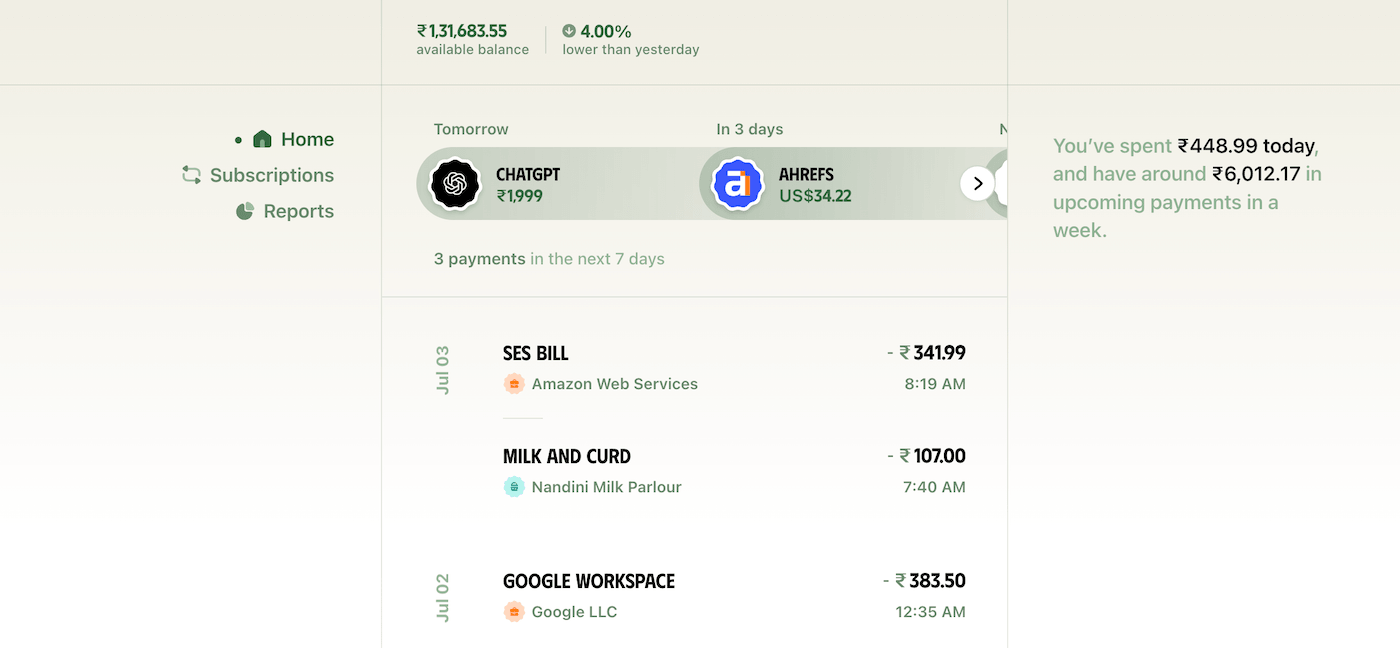
This healthy friction and repeated intervention make the next purchase more intentional because we're aware of our finances and we can make an educated choice whether to go through with the purchase, rather than spending liberally first and then regretting later.
Second, we can include relevant details that'll help us and the app understand the transaction better and file it accurately.
Let's revisit the Amazon purchase from earlier. With this tracking approach, we can accurately categorise the book purchase under Education and the impulse buy under Shopping and include relevant notes.
This makes the later-generated reports much more beneficial because they paint an accurate representation of where and how we're spending our money every month so that we can act accordingly and trim the excess.
Now, following this practice of consciously tracking our daily expenses over the long run requires building a habit that makes the process automatic.
We can do this by borrowing a few concepts from James Clear's book Atomic Habits.
To ensure we stick to this tracking habit in the long run, we need to make logging each transaction incredibly easy (priming our environment), and to make it automatic, we can chain it to the purchase action (habit stacking).
This might sound complicated, but it isn't.
Here's how I:
Track expenses with the Ducat app
One of the core principles of starting a new habit and sticking to it is to reduce the friction in getting things rolling.
The primary reason behind why many of us give up on manually tracking expenses or don't even try it is that it's too tedious to jump through many hoops just to log one expense.
The Ducat app smooths this process using an AI-assisted transaction input.
Here's how it works:
I can describe my recent spend in plain English or my local language, as I would to any other person, and the app understands the transaction, finds the relevant category for it and logs everything for me:
It even converts foreign currencies to my local account currency equivalent amount while saving the transaction so I don't have to do that math myself.
The whole process takes a few seconds, and I don't have to navigate through form fields or screens to record a single expense.
Now, the app can sometimes mark a transaction with the wrong category. In such cases, I open the transaction and choose the correct category for it:
This is still easier and faster than filling out a multi-step form every time I need to log a transaction.
So, the app takes care of the first leg of our habit-building exercise: reducing friction in logging daily expenses.
To stack this new habit of tracking expenses with something I already do, I started tracking each transaction immediately after spending or receiving money.
Since the tracking process takes a few seconds, it's easy to do this on the spot and doesn't pile up work for me at the end of the day.
However, if you prefer logging everything all at once, you can start a ritual of taking a few minutes every evening to log your transactions for the day. Or reserve a few minutes every morning to log your spends from the last day.
A simple trick to ensure you're not missing out on any transaction is to keep texts or other messages from your bank for each transaction unread.
One of the perks of the Ducat app is that it allows describing transactions in bulk.
So, we can describe transactions like “450 lunch at boho and 22k for flight tickets to goa from goibibo”, and the app will log both transactions at once:
After about a week of diligently tracking your expenses and income, you'll notice this process has become second nature.
I've been doing this for 8 years, and now I don't even have to remember to track anything. I automatically reach for the app and log what I spent money on.
Now:
While this approach works splendidly for one-off expenses, it doesn't make much sense for our subscription payments.
Subscriptions are fixed payments that are redundant to track as and when the automatic charge occurs. Instead, we can set up an automation to track these predictable charges and review them later to decide whether we should keep or cancel them.
Conscious spending is still at play here in a retrospective capacity.
This is how I:
Track monthly and yearly subscriptions
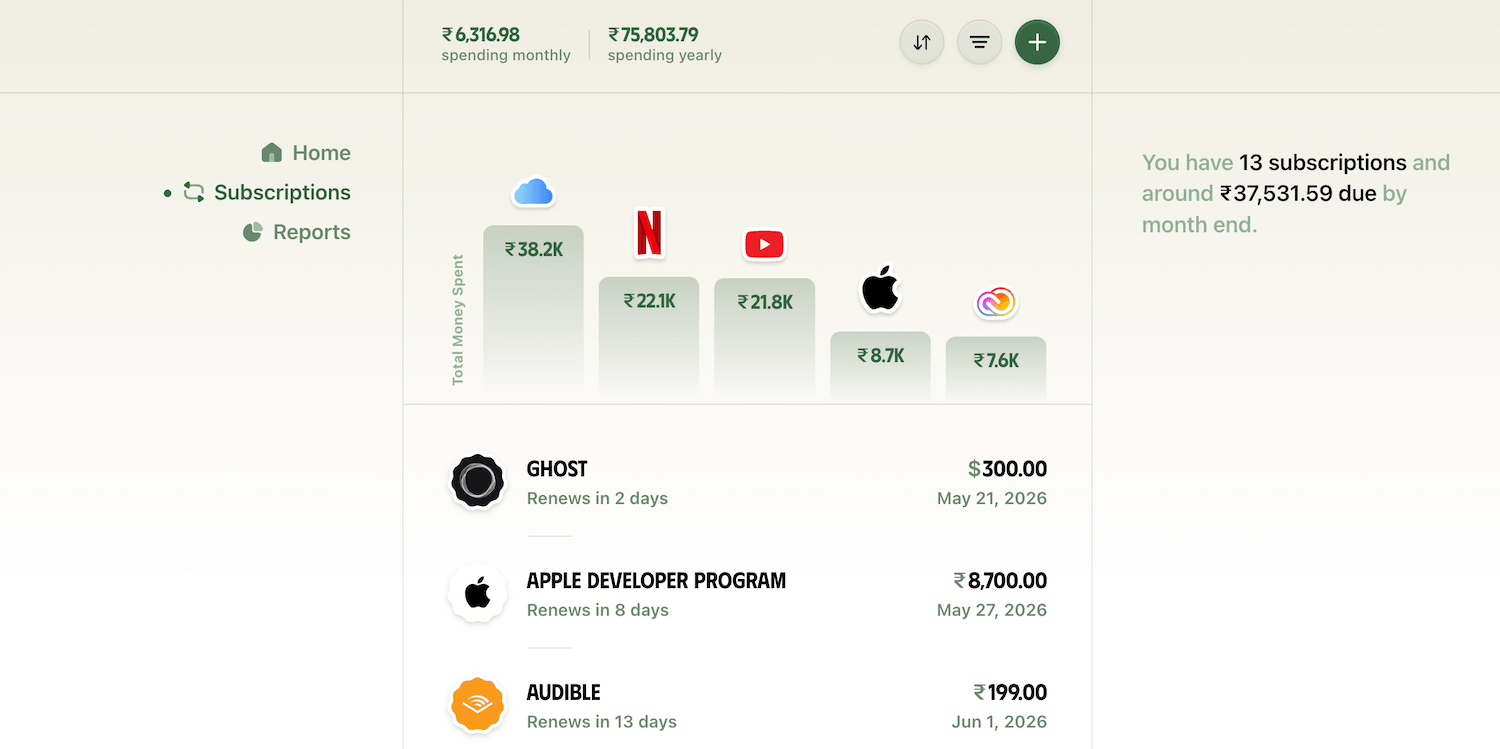
Ducat has a dedicated section to track and display all our subscriptions, including their projected and past costs:
For example, I have a Netflix subscription that I've tracked like this:
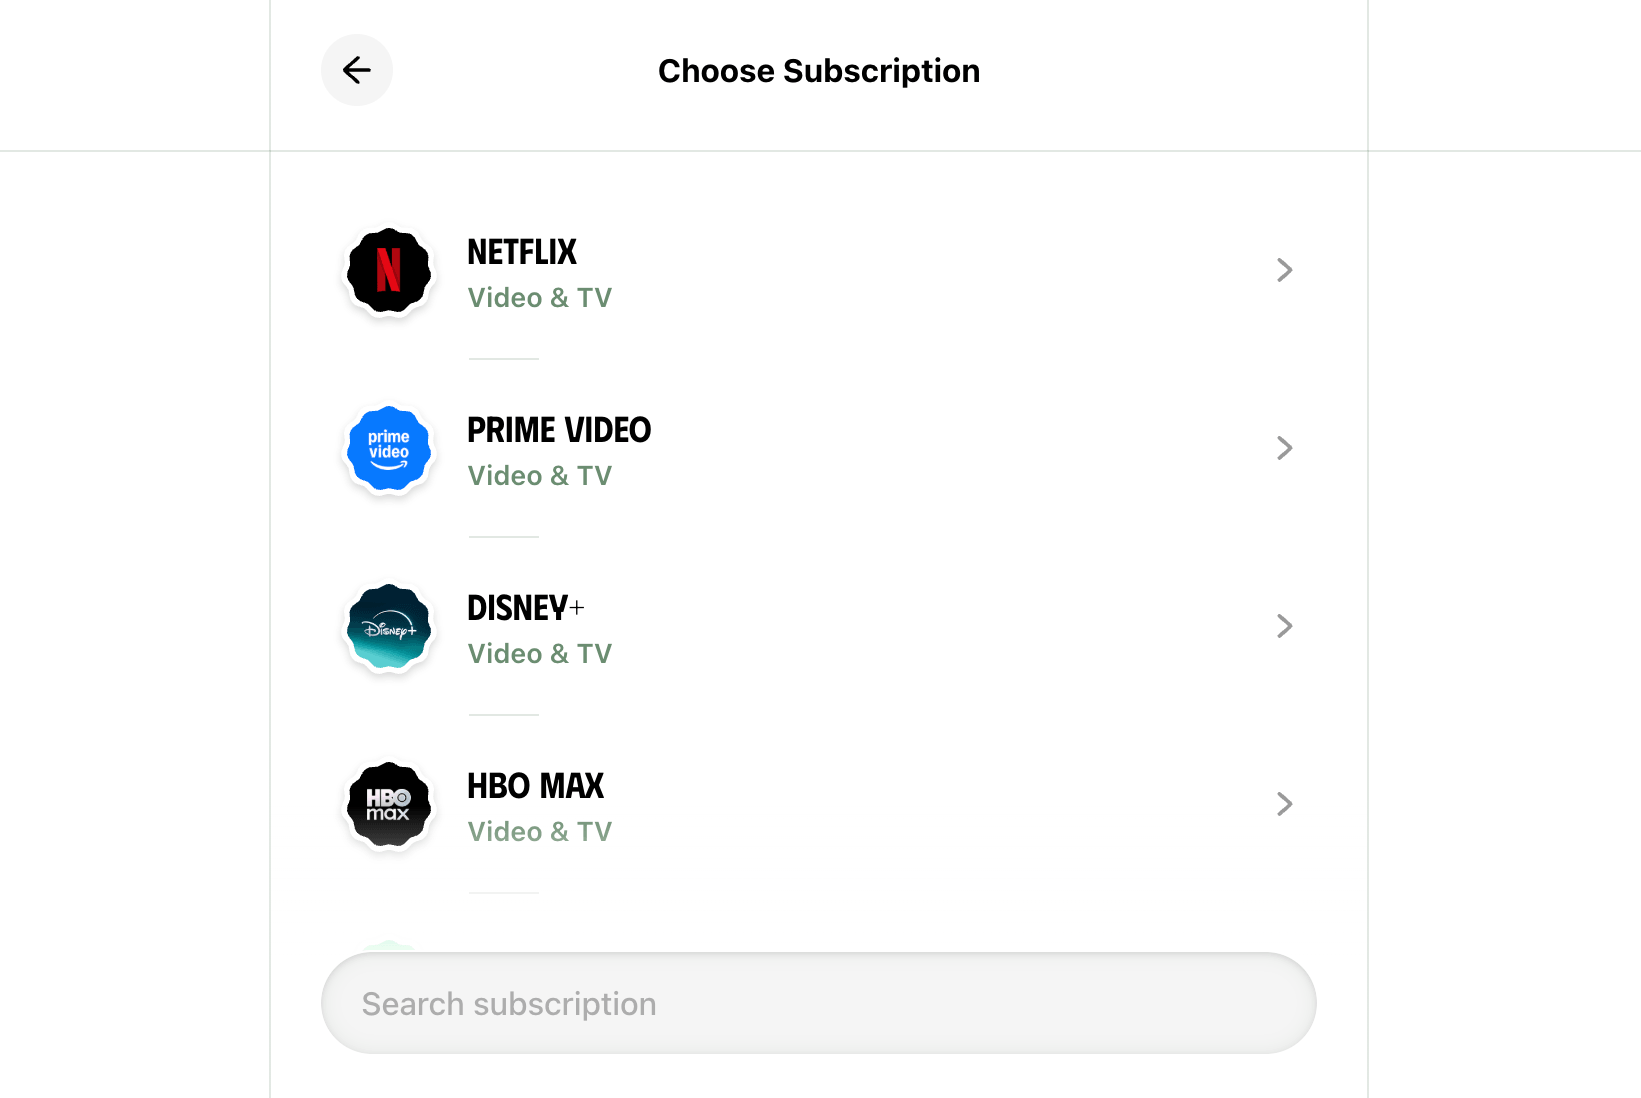
First, let's add a new subscription by clicking the + button on the Subscriptions page.
Then, choose Netflix from the list of suggested subscription options:
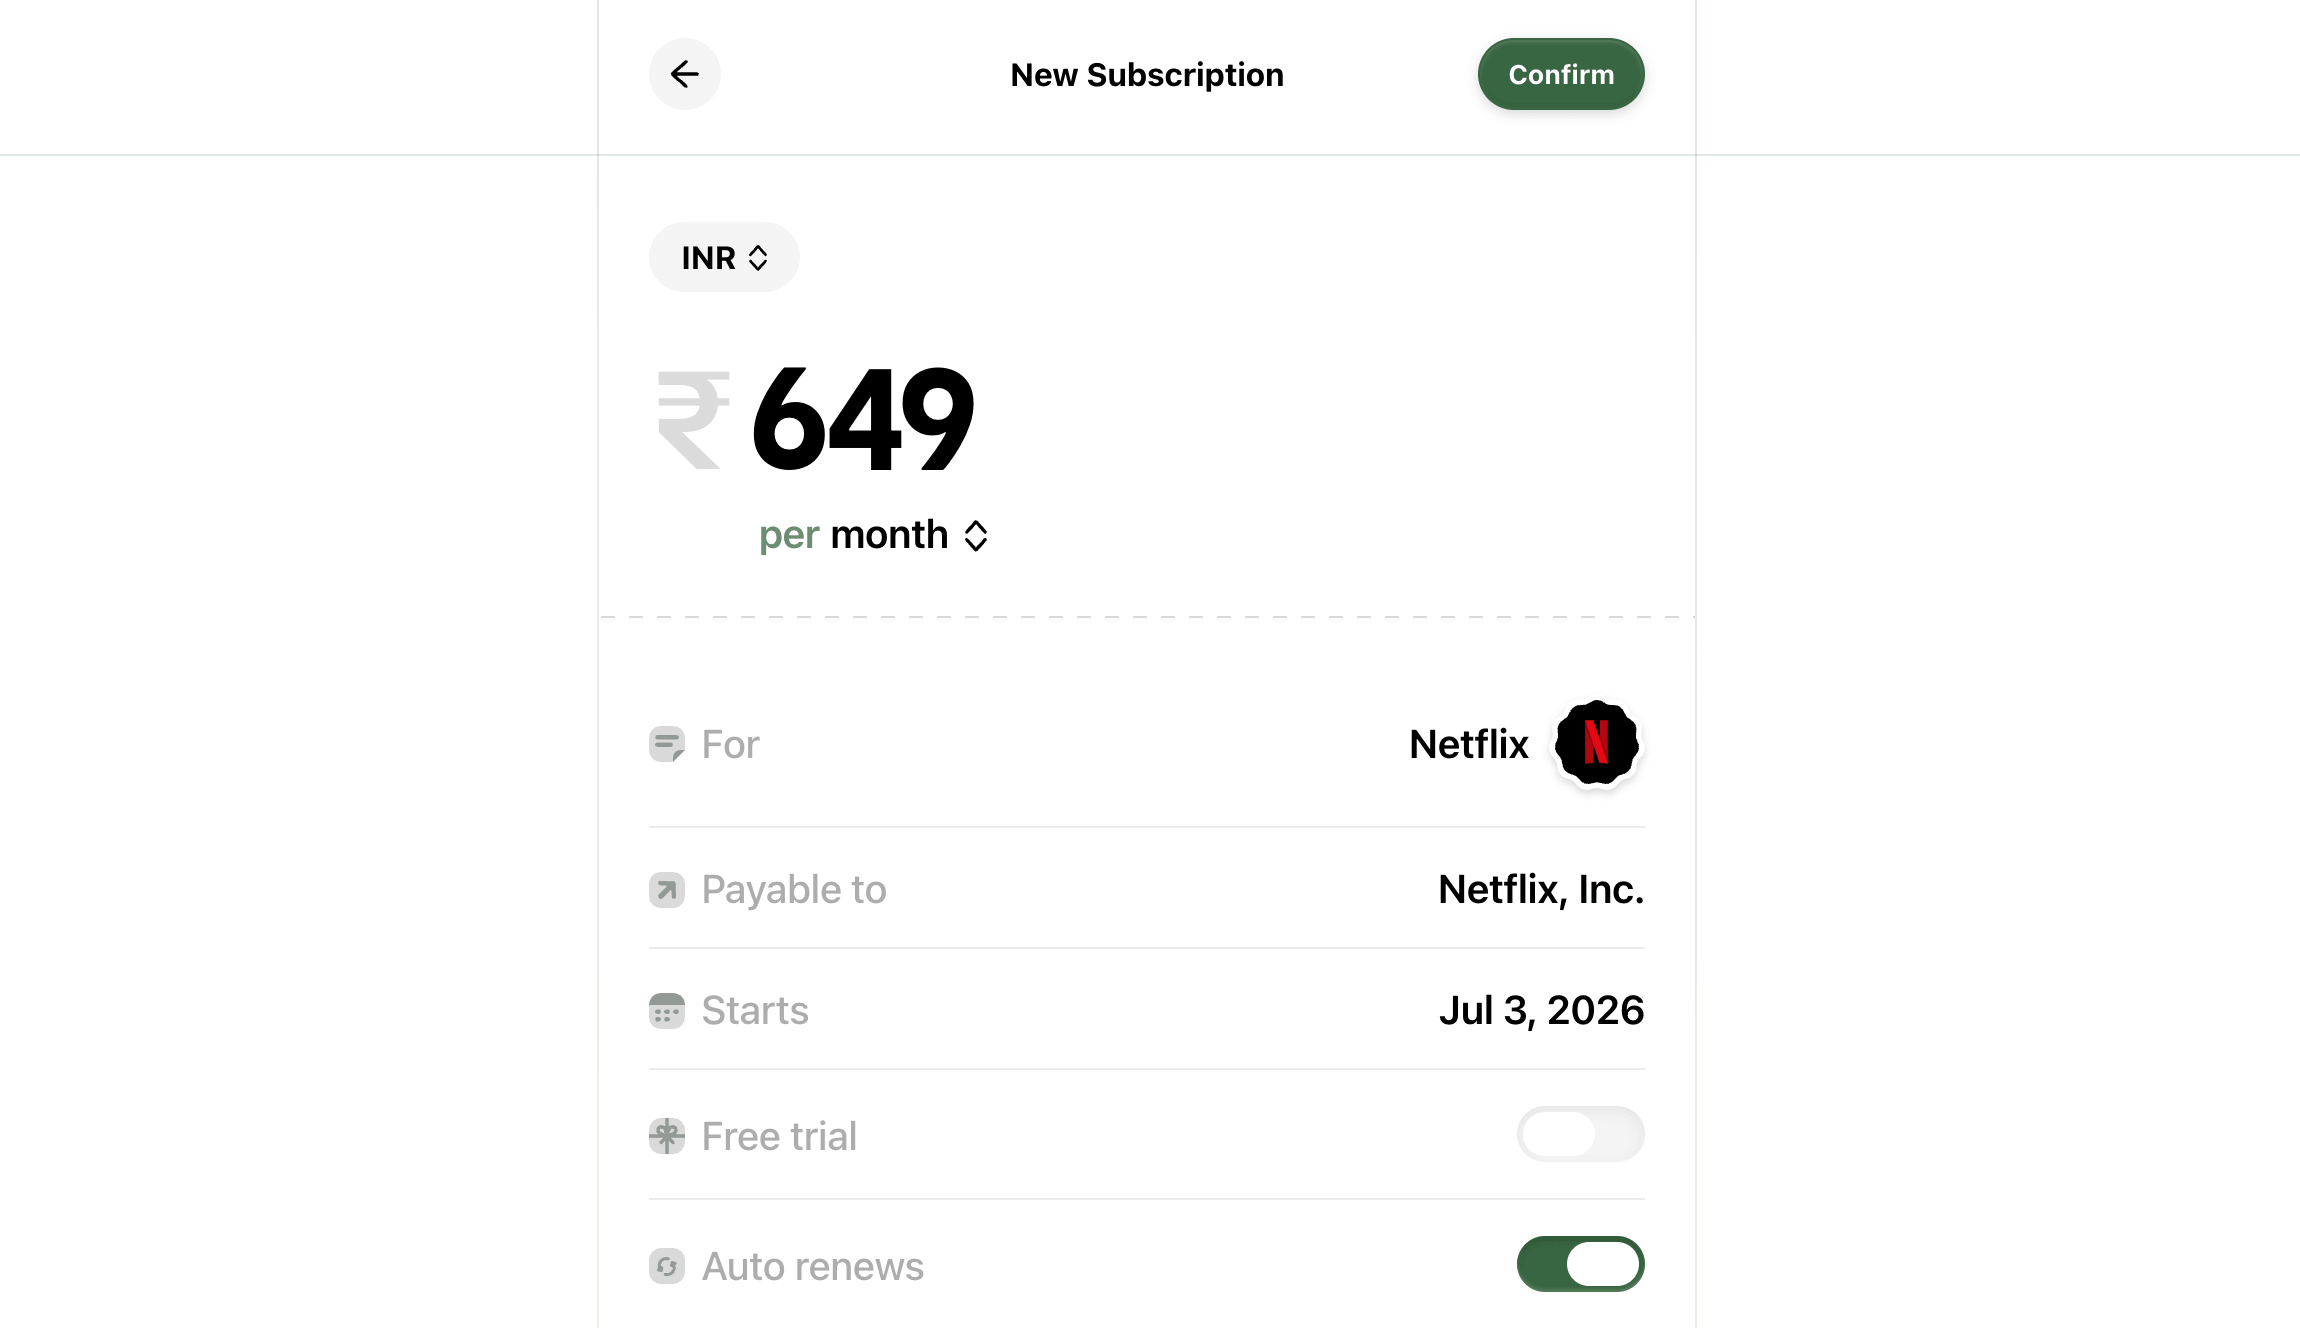
This will prefill relevant details about the subscription, such as vendor logo, payee name, etc., and we can input the amount we're charged, the billing frequency, and other missing details:
We can also choose when we want to be reminded of this subscription's renewal:
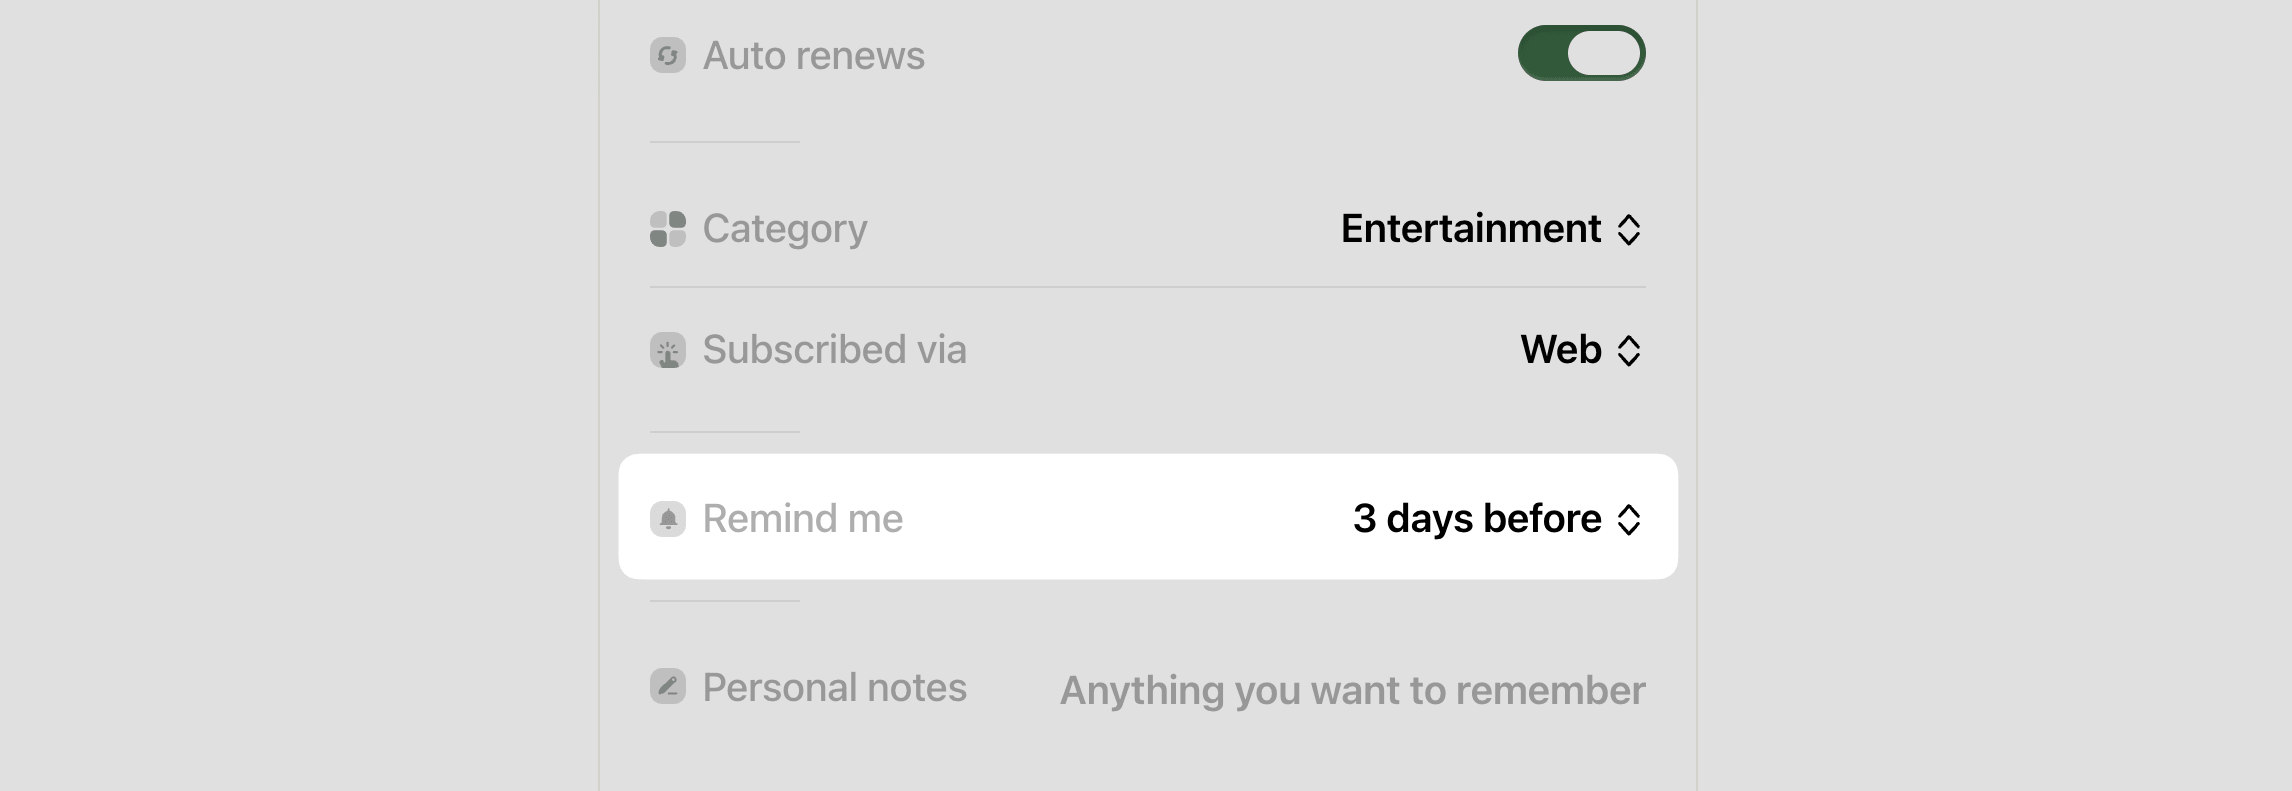
I usually choose between one and three days to receive a reminder because it's close enough to the renewal while still giving me the option to cancel a subscription if I need to.
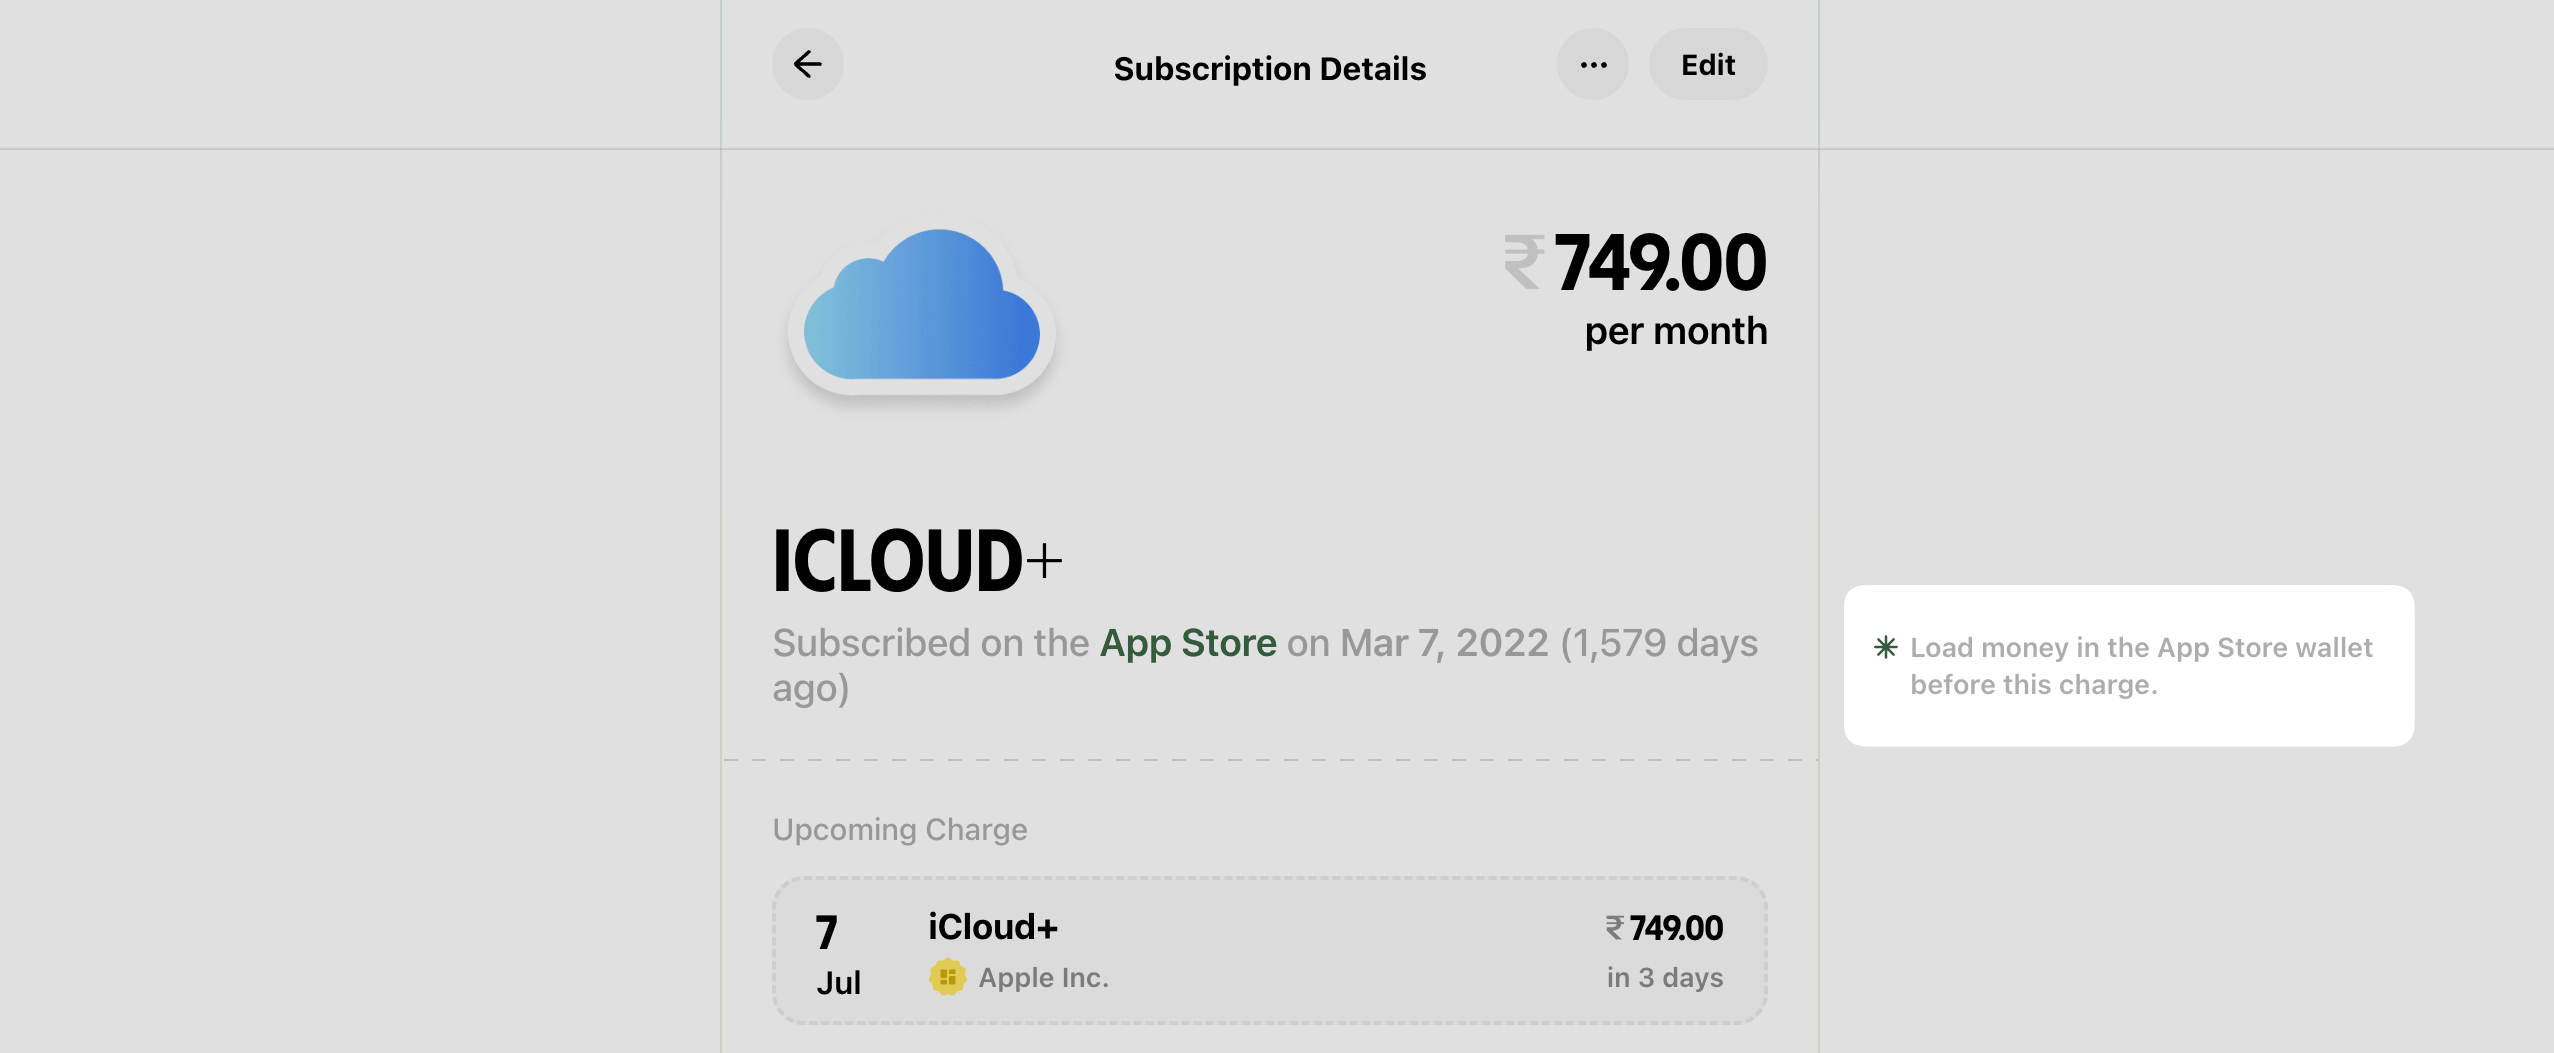
Finally, the Personal notes section can be quite handy for situations where you're on a legacy plan and cancelling and resubscribing would put you on a more expensive billing plan:

I use the notes section to include notes for myself, such as topping up my App Store wallet before my iCloud+ plan renews:
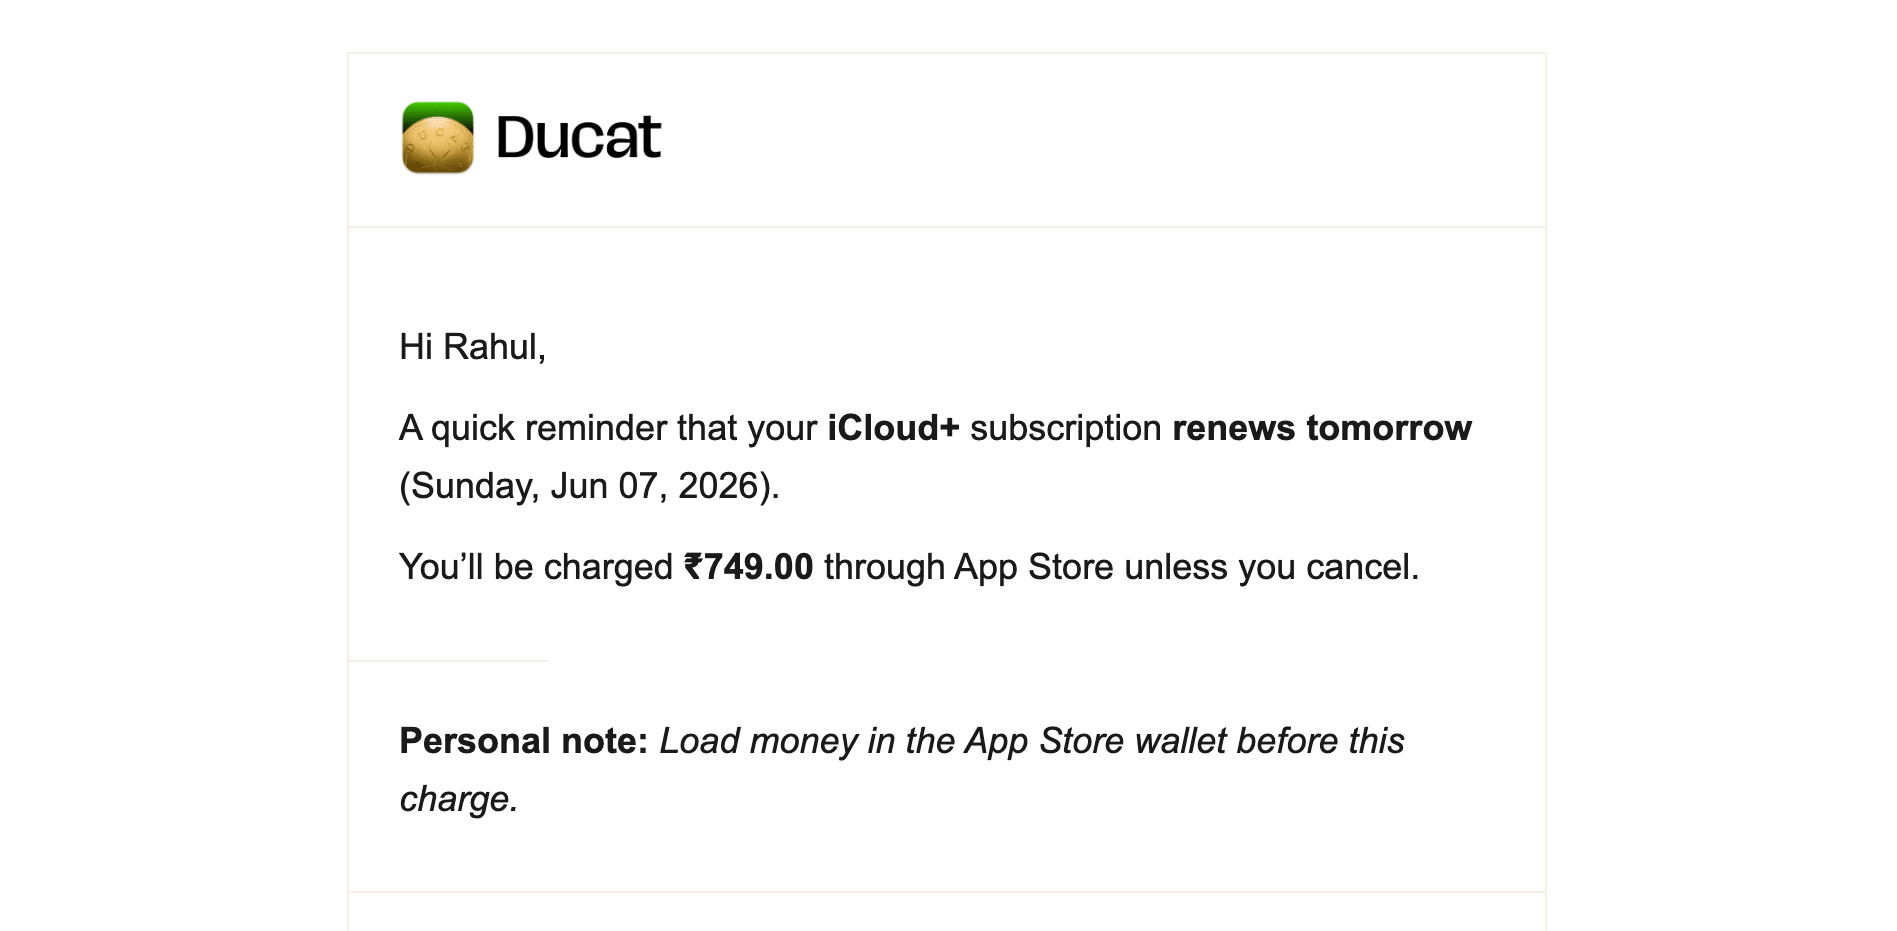
This shows up in the renewal reminder emails, too:
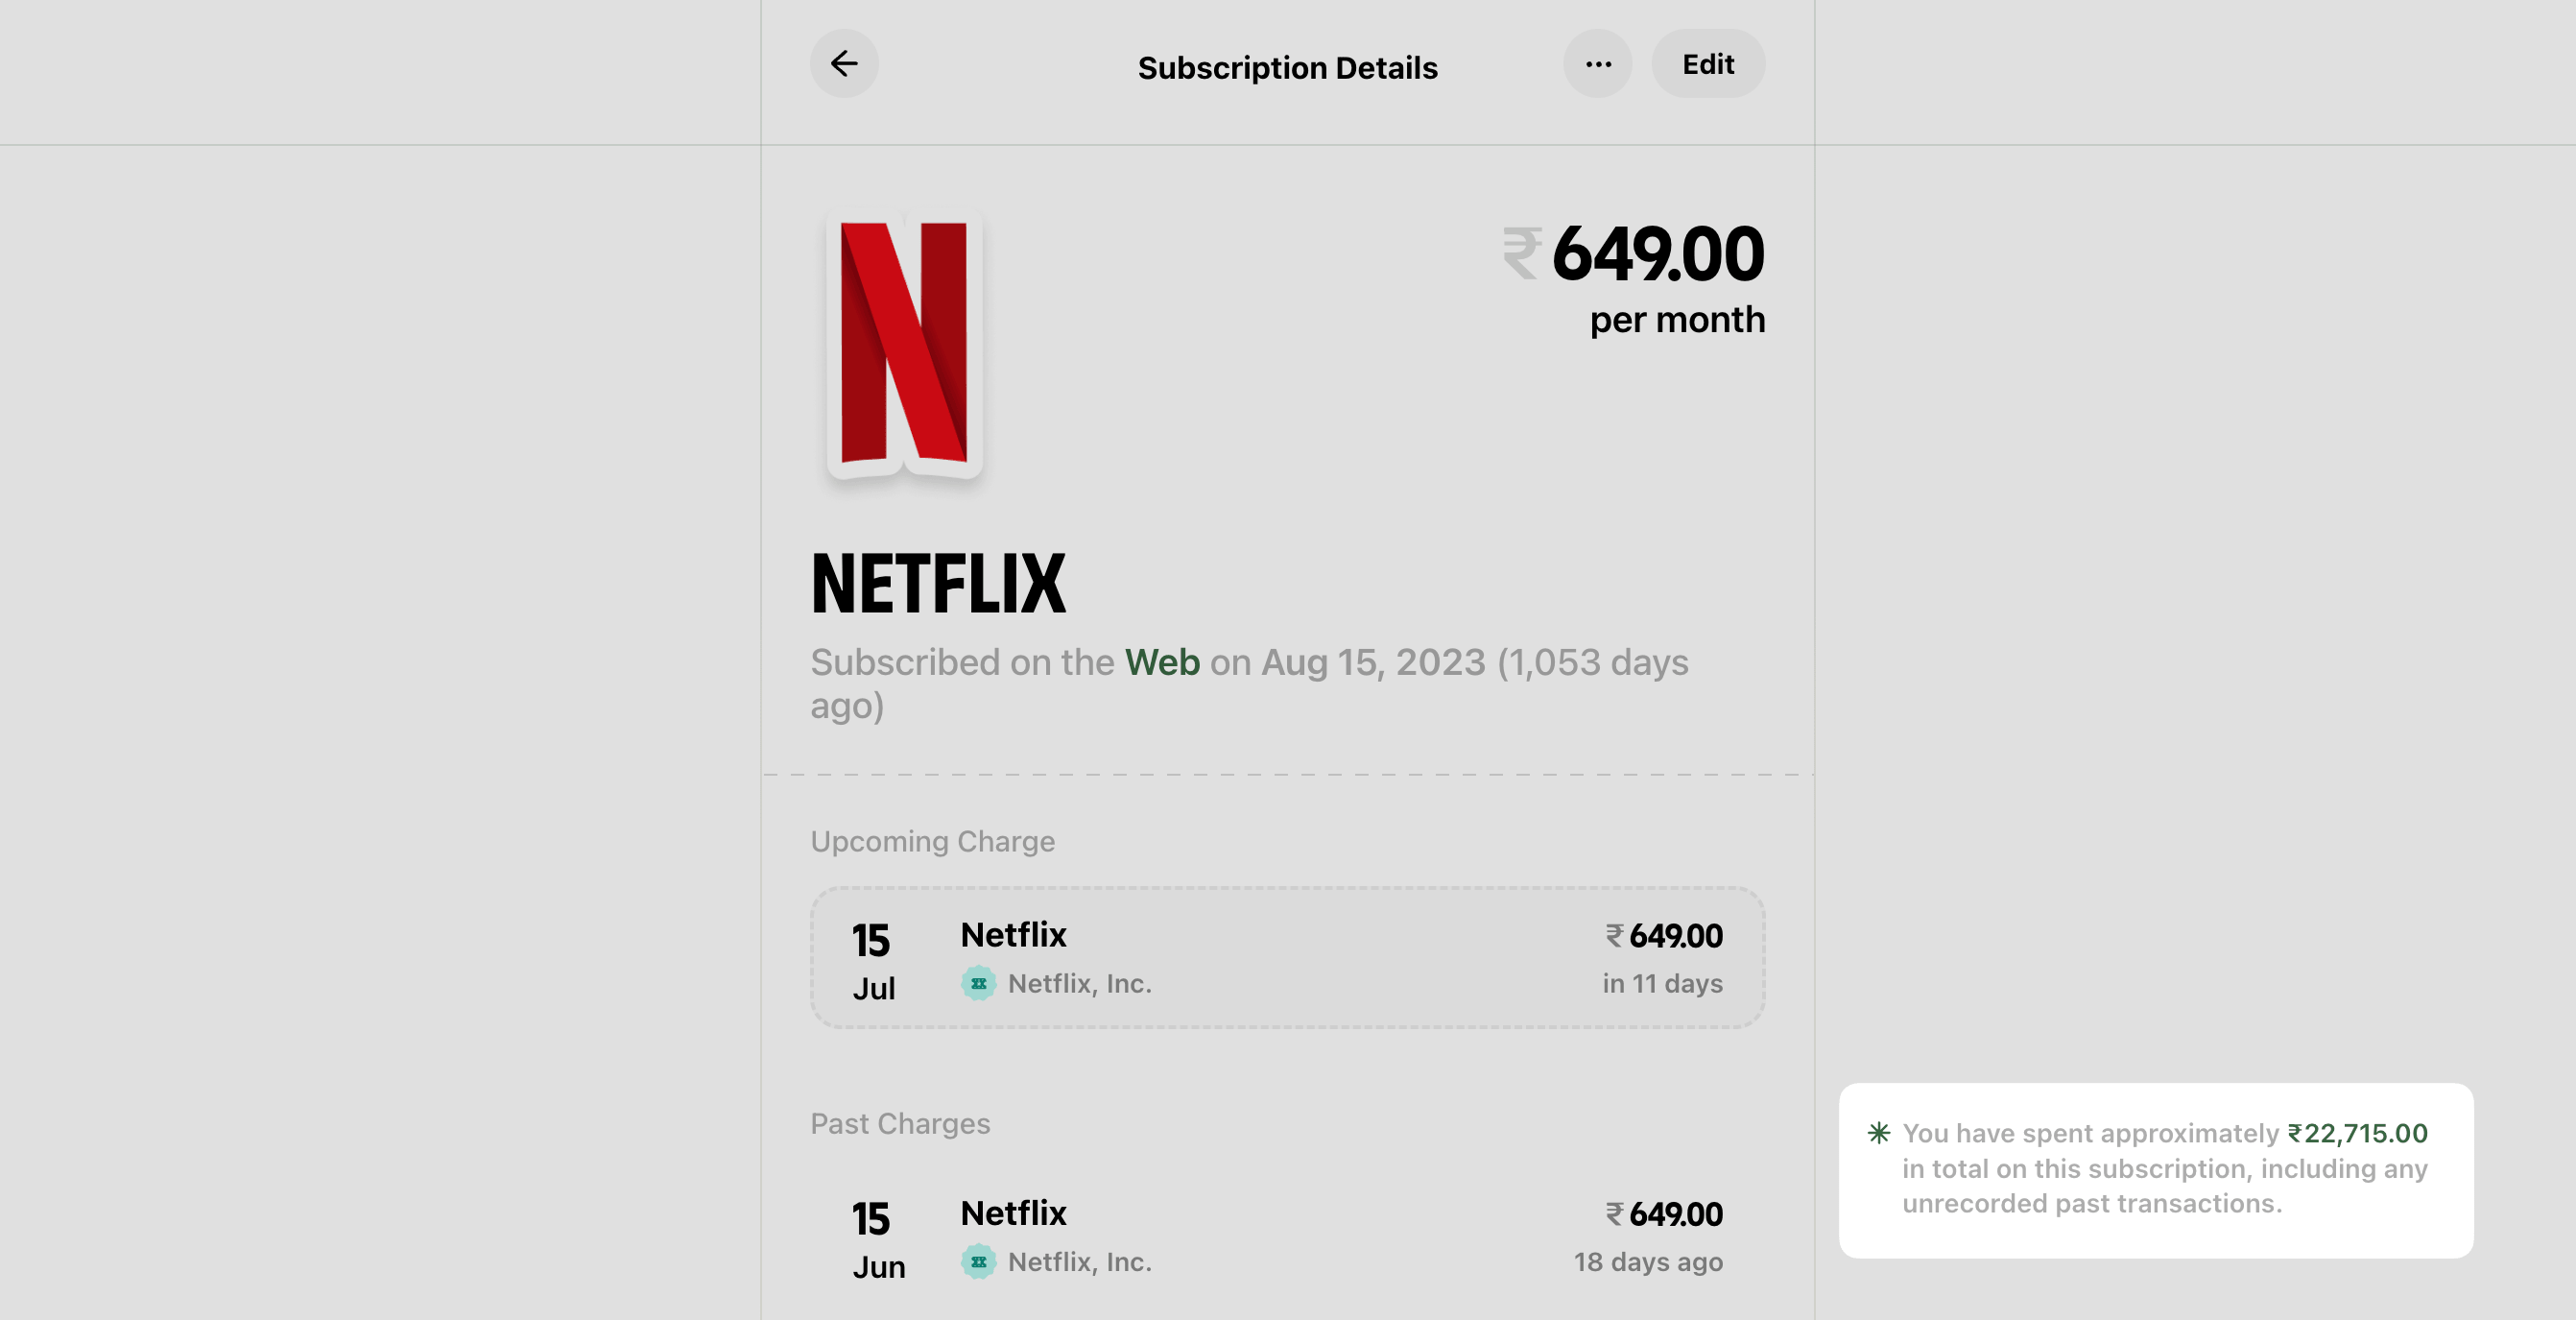
Now, while adding a subscription, we can choose the start date as the last charge date if the subscription has already started, but to get a complete picture of how much we've spent on this subscription, it's better to set this as the first charge date.
This will help the app estimate the total amount we've spent on any subscription based on its frequency, start date and amount, which can be quite revealing for long-running subscriptions.
For example, when I added my Netflix subscription with the correct start date, I realised I had already spent nearly ₹23,000 (~$241) over the years:
We don't see the long-term costs of a subscription because we only see the monthly or yearly fee and dismiss it as a nominal spend.
To find the start date for my subscriptions, I used the Gmail filter ("renews" OR "billing") to pull up subscription renewal emails and navigated to the first charge notification:
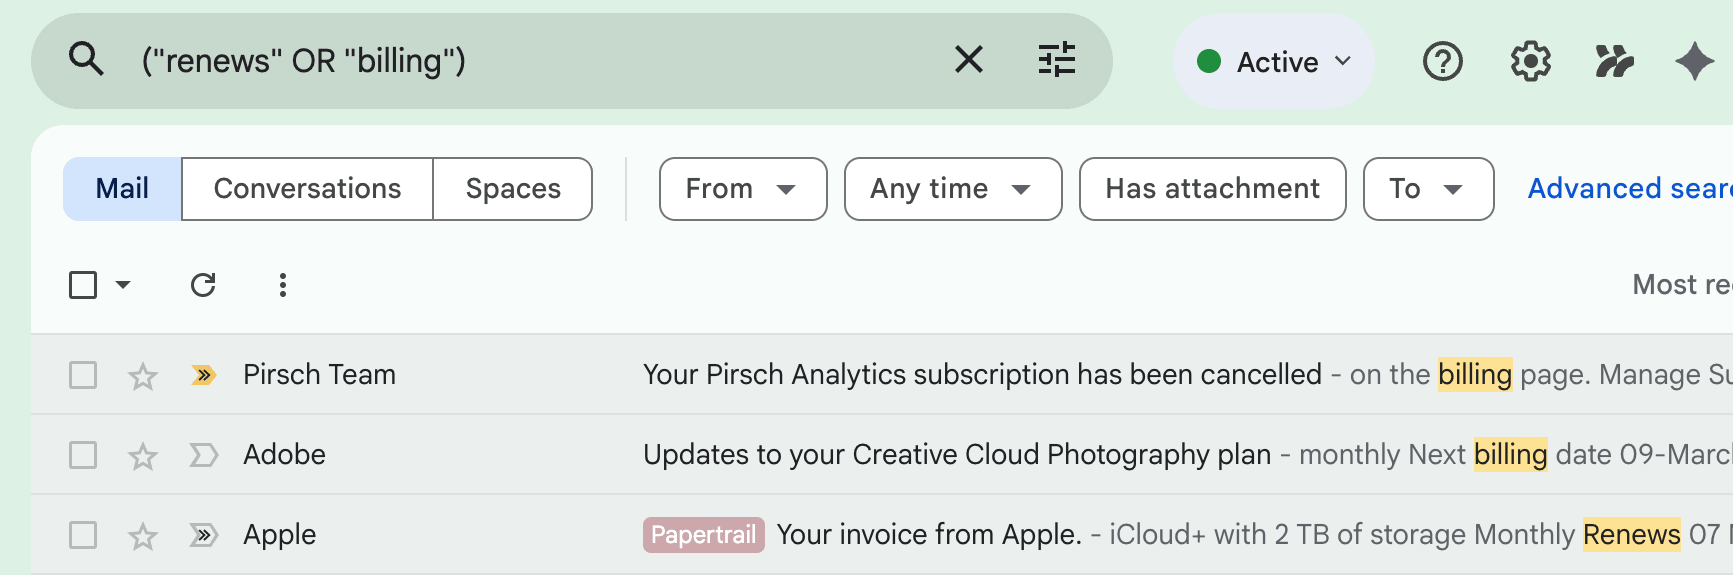
If you use a different email app, you can search for phrases like “renews”, “subscription”, “billing”, etc. to find renewal emails.
With each subscription added in the app, Ducat automatically logs future charges on the subscription renewal date.
If you have a subscription charged in a foreign currency, you can select the currency while tracking the subscription, and Ducat automatically converts the amount to your local account currency while logging its expense.
For example, I have an Ahrefs subscription charged in USD while my account currency is INR. While logging the expense, Ducat converted this charge to an equivalent INR amount:

Also, reminder emails show an approximate currency-converted charge amount using the latest exchange rates, and I don't have to do the mental math of converting the amount to my home currency:

The best thing about tracking subscriptions like this is that they show up separately in reports.
For example, say I'm looking at the breakdown of my spending from last month; I can see a dedicated section showing me the subscriptions I spent money on and how much of my total spending was due to subscriptions:
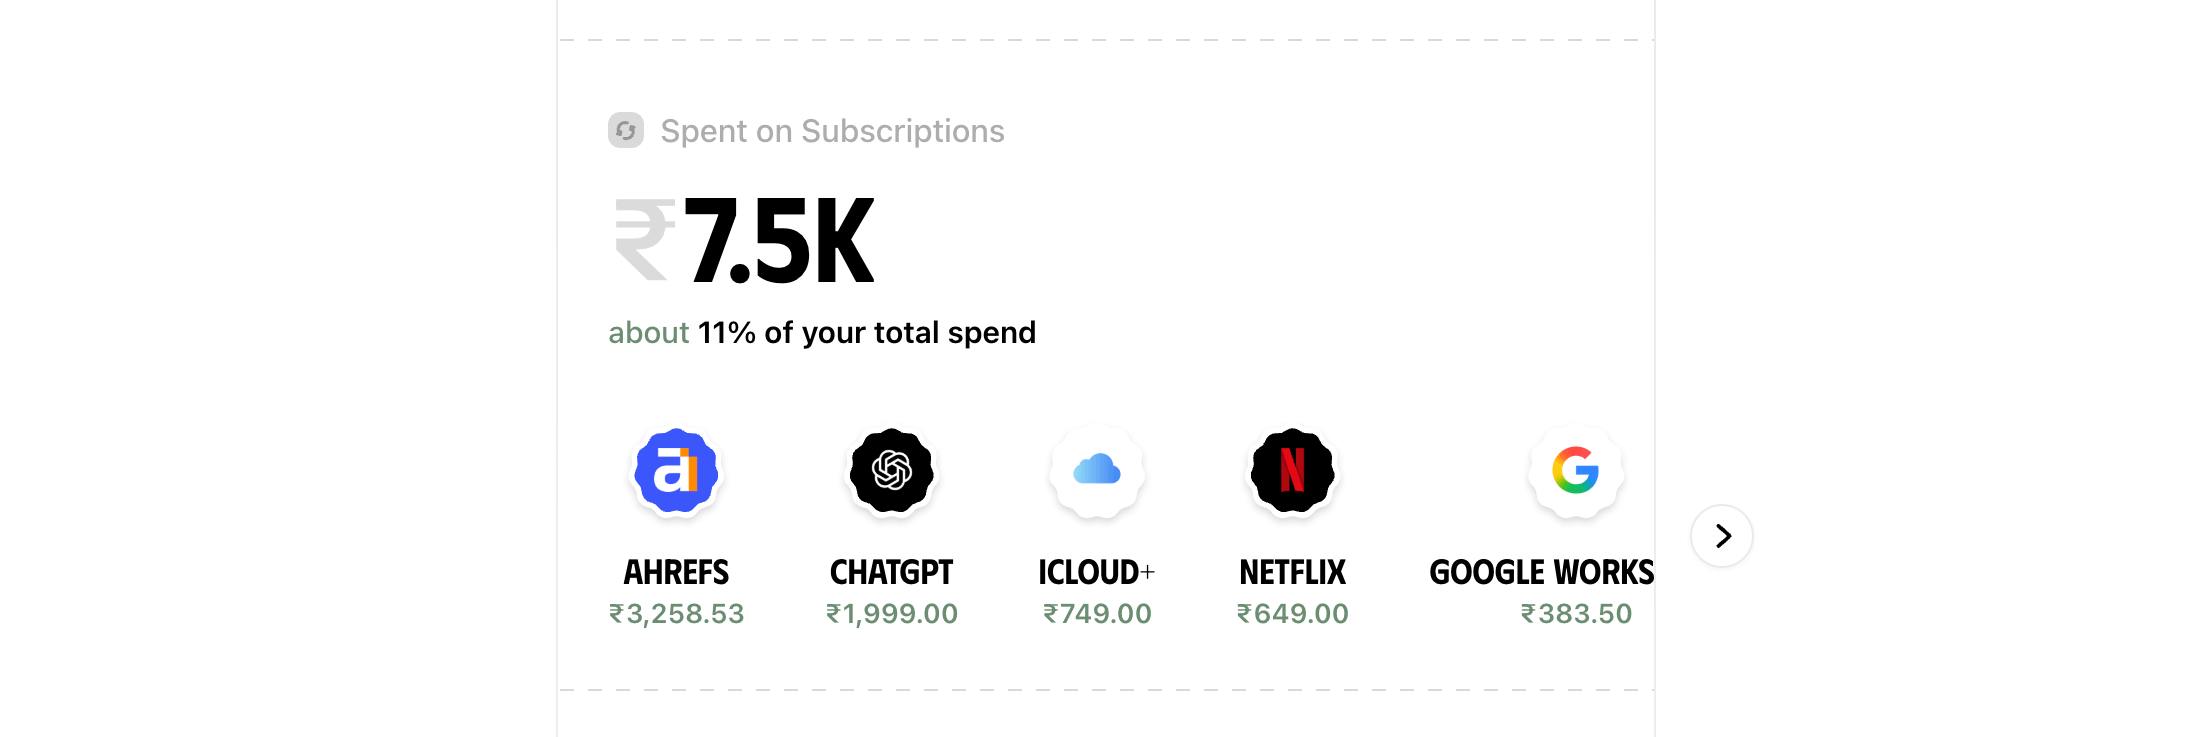
This helps me understand whether I'm bleeding too much money on autopilot, and I can therefore cut my spending wherever needed.
Now, tracking one-off and recurring spends is only half the story. The other half is:
Regularly reviewing tracked expenses
We can only change what we notice.
While consciously tracking expenses keeps us in the loop daily, reviewing what we've spent in a month, or more, helps us identify broader spending patterns.
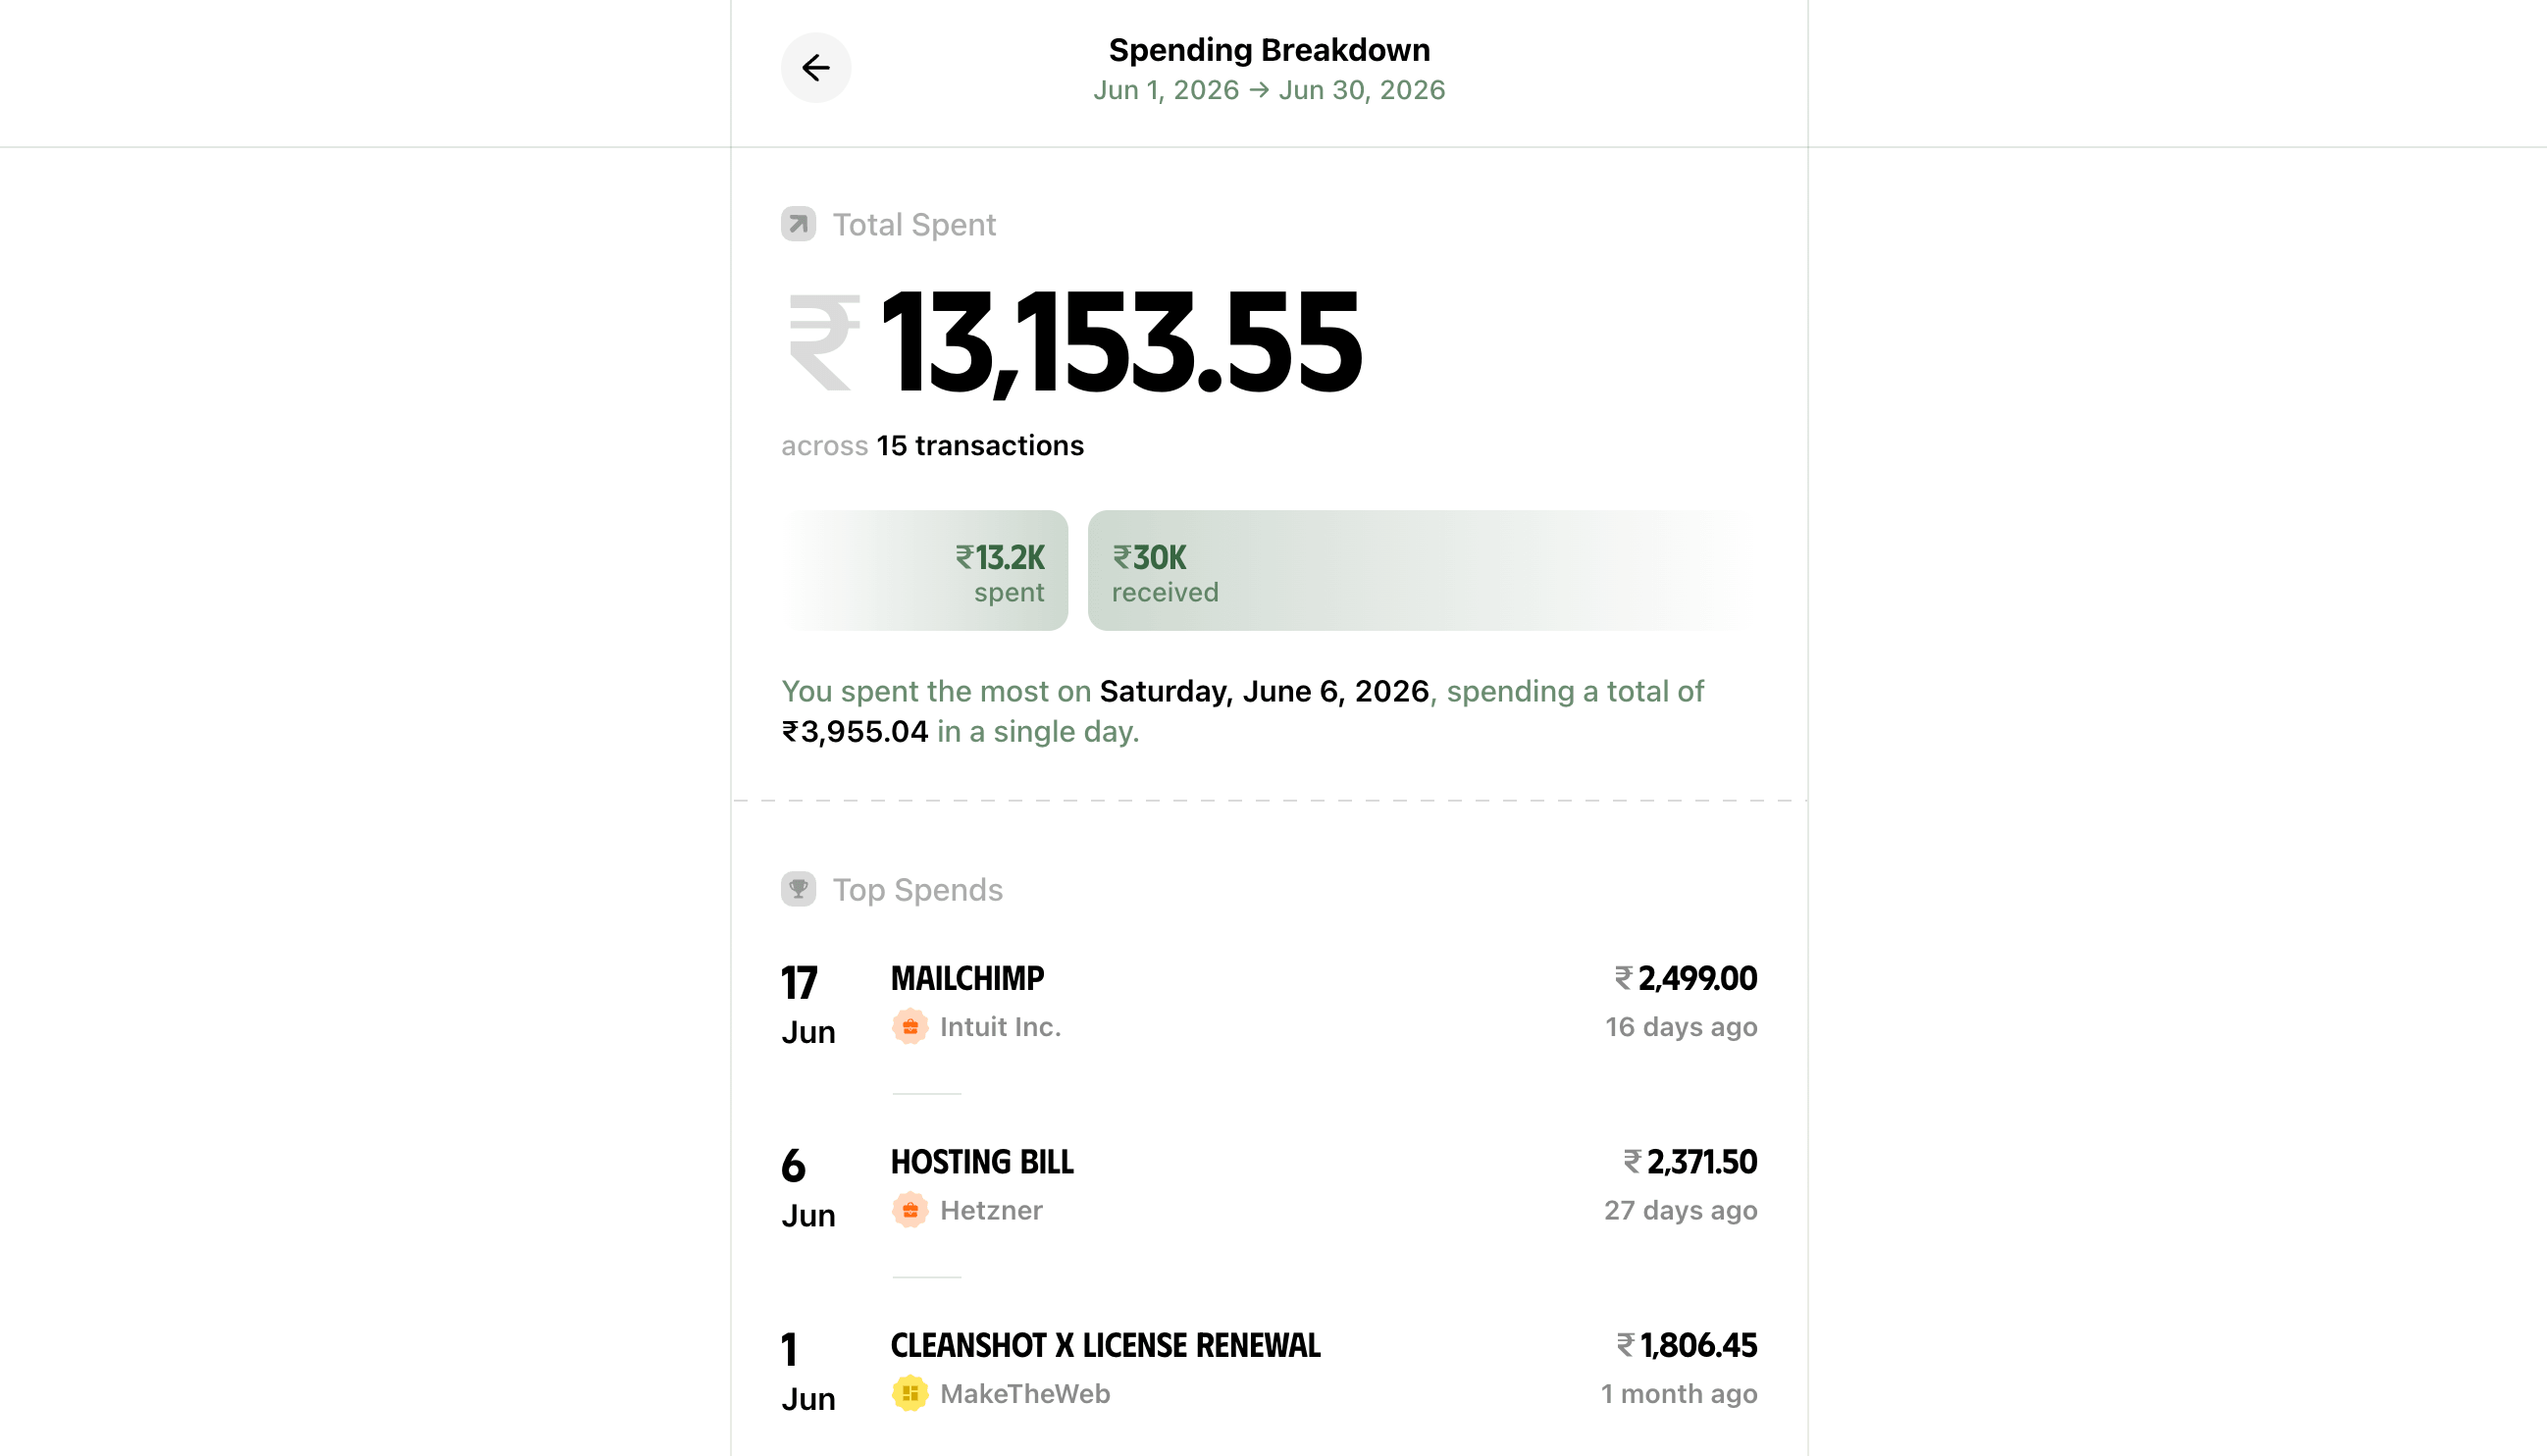
I usually review my spending weekly using the Last Week time range in the Reports every weekend:
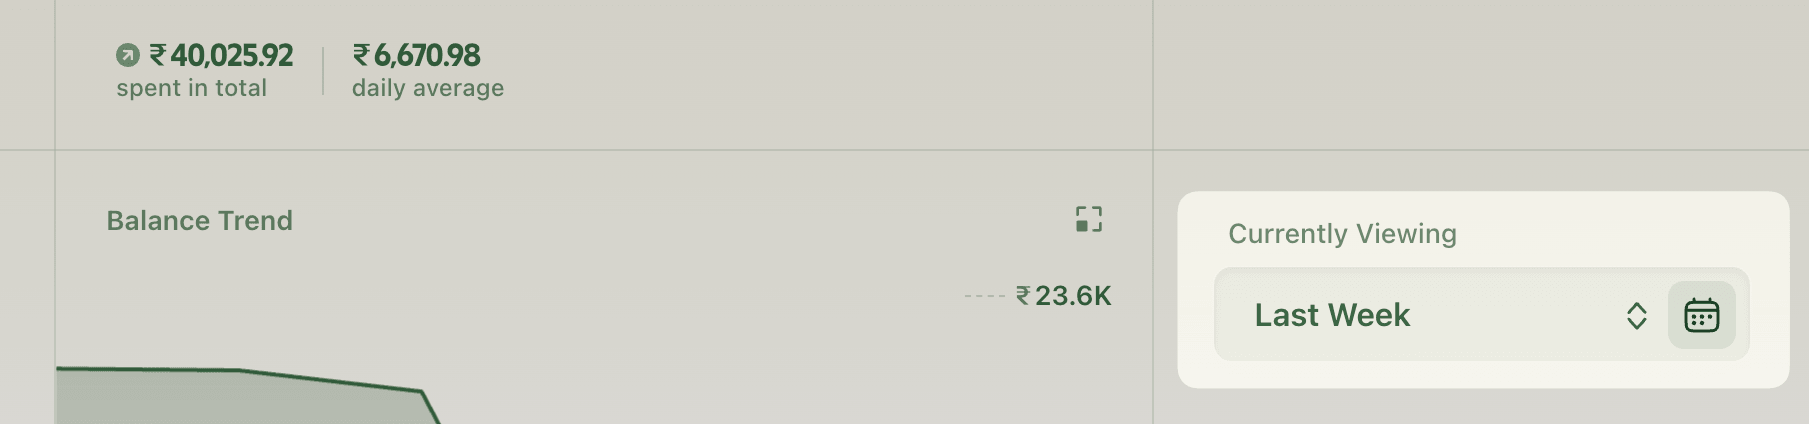
Here, I usually open the breakdown of the week by clicking the expand button on top of the graph after choosing the time range:
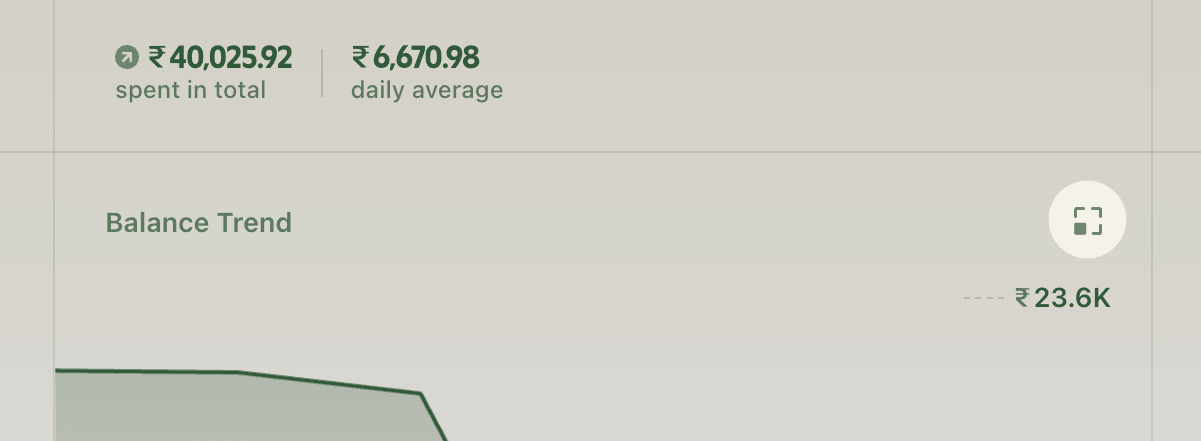
This opens a neat, summarised breakdown of my spending over the week, and I can spot any irregularities or abnormally large spends:
I also do a monthly review where my wife and I go through the breakdowns, especially the category-wise spending breakdown:
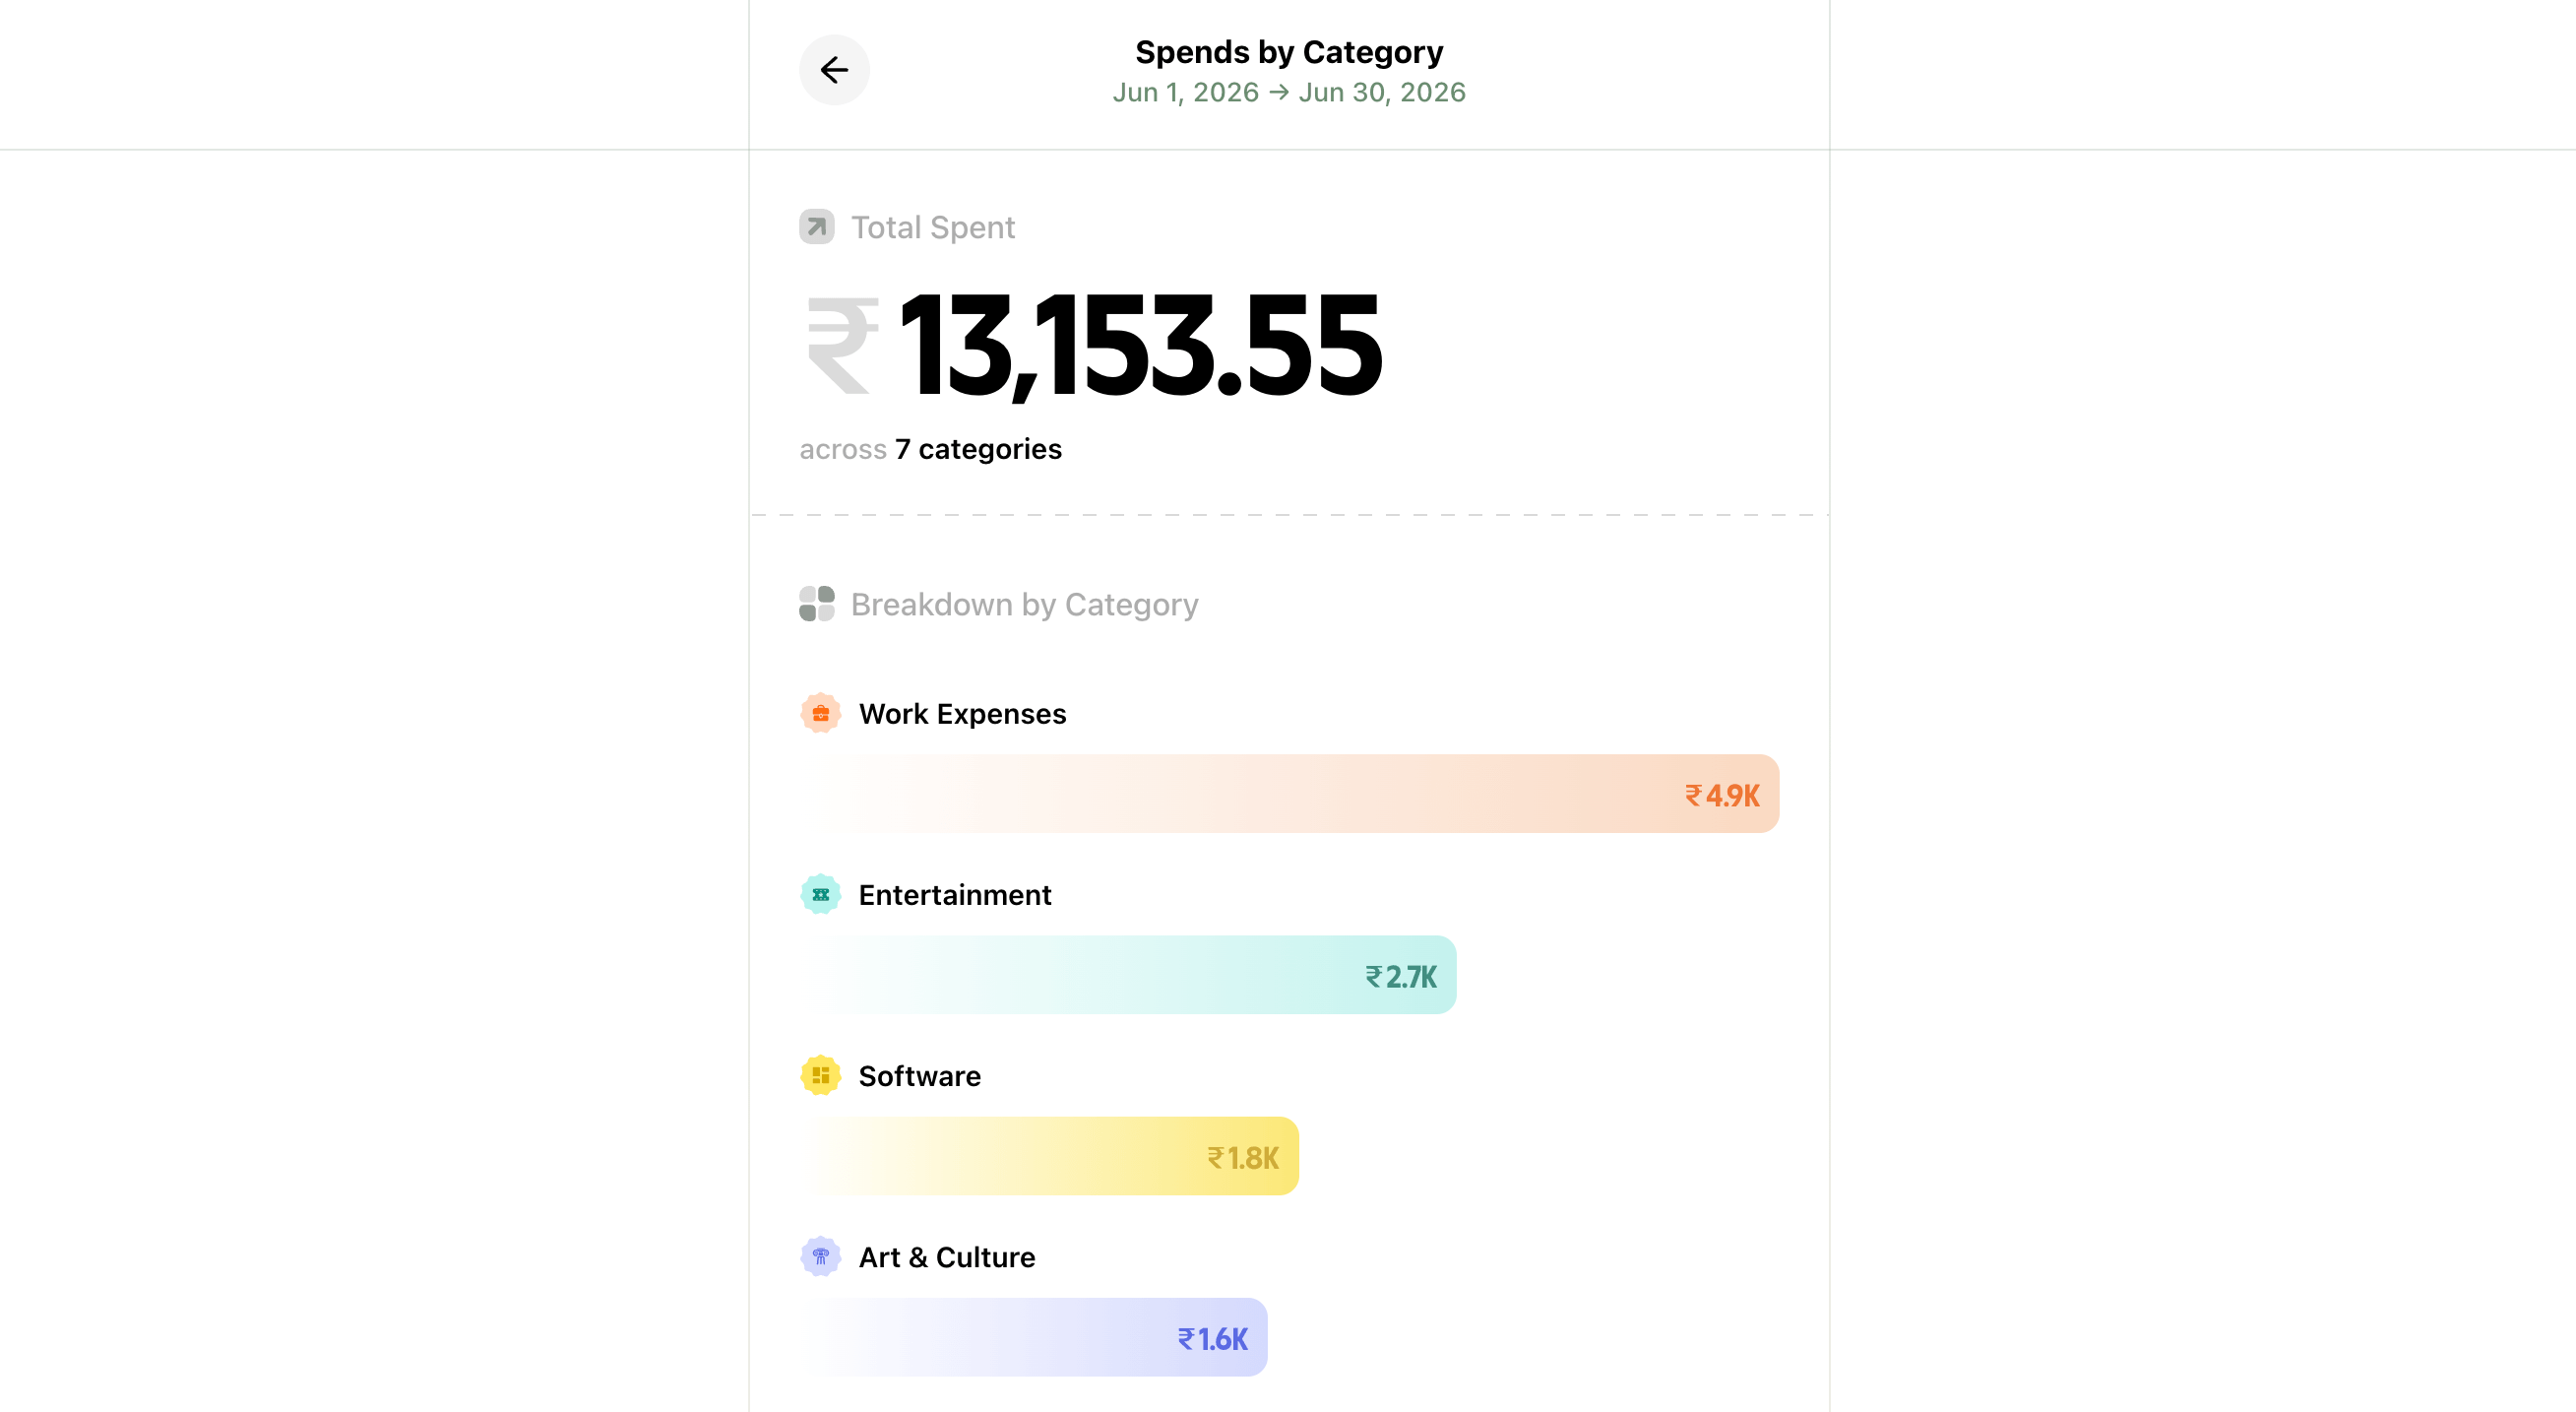
This shows us our last month's spending totalled and grouped by categories, which we then copy and port over to a Notion database to see a yearly spending breakdown:
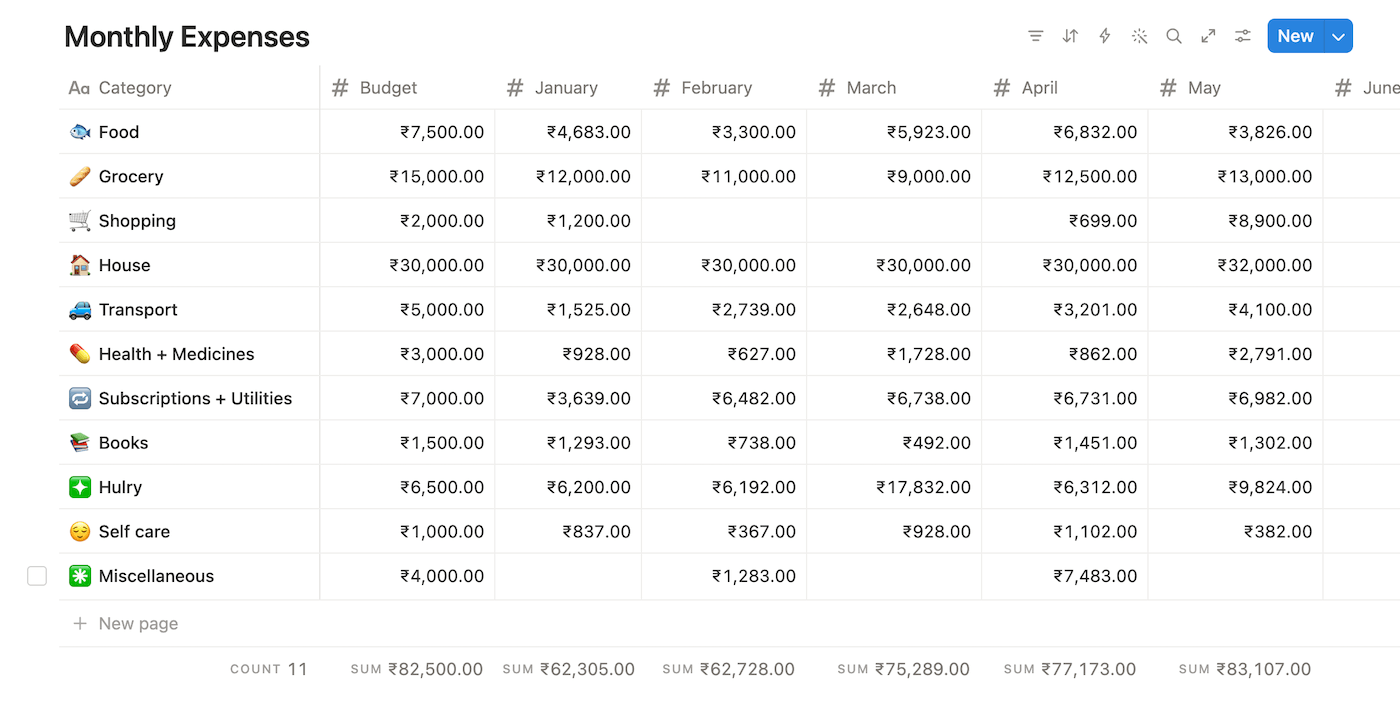
Having monthly breakdowns side-by-side across the current year helps us compare spending across months, and adjust if we notice we've been overspending recently.
Now, we've discussed a few new processes in this blog post that you can leverage to spend money more intentionally and be aware of your financial ground reality.
So:
Where do you start?
Start with the core habit:
The next time you make a purchase, note it down.
You can use your notes app or a spreadsheet to do this, but I'd recommend using an app like Ducat to keep things simple and organised without having to retrofit general-purpose tools to work for your use case.
Gradually build a habit of tracking every expense at the time of the transaction or reconciling everything later in the day.
Then, over the weekend, take an hour to comb through your active subscriptions and track them with appropriate reminders.
Now, here's the thing:
We're not machines, and life's random.
You might not always be in a situation where you can quickly jot down each payment as soon as you make one.
For example:
You're rushing to catch the morning train to work; at that moment, your priority is buying the ticket and going to the assigned platform, not standing near the ticket counter and noting your expense.
In such cases, you can either rely on your memory to note down all unrecorded expenses at the end of each day.
Or, if you're doing digital transactions, you can keep your transaction text from the bank unread so that you can remember to jot any pending transactions in the app.
With that said, it's natural to miss adding a transaction or two from time to time.
Don't beat yourself up for missing a transaction and then give up on the process altogether.
Do your best to follow the system as diligently as possible, and you'll be better off than most who don't have a clear view of their finances.
Finally, tracking is only half useful if you're not reviewing your spending periodically.
You don't have to follow my weekly and monthly cadence. Pick a routine that works well for you, but if you've been overspending recently, start with a frequent evaluation and then taper it to a monthly or quarterly review.
Start with the first simple step:
Record transactions for one day.
Once you get into the swing of things, you'll find it much easier to stick to.
Try it, and good luck.


