


 In-depth articles, series and guides

When I bought my iPhone in 2019, I had two choices — get the 64GB version or pay about $100 more for the 128GB one.
I chose the 64GB version.
After about one and a half years of usage, I still have over 24GB of free space left on my phone.
Buying the 64GB version was the right move.
In this post, I’ll talk about why I didn’t opt for higher storage in the first place and how I keep my local storage footprint low.
Let’s start with:
Why I bought a 64GB iPhone instead of the 128GB version
When buying any device with a storage unit, the usual temptation is to buy the one with the maximum storage.
We don’t want to run out of storage space, do we?
And when it’s a personal and frequently used device like a smartphone, picking one with lots of storage usually makes sense.
Because:
Over time, we take many photos with our smartphone, download songs and videos for the go, and install many apps.
All these need hefty storage space.
But:
From what I’ve noticed with my 128GB OnePlus 5, the phone I was using before an iPhone, is this:
You don’t need that much local storage.
In the two and a half years of using my OnePlus 5, I only filled up about 45GB of storage space.
And to give you an estimate on the number of photos on the device, I took this phone with me on a 3-week long Europe trip.
So, there were a shit ton of photos on the device.
Now, here’s a question:
With ever-increasing file sizes, how is having a low storage phone feasible?
Here’s how:
Cloud storage
It’s almost always a good idea to have all your important files, be it photos or documents, stored in the cloud.
A couple of reasons for this:
- You might lose your phone. If you lose your phone or if it gets stolen, you’ll end up losing your important documents and precious memories with it too.
- Your phone might stop working. Electronic devices, although quite reliable, can malfunction. And if the local storage unit of your phone is damaged, you lose your files.
So:
To make sure your files stay safe and accessible whenever and wherever you need them, you must use cloud storage.
Now, most cloud storage services have functionality for:
Offloading files from your local storage
I use both iCloud and Dropbox as my everything cloud storage services — iCloud for photos and Dropbox for everything else.
And both of these services support offloading files from my local storage to the cloud.
This is how offloading works:
Once a file is offloaded from the device, iCloud or Dropbox shows up the file only as a reference.
This means that although I can view the offloaded file normally on my local storage, it’s not taking up any space.
It’s kind of like a shortcut to the file present in the cloud.
Once I open the file using any app, iCloud or Dropbox downloads the file and makes it available on the device for use.
Here’s an example of offloading in practice using iCloud:
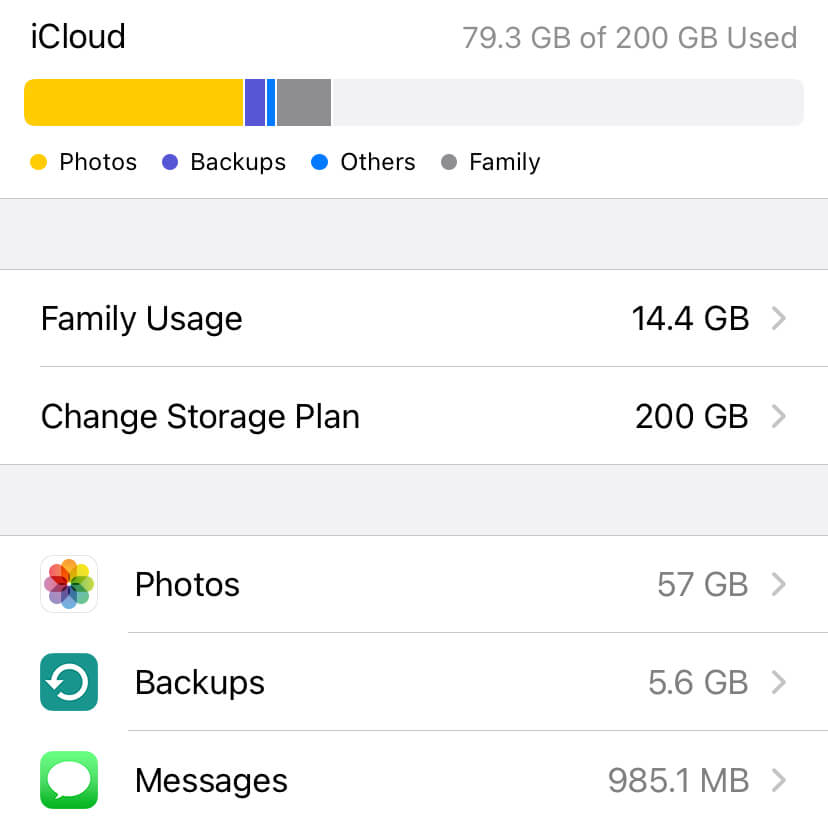
In this screenshot, you can see that photos take up well over 50GB of my iCloud storage space.
However, on my local iPhone storage, photos take up less than a GB:
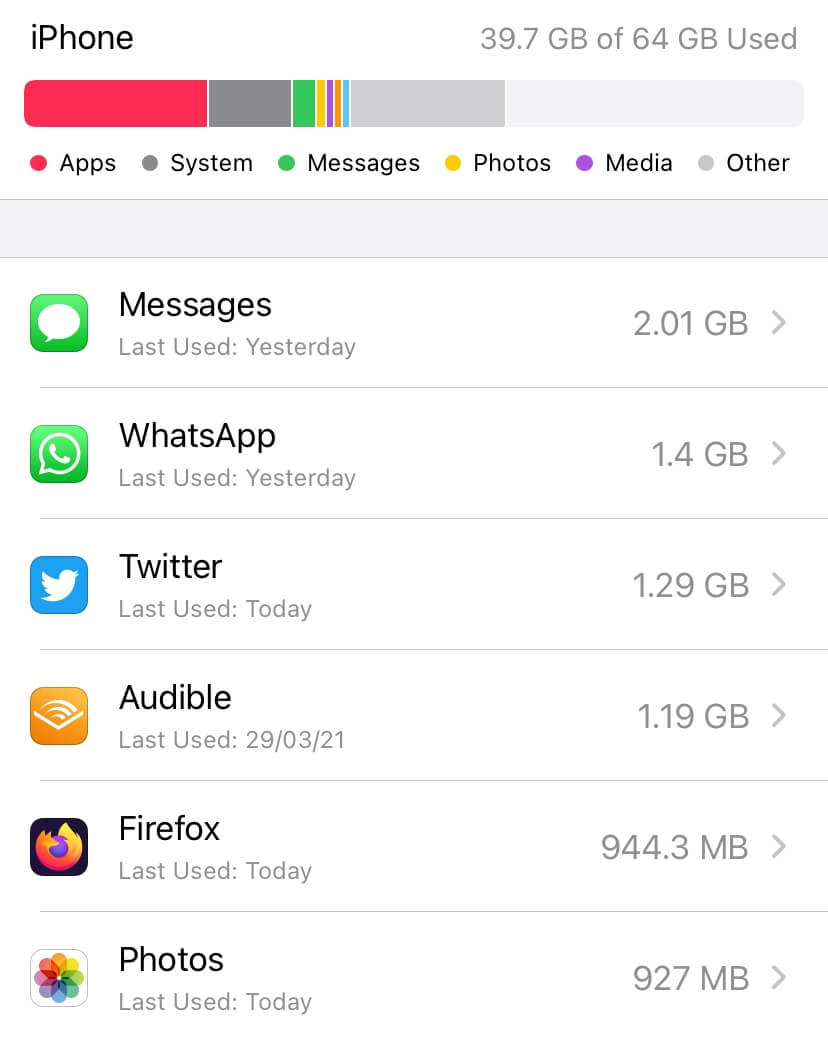
What the Photos app does is that it offloads all older photos from my device to iCloud, freeing up my iPhone’s local storage.
Whenever I view any photo, the Photos app seamlessly downloads the photo and opens it up for me.
It’s a classic example of having your cake and eating it too.
Now:
There’s a minor caveat to all this magic.
Offloaded files need internet to be available for use
Since the files are no longer on the device and present only on the cloud, they need to be downloaded when you access them.
This requires an active, strong and preferably cheap internet connection. If your data plan is expensive, offloading will end up costing you a significant amount of money.
Why?
Because offloading works two ways:
When you offload, you’re using data by uploading your files to the cloud. And when you access, you’re using data by downloading the offloaded files from the cloud.
Also:
If you’re on a slow network, the wait time for accessing your offloaded files can be a frustrating experience.
For me, though:
Using offloaded files for months, I’ve never had a bad experience.
With a fast and cheap internet connection, my files download in a flash whenever I need them without breaking my bank.
Also, here’s the thing:
I don’t need my old offloaded files very often.
There are rarely any situations when I open an offloaded file that needs to be downloaded for access.
Now:
Since we’ve seen the benefits of offloading, here’s:
How to offload files from an iPhone
For offloading files from your iPhone, you’ll need an active iCloud storage plan.
Although every iCloud account comes with a 5GB free storage plan, it’ll not be sufficient in the long run.
So:
If you don’t have an active iCloud subscription, the first step would be to get one.
I’m subscribed to the Apple One Family Plan, so I get 200GB of cloud storage shared with my family.
It’s a cost-effective plan that I enjoy.
To start with, if you don’t need that much storage right off the bat, you can get a 50GB plan which is usually dirt cheap.
Now:
With an active subscription, go to the settings page of the Photos app, turn on iCloud if you haven’t already, and choose “Optimise iPhone Storage” like this:
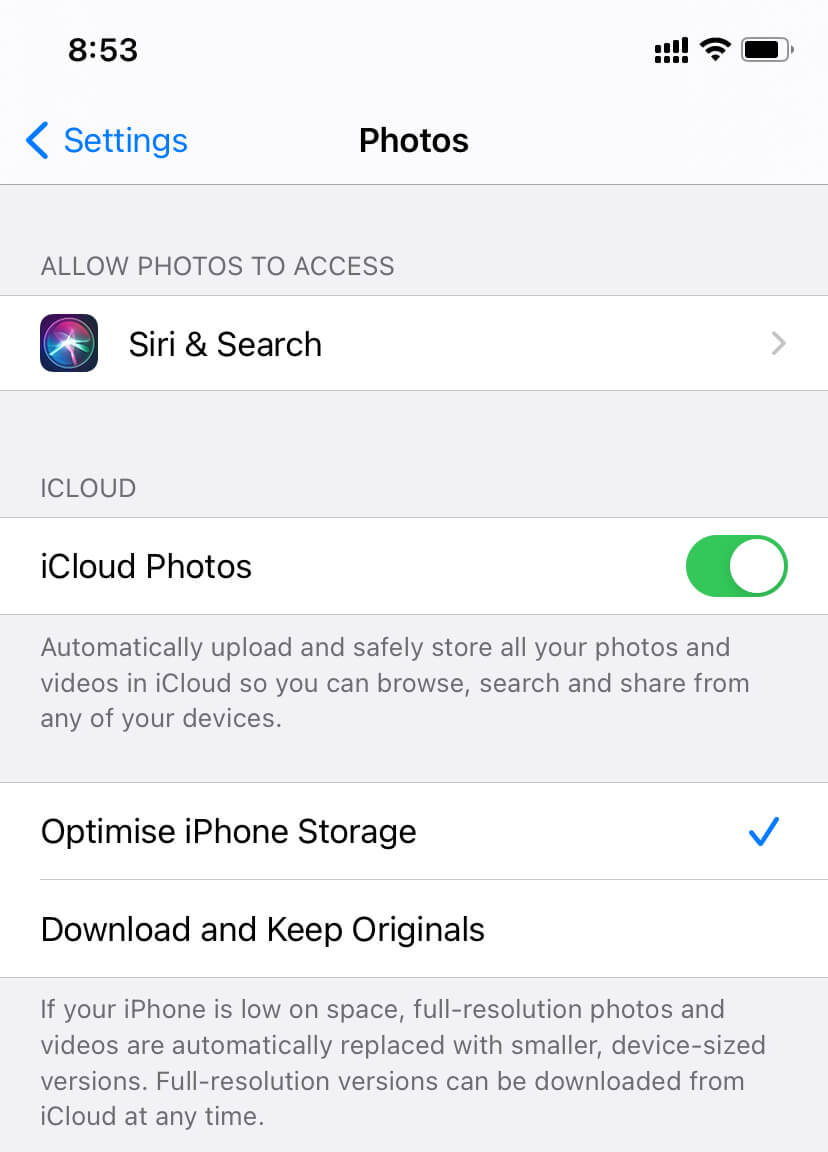
From now on, the Photos app will transfer the original quality photos from your phone to iCloud and keep a low-resolution copy on your phone.
When you try to access any offloaded photo, the Photos app will seamlessly download your photo’s original version and make it available for you.
Neat, right?
Now:
Photos take up a portion of space on our iPhones. Apps usually occupy the other significant part.
So, here’s:
How to offload unused apps from your iPhone
Similar to photos, we have an offloading mechanism for apps and games well.
And this is helpful because apps and games take up a significant portion of storage on our iPhones.
Offloading unused apps means we can make space to download new apps or have some storage space to house our photos and videos until they get offloaded.
Here’s how app offloading works:
After turning on offloading for apps, iOS will observe app usages on your iPhone over time.
For the apps and games which you downloaded sometime back and seldom use, iOS will offload them and show up a cloud icon beside the app name, like this:
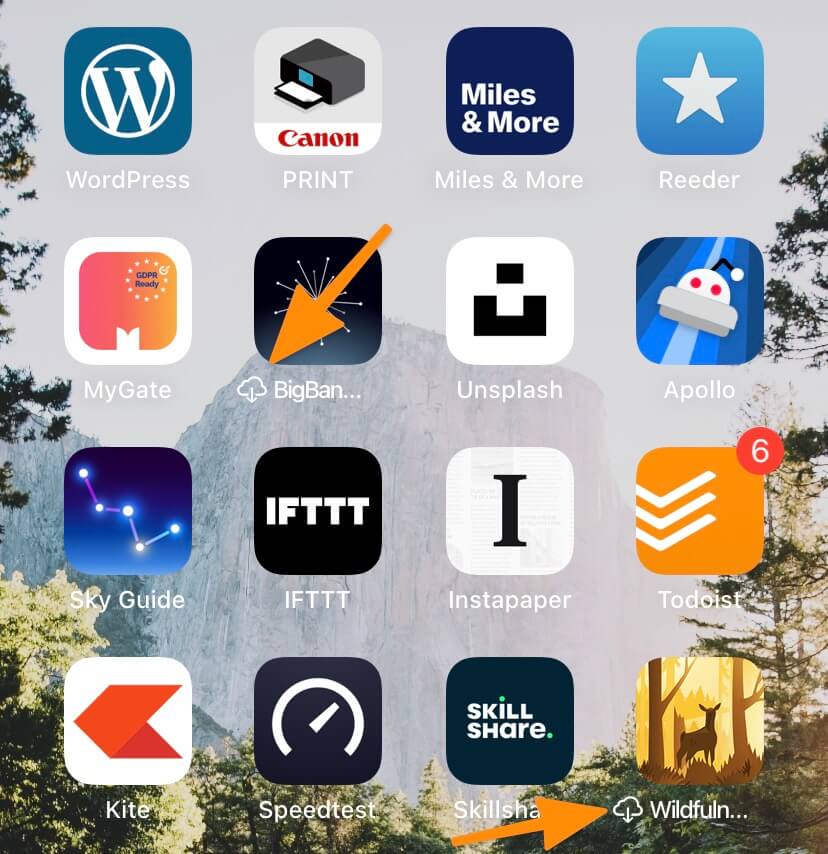
This means that although the app is present at the convenience of a click, it occupies a reduced amount of space.
If you want to use the app again, clicking on the app icon will download the app data from iCloud and make it ready for use.
One thing to note here:
With offloading, the app data remains intact.
This means that once you re-download the apps by clicking on the app icon, the app will open with data restored to the point where you last used the app.
I love this feature because there’s no data loss, and there’s no initial app set up to do, which I would have to do if I had uninstalled and reinstalled the app from the App Store.
So, now that the benefit of app offloading is evident, here’s how you can turn on app offloading:
Navigate to the settings screen of the App Store, scroll to the end of the page and turn on “Offload Unused Apps”, like this:
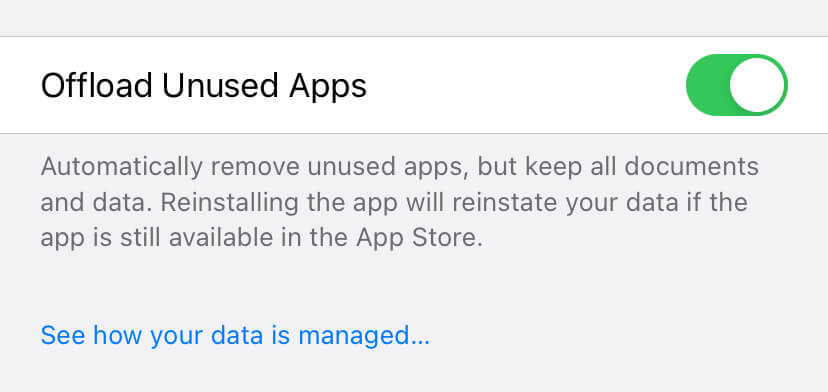
One quick setting and iOS will do all the heavy lifting for you.
Now:
Apart from photos and apps, another thing that blows up local storage is music.
So, here’s:
How I deal with music on my phone
Years back, I used to keep all of my favourite music downloaded on my phone because internet plans were expensive, and cloud streaming didn’t make sense.
But:
With the arrival of Jio and other cheap internet plans in India, I switched to cloud streaming.
Now:
Whenever I like some music, I add it to my library but don’t download it right away.
I let my music stream every time I listen.
This approach saves storage on my phone but at the cost of data usage to stream the music every time.
Now:
Since internet connections nowadays are fast and cheap and usually come with tons of data quota, I don’t mind having this trade-off.
But, here’s the kicker:
I keep some songs, my absolute favourite ones, downloaded on my phone.
This approach’s rationale is to have access to a portion of my playlist when I don’t have access to the internet.
For example, while in a flight or moving through a region with flaky network connectivity, I can still play some of my favourite songs.
And having only a handful of songs, let’s say 100–150, doesn’t eat up a lot of storage space on my iPhone even when I have my songs downloaded at high quality.
Now, for the burning question:
Should you opt for a lower storage iPhone?
For most people, the answer would be a definite yes.
Cloud is the present and the future.
And with tons of competing cloud providers, storage plans are incredibly cheap these days.
Also, cloud storage is the way to go for your files, as we discussed earlier because it protects your files from accidental losses.
So:
If you’re like me and use cloud storage heavily, save that extra $100 or whatever it costs to get a high storage iPhone and opt for the low storage variant.
With the techniques I outlined in this article, you won’t face any problem with a 64GB iPhone.
And for me, when I get my next iPhone, it’ll be the lowest storage variant available at the time.


