


 In-depth articles, series and guides

Around April last year, after reading hundreds of personal finance articles, I got into the habit of being aware of my money management.
To sum up the situation, I wasn’t doing an excellent job at that moment.
I had little to no savings and didn’t have a vision for my long-term finances either.
So:
One of the first things I did to take charge of my financial mess was making monthly money plans.
Since the last 8–9 months of religiously making money plans, my finance management skills and savings grew exponentially.
In this post, I’ll talk about money plans and how I set up a monthly process to record my expenses and savings in an easy to comprehend format.
Also:
I’ll share a Notion template to help you get started with your money plans in a few clicks.
Let’s start with:
The motivation behind money plans
I have been tracking my expenses for years.
However, tracking expenses doesn’t automatically mean lots of savings.
Even after manually tracking every single purchase I made, I sucked at saving money.
This was mainly because saving money was an afterthought and not a plan.
The situation was that if I have any money lying around in my bank account, I would see if I wanted to save it up somewhere.
And when you don’t have a plan for your money, you usually end up spending your entire income on things you don’t need.
To get serious about savings, I knew I had to create a plan. One that would be made before money got credited to my account every month.
Now:
It’s crucial to have a spending and saving plan before the money hits the bank. Otherwise, we would be back to square one, where we don’t have money left to save.
This is where monthly money plans come to the rescue.
Unlike a traditional budget, money plans have five components:
- Expenses. All of your regular monthly payments and big purchases.
- Income. Monthly household income. Just yours, or your and your spouse’s income if you’re married.
- Direct Account Payments. If you’re like me and make all purchases via a credit card, this section will house all the payments you make directly from your bank account (including last month’s credit card bills).
- Savings. The amount and accounts in which you would be saving up money for the month.
- Missed Savings. This section would rarely be needed but helps to glance at when you miss saving up some portion of your money due to an unexpected expense.
With a detailed sheet like the one above, not only do I have a proper savings plan for a month, but it also serves as a record of how I managed money in the past.
Once every 3–6 months, I come back to my past money plans and check if I’m missing too many saving goals or spending money on useless stuff.
This approach helps me course correct for the future and sharpen up my finance skills.
Now that we’ve seen how money plans can be helpful let’s start by:
Making a money plan
Around mid of each month, I create a money plan for the next month.
There are a couple of reasons behind this approach:
- Have a savings plan ready before money rolls into my account. With a proper savings plan for the month, I can immediately start moving money into my savings accounts as soon as I get my paycheck. This approach puts savings as a top-priority rather than a nice to have option.
- Recurring process. Making a one-time money plan means I’ll tame my money only for a month. With a routine procedure every month, it’s easy to engrave a savings-first mentality into my mind.
- Serves as a snapshot of my money management efforts. Having historical records of how I managed my money each month helps me correct any mistakes along the way.
I use Notion for creating and storing my money plans, like this:
However:
If you don’t use Notion, you can use apps like Google Sheets or Dropbox Paper to get the job done.
We only need table/spreadsheet support, and most modern apps provide this functionality.
But, here’s the thing:
Whichever app you use, make sure it has cloud sync.
You don’t want to lose your historical finance data due to corrupted local storage on your computer.
Now:
The initial setup might seem tedious, but once you have one money plan ready, it’ll be easy to duplicate and change values for the later months.
So:
Let’s kick off a new money plan by:
Listing down monthly expenses
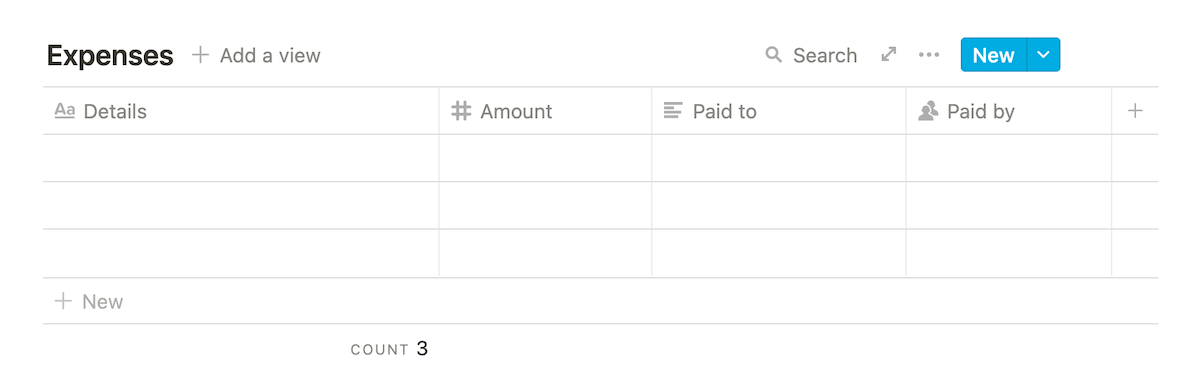
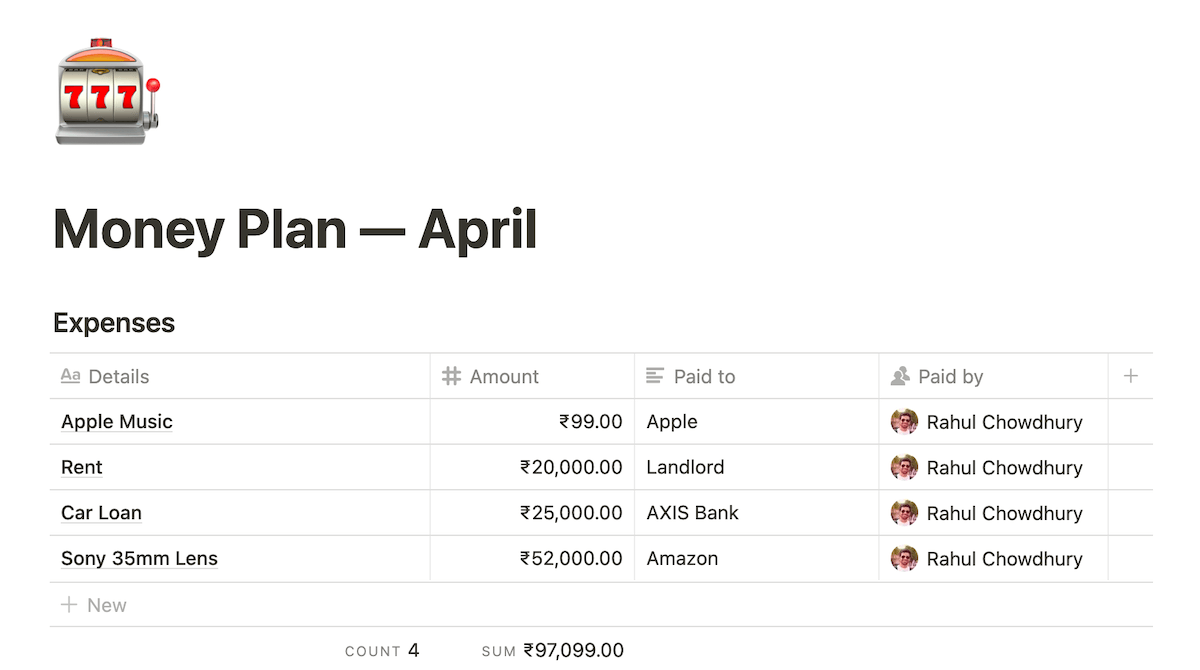
If you’re using Notion, create a blank page and add an inline-table like this:
We’ll name it “Expenses”.
Now:
We need to add some fields to this table like description, amount, where was the money spent, and who made the purchase:
With Notion, we can format the amount column to show up the amount with a currency, like this:

This is nice formatting I like to have on my Notion columns dealing with money.
Now, regarding which expenses to list in this table, here’s how it works:
I don’t add every expense to this table.
This table contains my expected monthly expenses like subscriptions, rent payments, loan repayments, etc. and some ad-hoc expenses.
However:
To keep this table short and easy to comprehend, I only add ad-hoc expenses above a certain threshold.
For example, only the ad-hoc purchases above ₹2000 make it to this table.
I anyway track all of my expenses on the Wallet app, so monitoring only the bigger chunks and repeated payments on this table is sufficient.
Now:
Once you’ve listed your expenses in this table, it’s time to set up a sum of the amount column.
In Notion, you can do it like this:
Having a sum of your expenses is crucial because while auditing, you’ll look at the big picture first — total amount spent in a month.
Getting to the nitty-gritty will follow if you want to dig deep to analyse any deviations in your plan.
Here’s a simplified version of the expense table containing a few expenses:
With the expenses table done, the next step is to:
Create an income table
The income table will hold information on all the payments/salary you’re going to receive next month.
If you’re employed in a company, this means recording your upcoming payroll amount.
If you’re a freelancer or own a business, list down all the payments, you’re due to receive as part of your income for the next month.
Why next month?
Because we’re creating this money plan for the upcoming month.
Also:
If you’re married, it’s best to include your spouse’s salary as well because it makes it easy to club both of your income and create a unified plan.
With Notion, you can add another inline-table in the same page, like this:
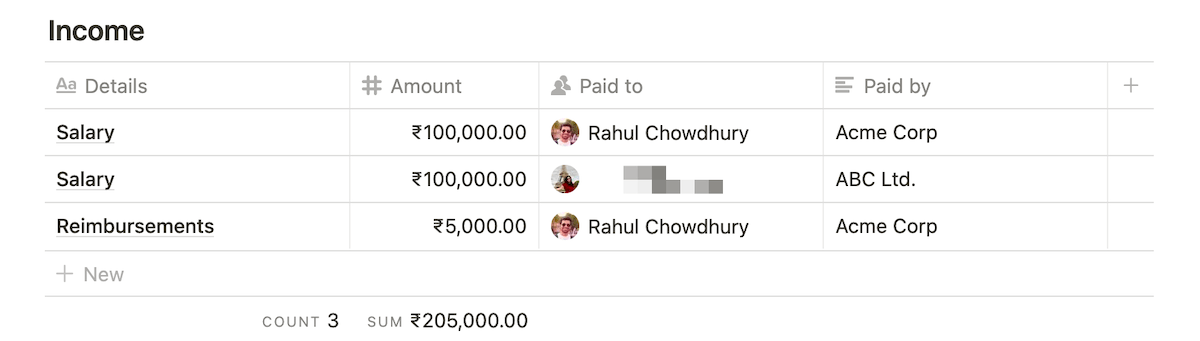
Every month, I list my salary, my wife’s salary and any reimbursements we are due to receive next month.
Don’t worry about putting the exact value right now; you can update the amount once the money gets credited to your account.
All you need to put here is the closest approximation of your next month’s income.
Now:
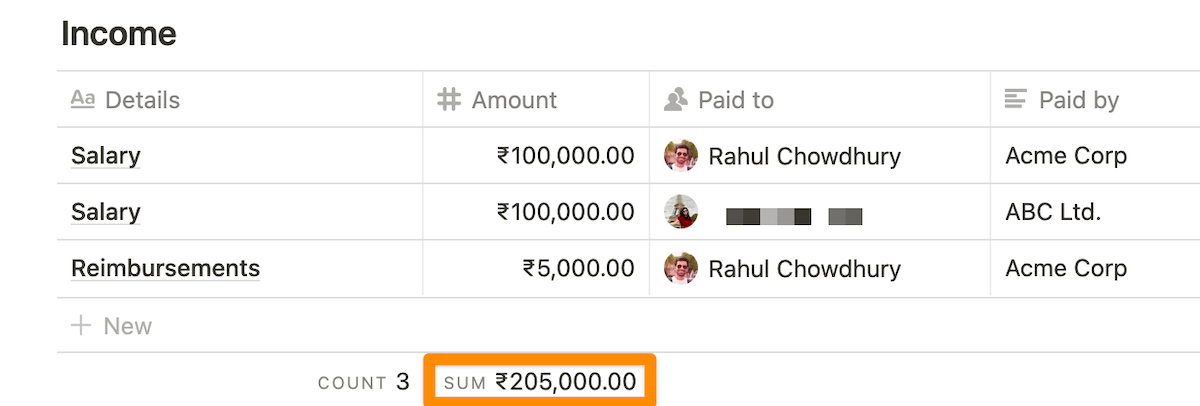
A quick sum of the total income gives me a bird’s eye view of my runway for the next month.
If you’re using a different app like Google Sheets, you can merge cells and create a header to have two separate tables in the spreadsheet, like this:
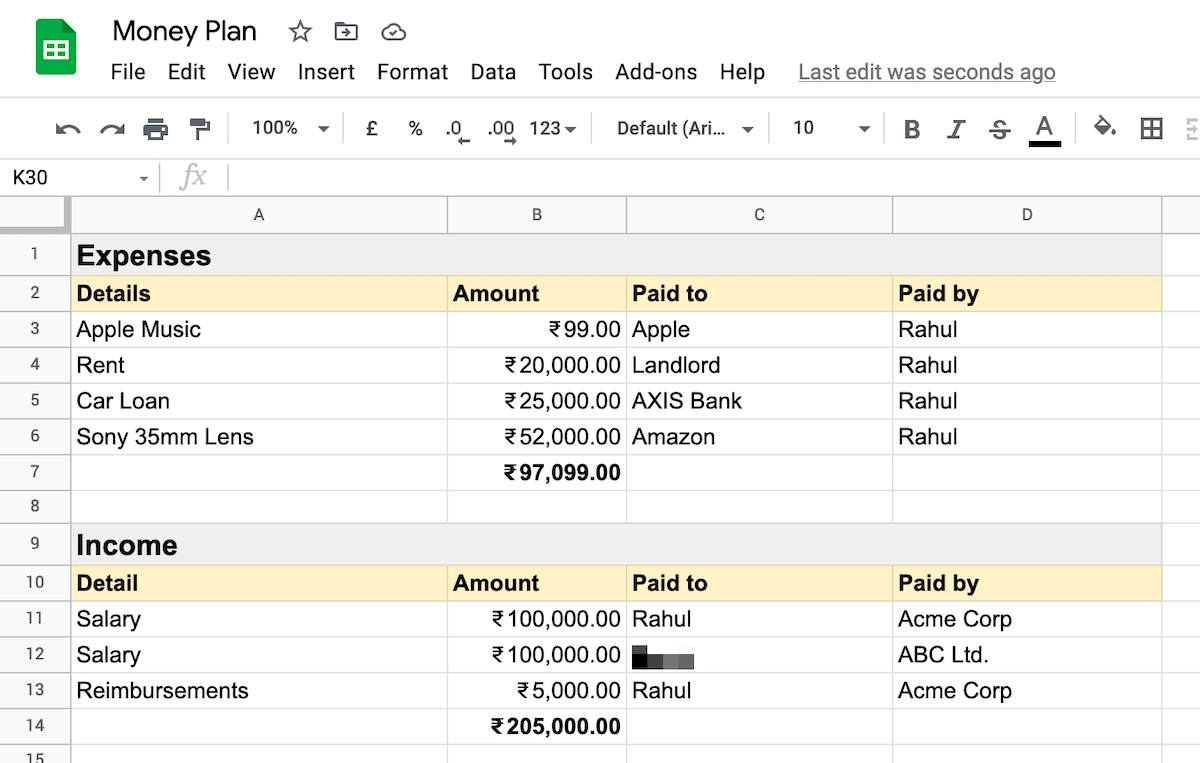
Sure, you can create multiple sheets in a Google Sheets doc, but having everything in a single sheet makes it easy to review.
Now:
With income sorted, the next part of the money plan is to:
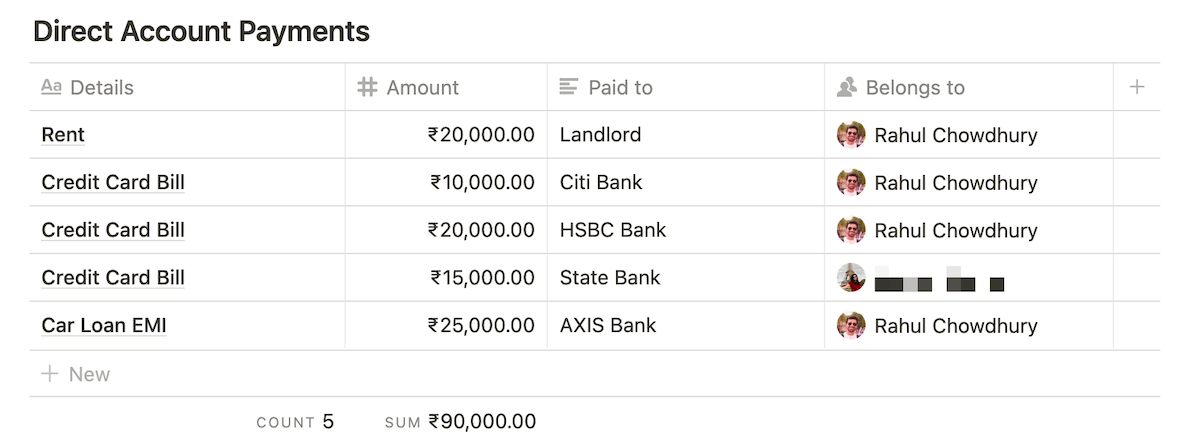
Add a table for direct bank payments
I use my credit cards for almost all expenses.
However, certain expenses like loan EMIs, sending money to parents, rent payments, etc., is not possible via a credit card.
To track these liquid cash movement, I record them in a separate table — direct account payments.
In Notion, you can add another table to the page containing the columns description, amount, and paid to, like this:
Now, tracking these expenses in a separate table might seem redundant, but here’s the deal:
Since my credit card bills are generated the following month, I need to pay my current month’s credit card bills next month.
So, essentially this table contains the following expenses for me:
- Loan EMIs
- Money sent to the family
- Credit card bills
- Rent payments
Now:
Once I calculate the total amount of direct account payments, I can do this:
Total savings opportunity = Total income – Total direct account payments
This total savings opportunity is essentially the amount of cash I would have to invest or save.
After the direct account payments, I won’t need to have any cash laying around except a few thousand rupees.
All of the following month’s expenses will be done via credit cards, which I’ll have to repay the next month. This cycle continues.
Now, having a total savings opportunity amount will help us to:
Create a savings table
A savings table not only acts as a plan for saving money but is also a snapshot of how diligently you have saved in the past.
I use this table to note down savings in mutual fund investments, retirement funds and general savings account deposits.
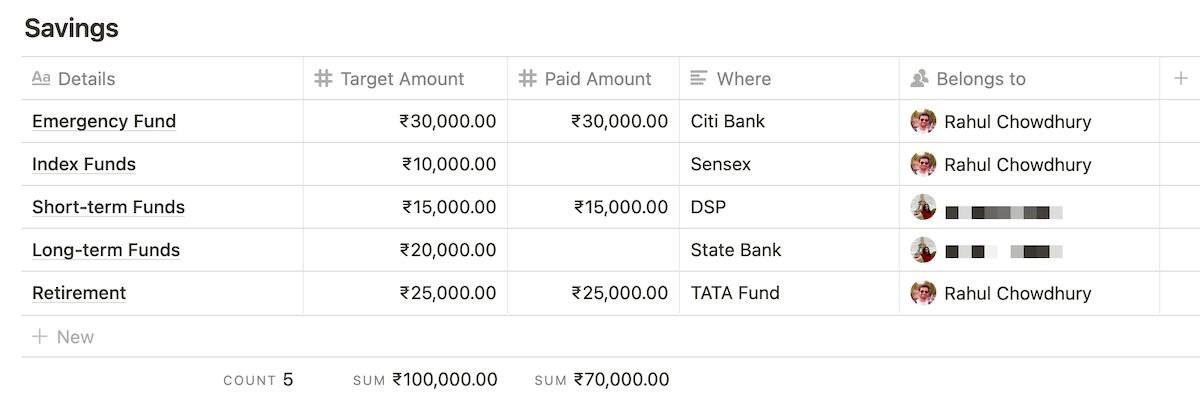
This how the savings table looks:
One fundamental difference between this table and the rest is the additional column called “Target Amount”.
The target amount is the amount of money I’m planning to save in a particular area, for example, a retirement account.
However, due to unforeseen circumstances, like an ad-hoc expense, I might not be able to save up as much as I plan.
So:
A target and paid amount columns help me visualise if I’ve missed the mark on some savings, and thus, I can plan more accurately in the future.
Now, once you have the savings table ready, using the formula we talked about earlier, calculate the total savings opportunity:
Total savings opportunity = Total income – Total direct account payments
Once you have your total savings opportunity amount, distribute the whole into different saving areas.
I usually divide my savings opportunity into multiple areas like retirement, short-term, long-term, index funds and liquid funds, like this:
Now:
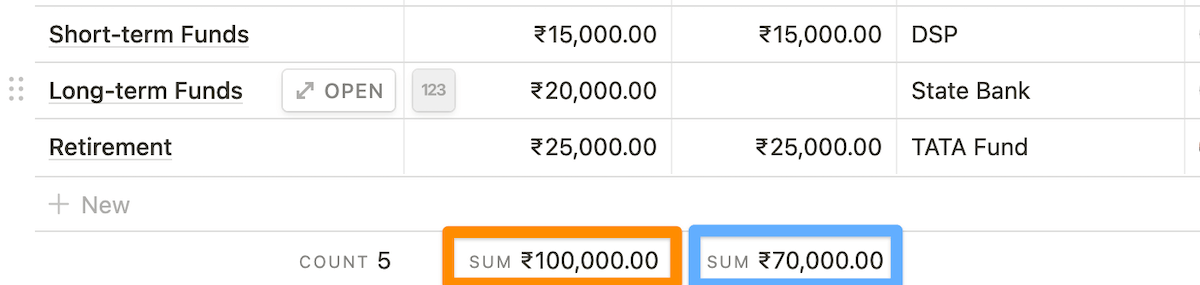
Every time you transfer money to your savings account or invest according to your savings plan, come back to this table and update the “Paid Amount” column.
This ensures that you get a clear idea of how much more you need to save or invest to meet your monthly savings target, like this:
Also:
I like to keep some cash lying around in my bank account to pay for ad-hoc expenses where credit cards are not accepted.
That’s why, in the above example, although my savings opportunity was ₹115,000, I calculated my savings amount as ₹100,000.
Now:
Since we’ve got the savings table out of our way, the only thing left is to:
Create a missed savings table
A missed savings table helps me identify the savings target I’ve missed in a given month and by how much.
Ideally, this table should be empty.
However, this table will act as a record of missed targets in case of a financial crunch.
This is how it looks:
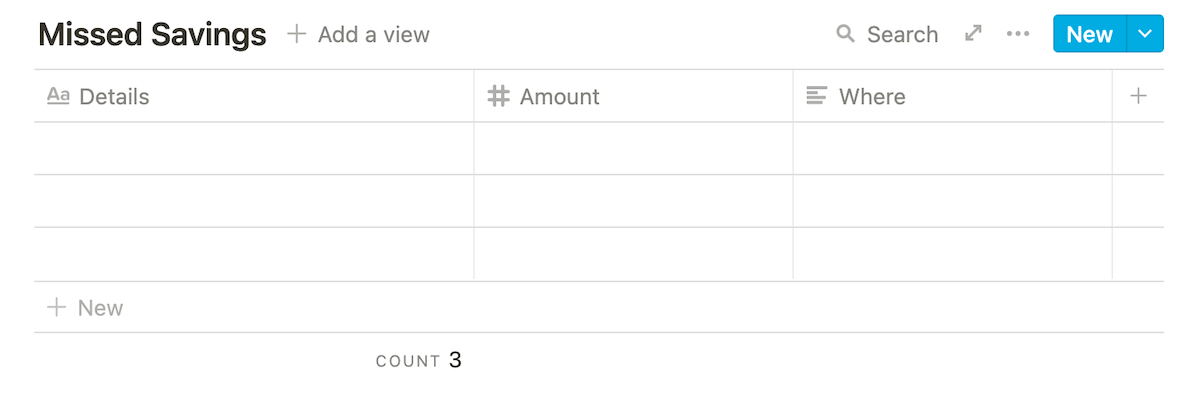
In the past 8–9 months of maintaining money plans, I’ve only had about two months when I added items to this table.
In such cases, I carried forward the missed target to the next month’s savings table.
This practice helped me ensure that I saved the amount I intended in the last month and not let the savings goal vanish into a black hole.
Now, as discussed earlier:
Making a money plan once is good. Making a money plan every month will help you have firm control over your finances.
So, let’s talk about:
How to keep making money plans every month
No matter which app you used to make your money plan, there will be an option to duplicate a document/page.
We’ll use this feature to duplicate our money plans every month from the past month and save a ton of setup that we just did.
Since I use Notion, I duplicate the last month’s money plan and remove all ad-hoc purchases from the previous month’s table, like this:
This means that payments that stay consistent every month, like subscriptions, rent payments, etc., are retained in the table with their monthly charges.
Whenever I make a new ad-hoc purchase, I return to my money plan and update the expenses table.
Similarly, if you receive a fixed salary every month, duplicating a money plan means you don’t have to refill your payroll details every month. They’ll already be in the table.
Now, here’s a neat trick:
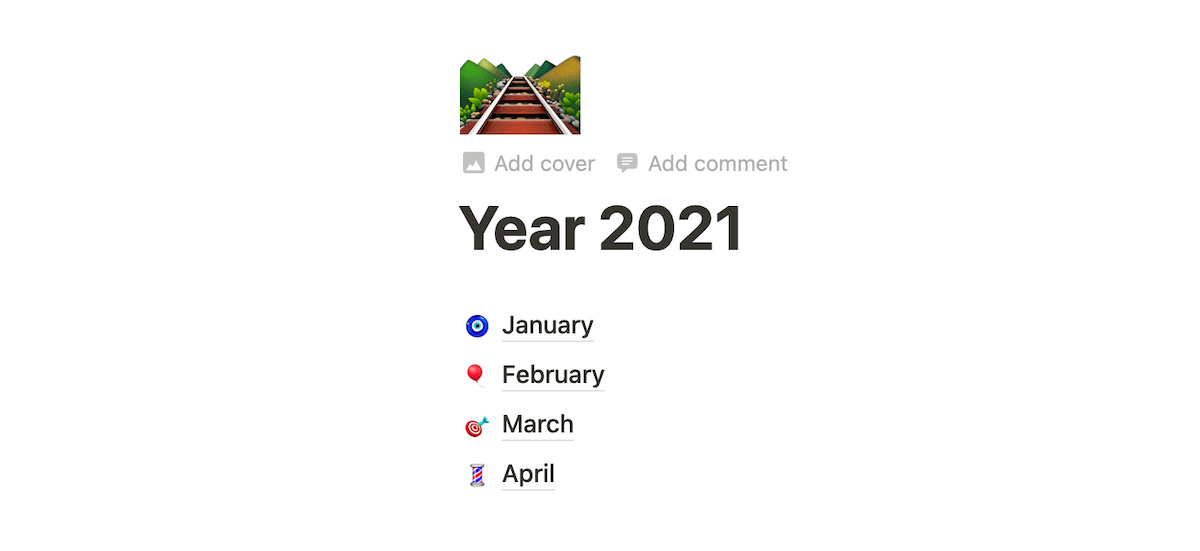
To organise a little better, I create separate pages based on years to house my plans, like this:
And, under the year page, I nest money plans named with the month name.
This approach enables quick navigation and prevents one page from getting overwhelmed with too many money plan listings — the standard folder organisation approach.
Now:
To make your job easier even when starting, I’ve prepared a money plan template for Notion.
If you’re using Notion, you can benefit from my template by creating a new money plan with a single-click, like this:
You can purchase the template for $5 and save yourself a ton of work.


