


 In-depth articles, series and guides

Todoist is an incredibly versatile to-do list app I've used for years.
I use Todoist to plan pretty much everything.
But:
There's this one aspect of running this blog that I relied on other tools like Notion or Trello was housing, refining and prioritising blog post ideas.
A Kanban board view and moving items across lanes make it easy to visualise my content planning in a way that a simple to-do list can't.
But then:
Todoist introduced a new project view called Board view, and it changed how I planned my content creation.
In this blog post, I'll show you how to use Todoist's fantastic board view and how I use it to plan content for this blog.
Let's start by:
Switching a project to board view
Every project in Todoist can be viewed either as a regular list or in a Kanban board view, like this:
And, Todoist offers two ways to turn a project into a Kanban board:
- While creating the project
- Switching the project view later
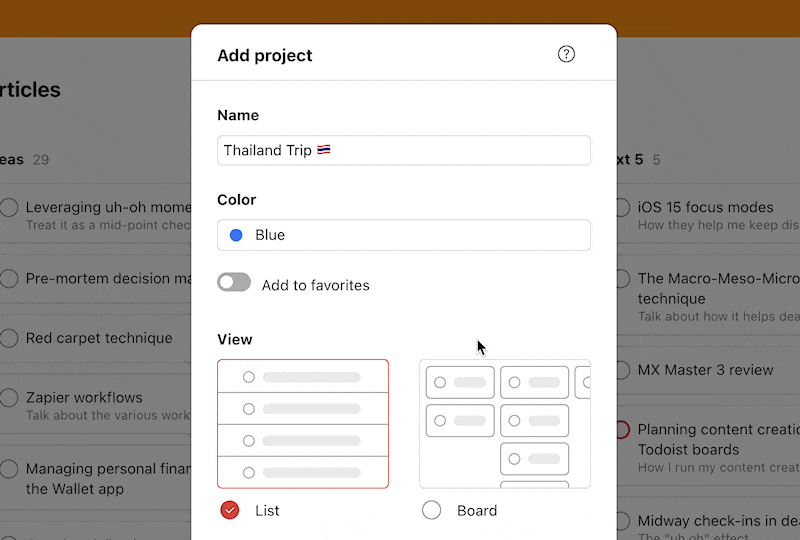
Here's how you can choose to view a new project as a Kanban board while creating it:
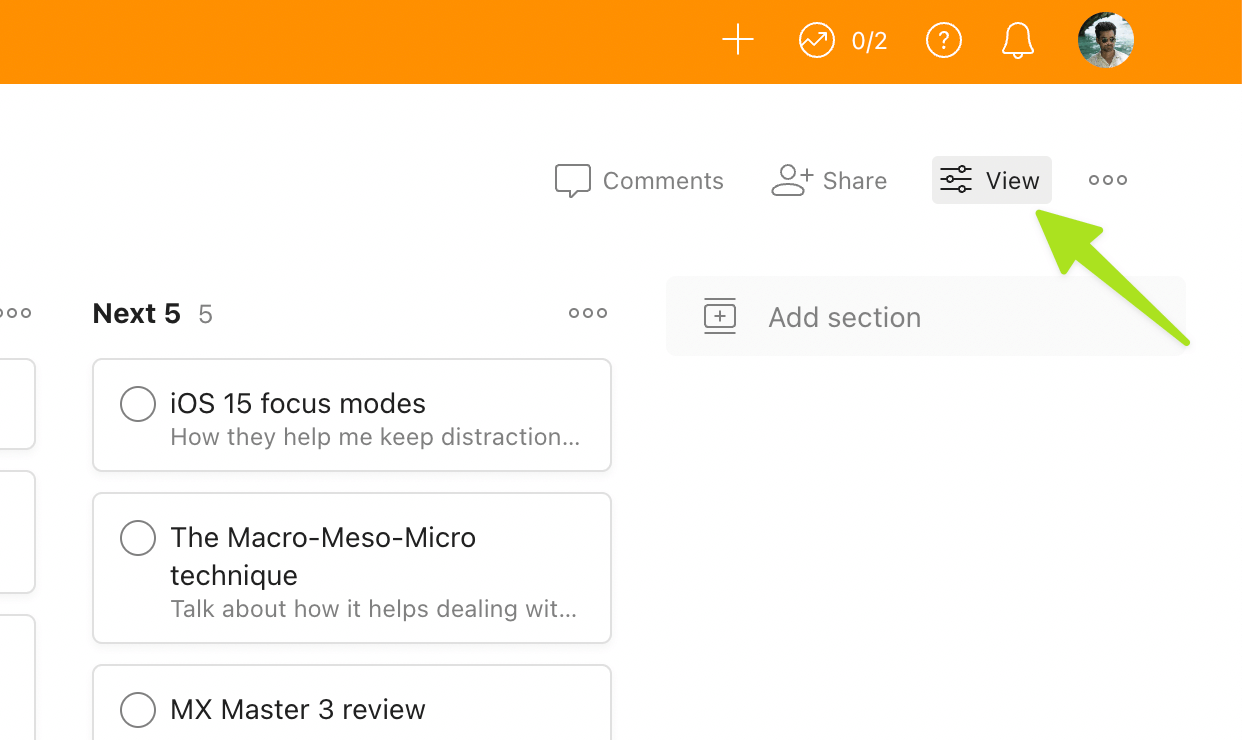
And if you want to convert an existing project into the board view, here's how to do it:
Open any project in one of the Todoist apps, and locate this View option:
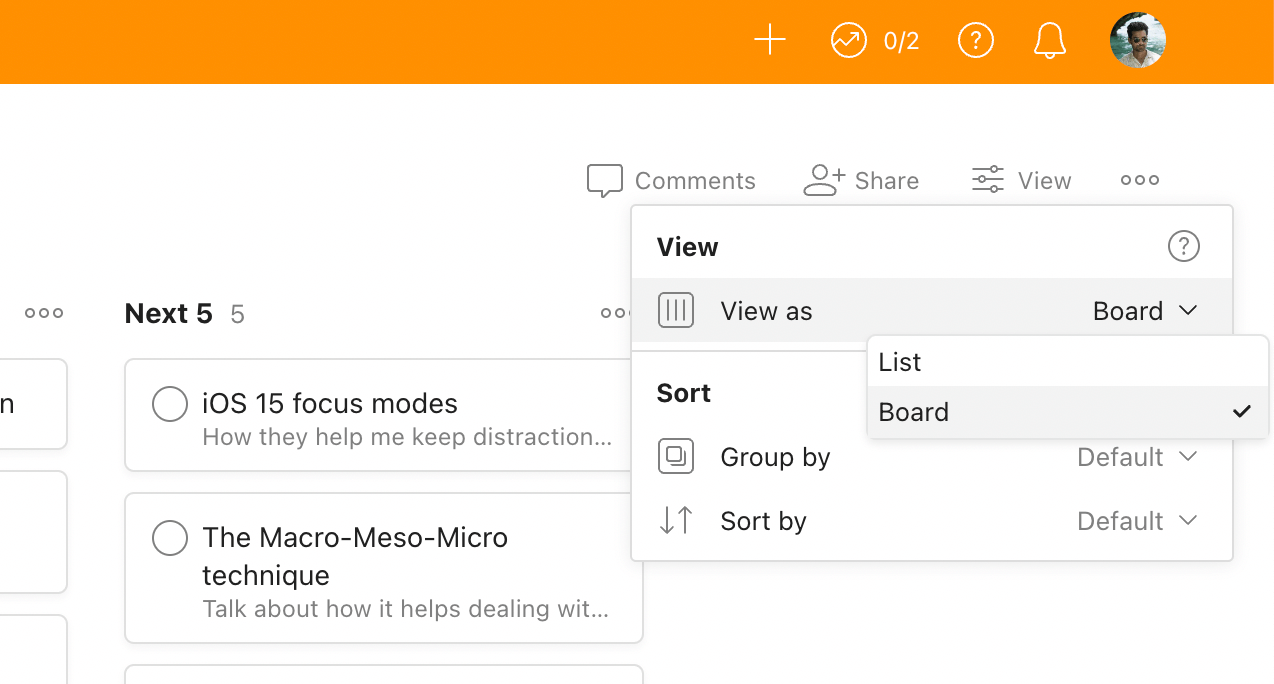
You can then use this setting to change how your project is displayed like this:
But, here's the thing:
Whether you're creating a new project or changing the project view of an existing one, Todoist will always group all tasks into a temporary section called No Section, like this:
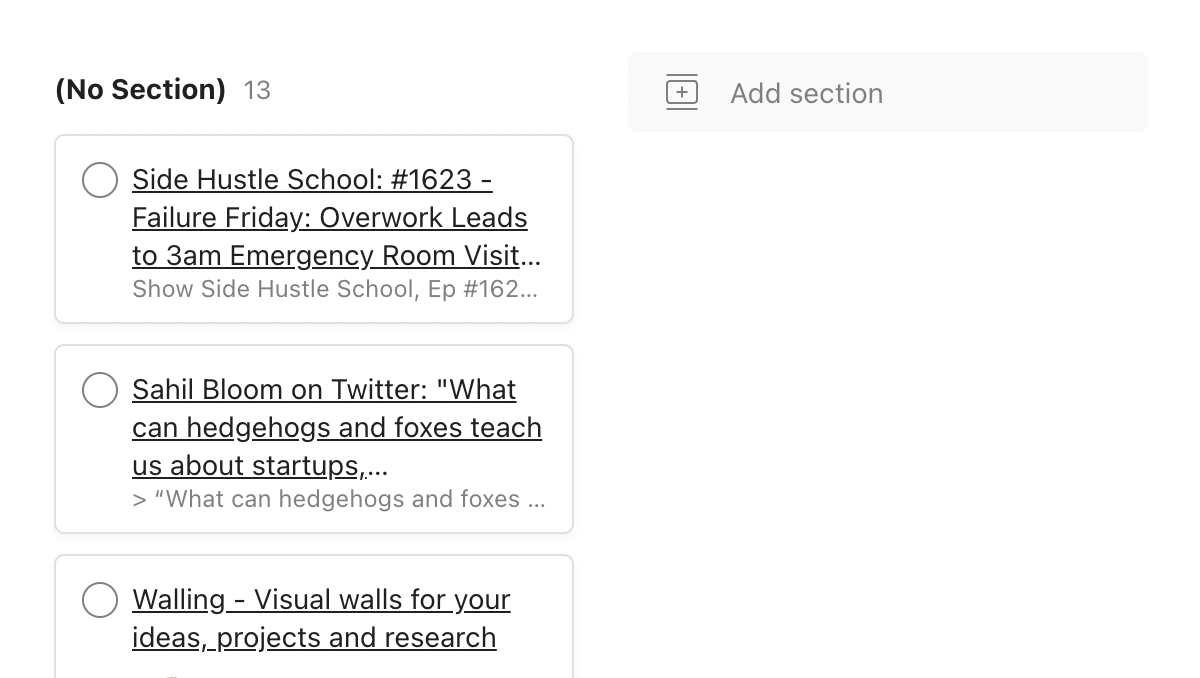
Okay, what are sections?
Sections help group tasks in Todoist into logical compartments.
In the list view, having sections will divide your task list like this:
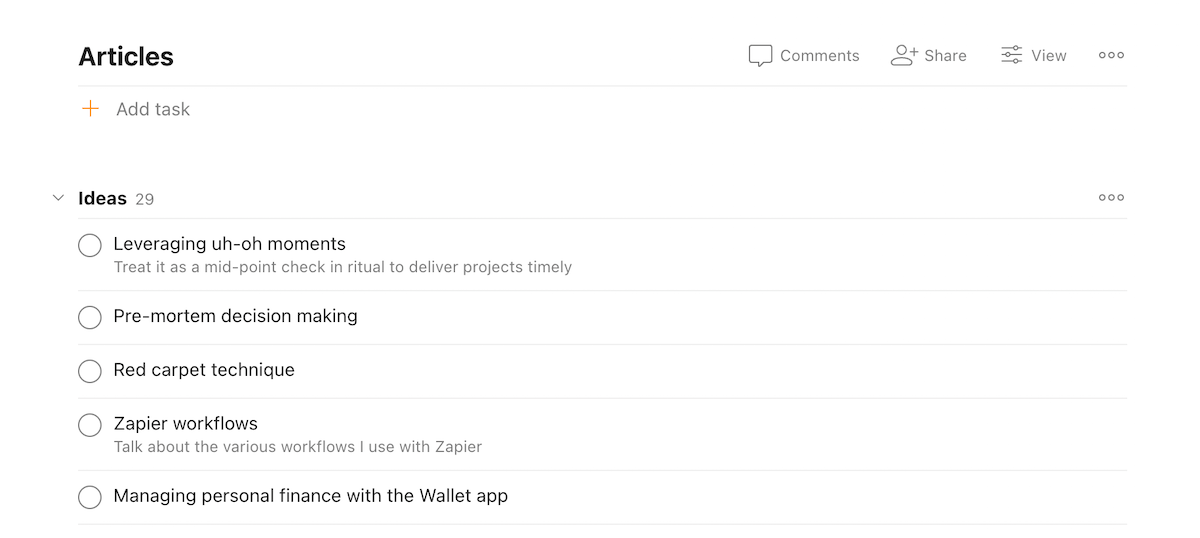
Whereas in Board view, it'll create columns-like sections.
If you're familiar with a Kanban board or have used apps like Trello or JIRA, you'll feel right at home with the board view.
Each section in your board can represent the current progress of a task or act as a funnel to pick what task to work on next.
To understand this better, here's:
How I plan my blog posts in Todoist
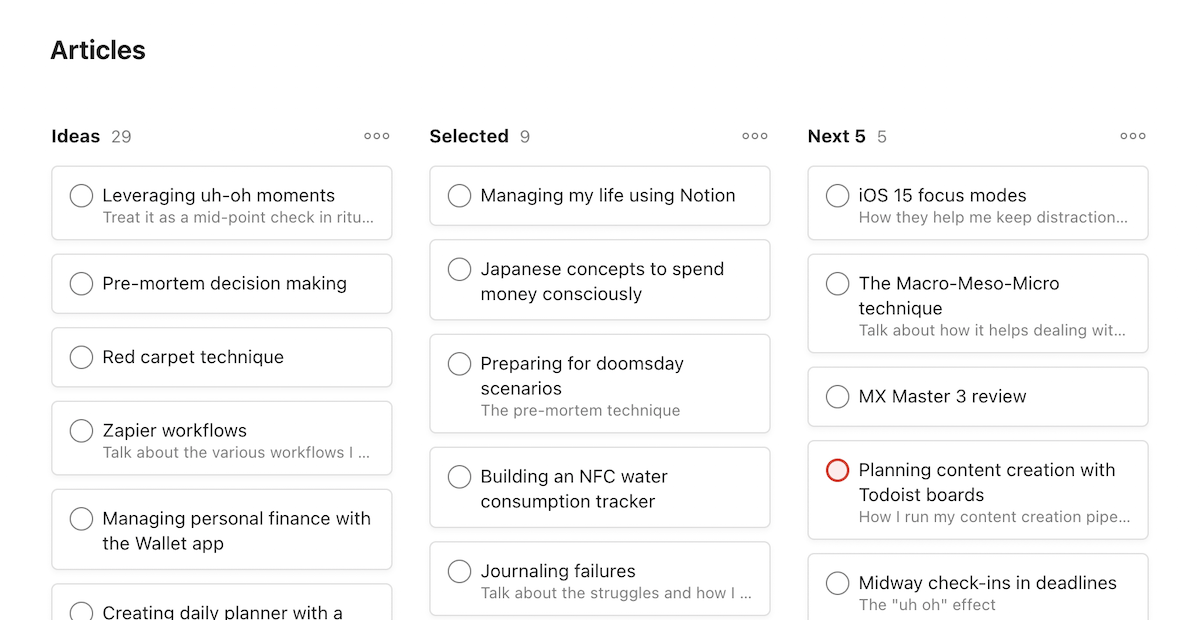
I have an Articles project in Todoist to house all article ideas that randomly pop up in my head, like this:
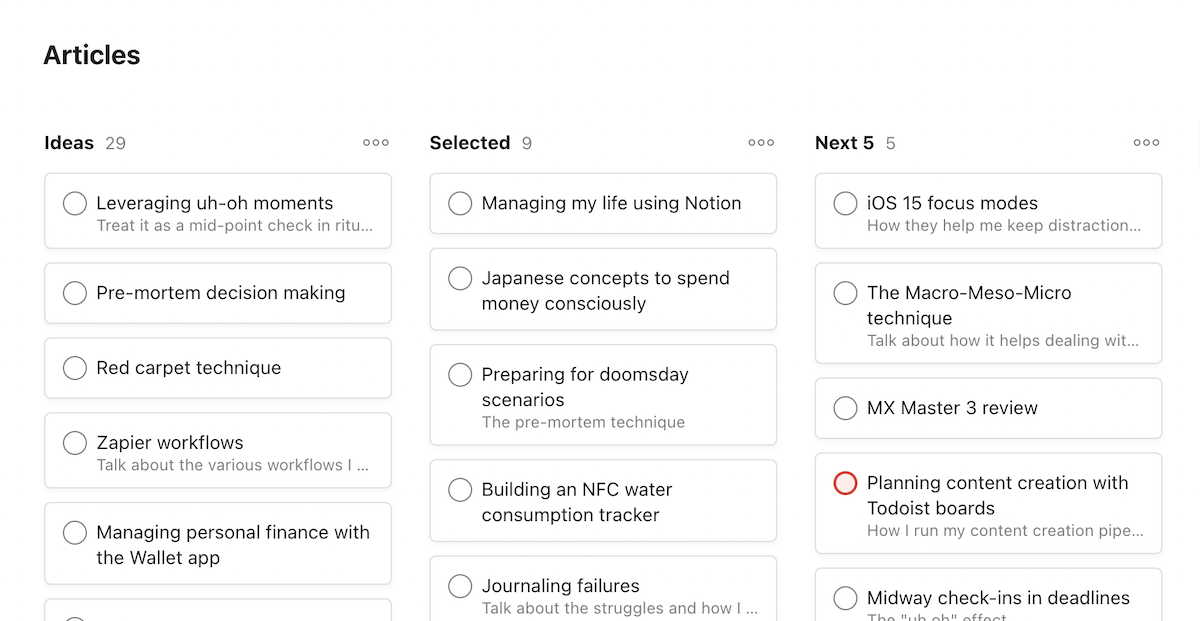
If you look closely, I have three different sections on my board:
- Ideas: Houses any new article idea that I get
- Selected: Contains article ideas that I'm keen to work on
- Next 5: Ideas for my next five blog posts
This is how the entire workflow runs:
Anytime I get a new blog post idea, I note it down in the Ideas section of my article board, like this:
Now:
I don't usually open the Articles board to add new ideas. I use this handy /Ideas shortcut to add a task to the Ideas section directly from any screen in the Todoist app:

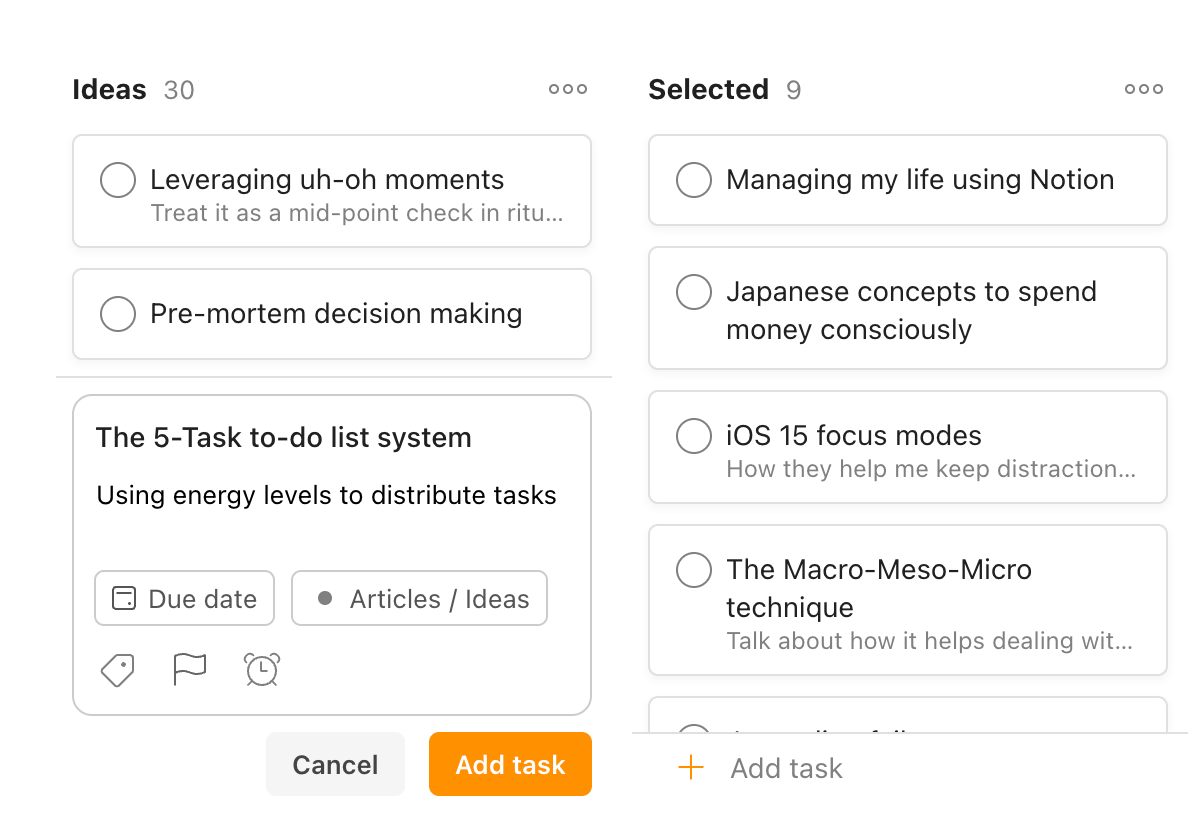
Once I've got plenty of article ideas sitting in the Ideas column, I do an audit now and then to sift through my ideas.
I take this opportunity to remove ideas from my list that I don't think will be valuable blog posts.
Or move some of them that I want to work on to the Selected column.
Now, here's the thing:
Picking an idea from the Selected section to write can get overwhelming since this section usually contains a staggering number of ideas.
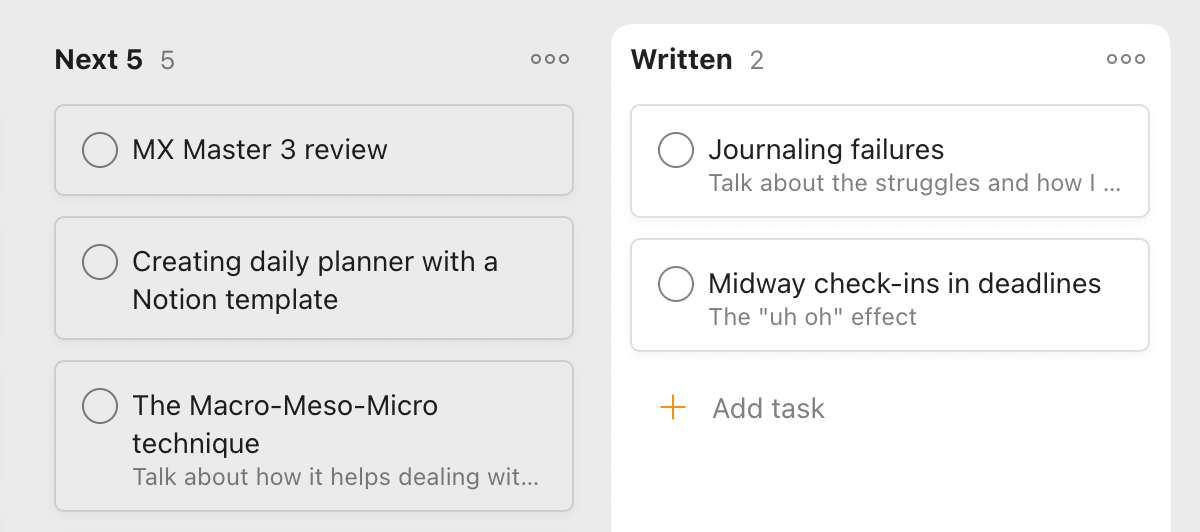
That's why I have an additional section on my board called Next 5, like this:
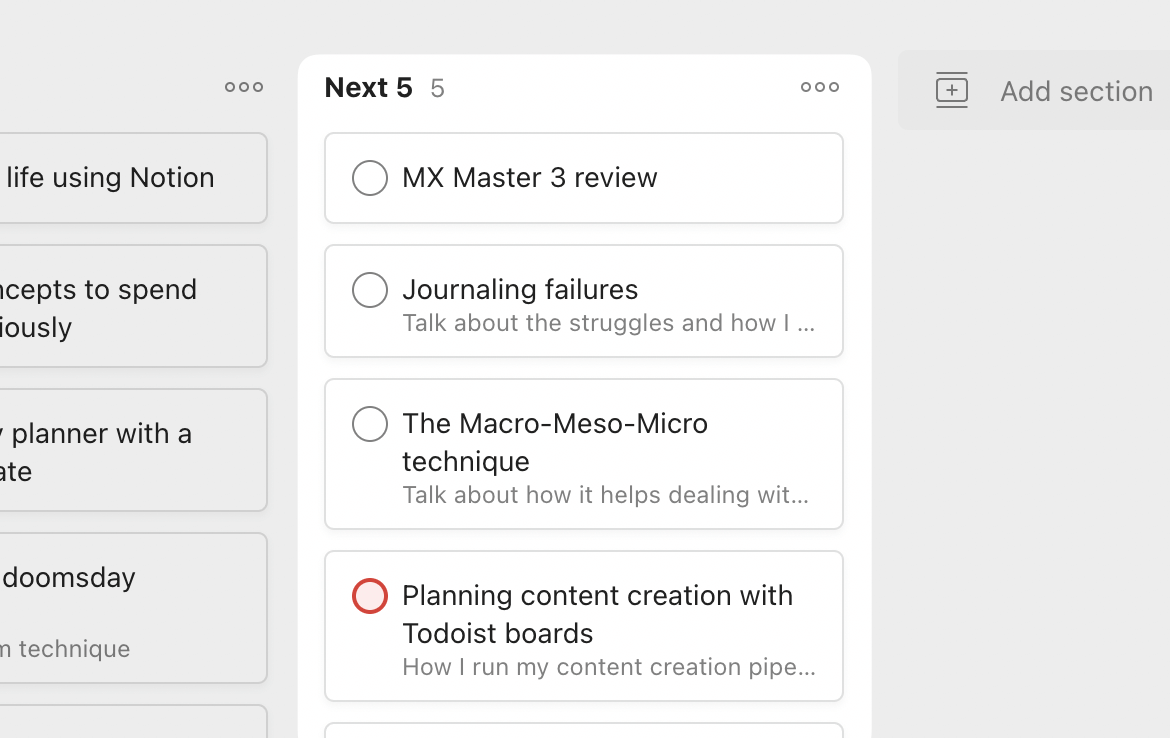
The Next 5 column only contains up to five blog post ideas I will work on next.
So, my board sections act like a funnel:
Ideas → Selected → Next 5
Ideas get refined and pruned with each step in the funnel.
Also:
With a handful of article ideas in the Next 5 section, I can start collecting resources and formulating outlines for this batch of blog posts before I start writing them, like this:
Think of it as prep time before a delicious cook.
Now, here's a thing to note:
Based on the type of article or content, my boards may or may not have another section called Written.
But, before we jump into the Written column, let's understand:
How I process ideas from my content board
Right now, my content publishing strategy is to write and publish one long-form blog post every week.
And to follow that schedule, I use this technique:
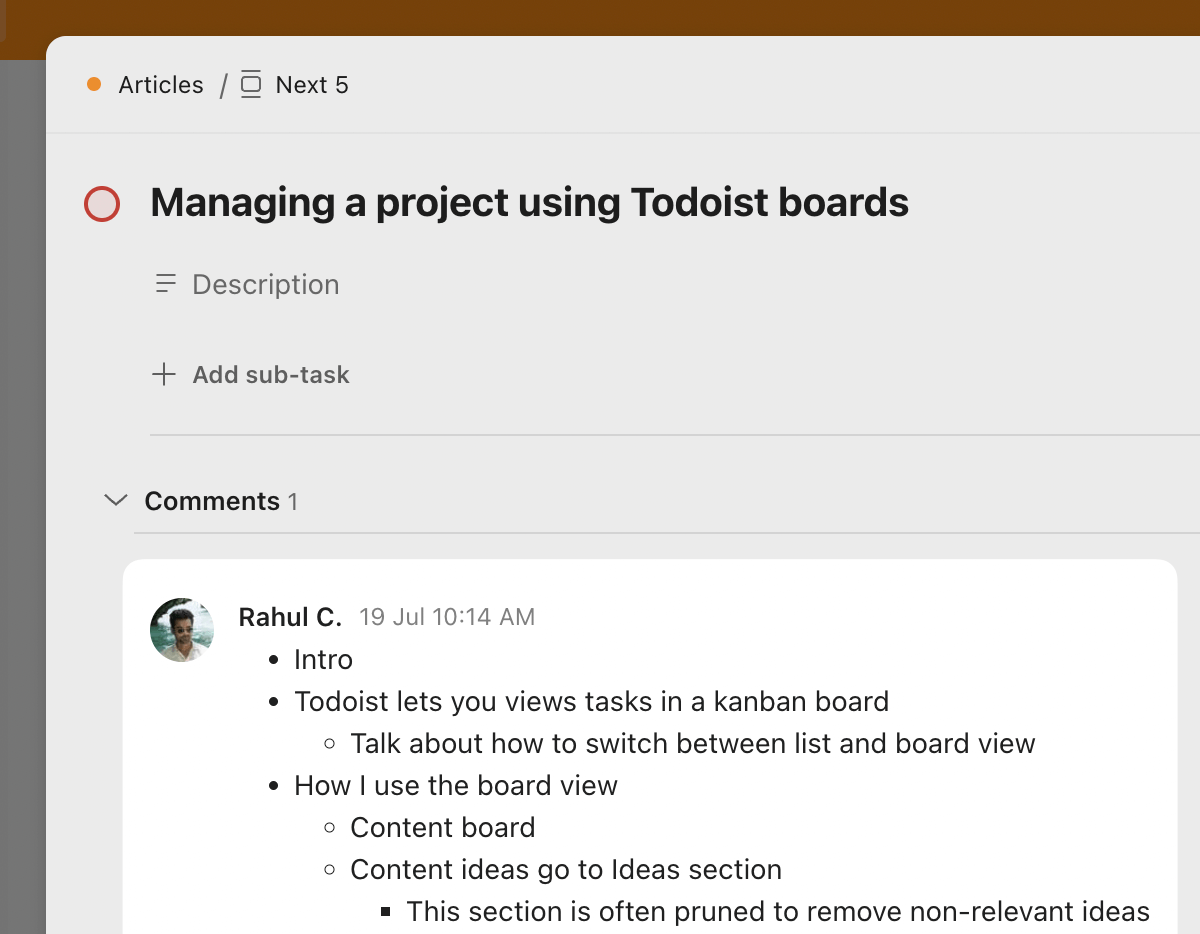
- After publishing a blog post, I look at the Next 5 section and pick the next blog post I want to write
- Once picked, I assign a due date to that blog post idea for when I want to write that post
Assigning a due date helps me schedule an article idea for writing beforehand and not have to spend high-energy time sifting through the list to find one.
Also:
With a due date assigned, the article writing task pops up in the Today view for the scheduled date like this:
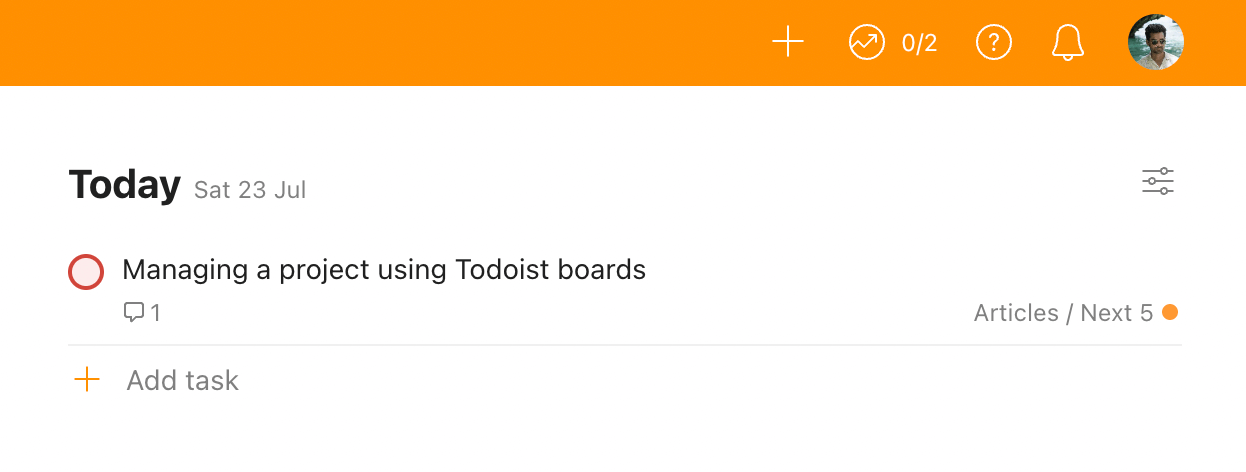
This saves the trouble of creating an additional task like "Write article" and then going through the content board to find what to write.
Additionally:
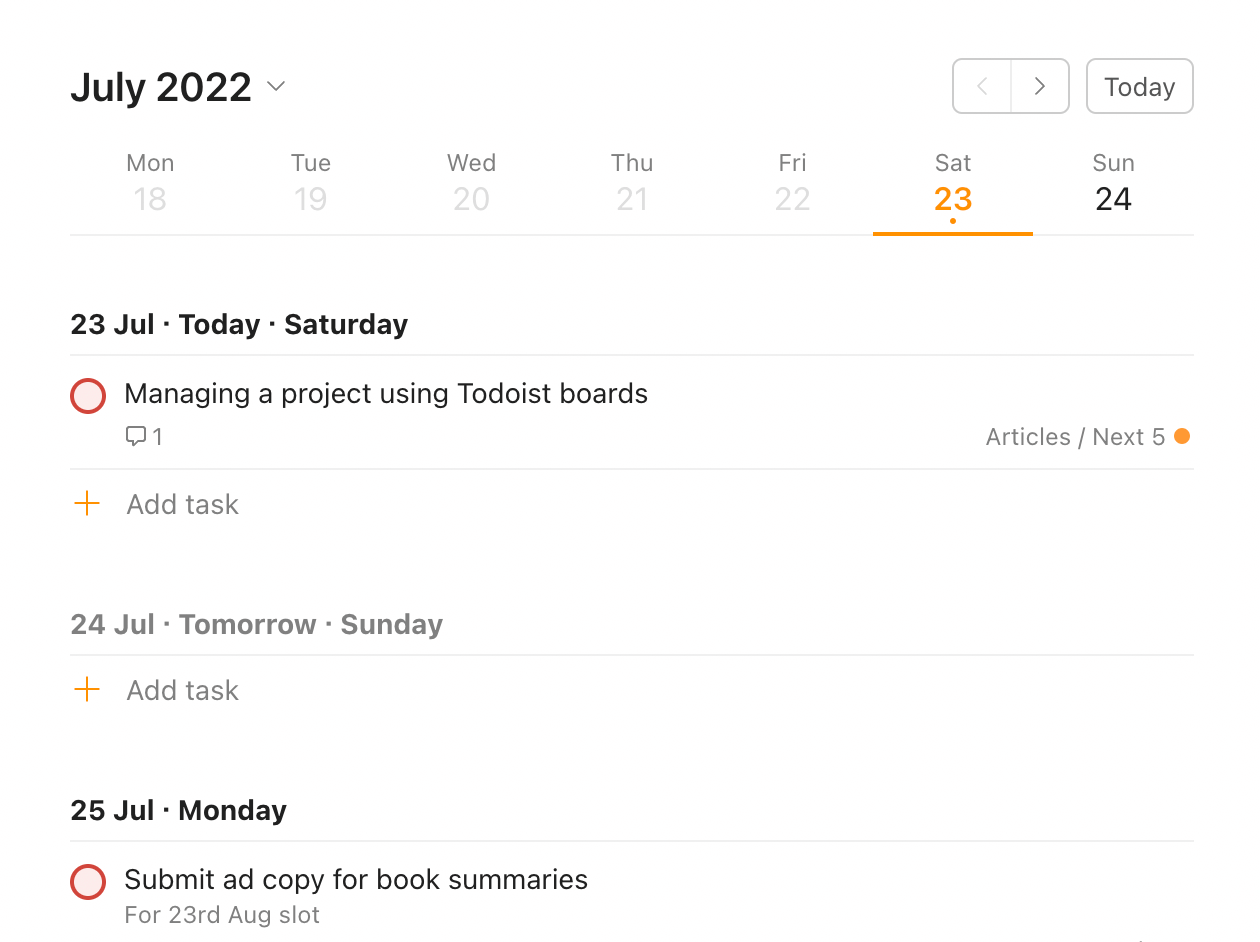
Having an article idea scheduled helps me look at my upcoming week and plan better since I can limit the no. of tasks I aim to do on days I have to write an article:
This is where the board view in Todoist shines.
I don't have to juggle multiple apps like Notion, Trello and Todoist to plan my content in one place and then execute them in another.
Everything's neatly sorted within a single app.
Now:
Since I don't usually write and publish on the same day, I don't mark the article task as done once I'm finished drafting it.
I reset the due date on the task like this to remove it from the Today view:
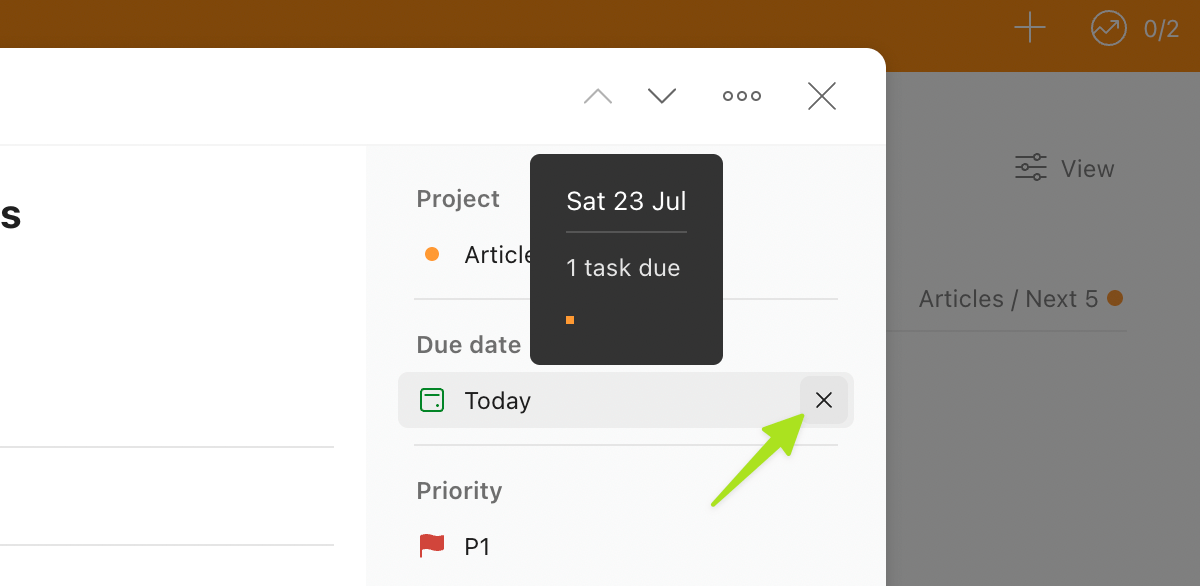
The task stays in the Next 5 section until I publish the article on the blog.
But:
For short-form articles and Twitter content, I have a separate section on the board called Written.
The Written column houses the articles that are written and ready to be edited and published.
Now:
This column only applies when I have multiple drafted articles waiting to be published.
So, I keep this column only on the content boards where I can write content in bulk, like Firesides:
Then, after publishing the blog post, I finally mark the article idea task as done.
This process transforms what was once a random thought into a full-fledged blog post without any overwhelm.
And, you can extend this same funnelling technique to other projects.
Here are some examples of:
Using boards for everything
You can think of board columns as stages in any planning or workflow.
As you move through each section, the idea is to funnel a large volume of tasks into manageable portions.
For example, a traditional project management board would have sections like this:
- To do: Tasks that you need to do. Probably 10+ things here.
- In Progress: Task you've picked and are currently working on. Down to around 2–3 items.
- Done: Completed tasks from your project.
Whereas a travel planning board can be made of sections like this:
- Looks Good: Hotels, places, activities that look interesting for your trip
- Selected: Things and places that you've selected
- To Book: Flights, hotels or any activity that you need to book
- Booked: Flights, hotels or any activity that you've already booked
Where a super long list of things or ideas creates chaos, a board view helps you arrange these tasks accordingly and focus your attention on only a select few at a time.
So:
Try visualising how your project would look on a board the next time you're starting one.
But, keep this in mind, a board is suitable for:
- Ongoing projects that don't have a finish date, like content creation, personal finance management, etc.
- Complex projects with 20+ tasks that need prioritising, like software development, travel planning, etc.
A simple project like revamping the landing page on your website containing 5-10 tasks is still better off as a list.
For small projects like these, doing the ceremony of viewing it as a board, creating sections, and moving tasks is mostly a waste of your time.
It's easier to prioritise from a small list of tasks and get things done in such cases.
So:
How are you planning to leverage this handy Todoist feature?


