In-depth articles, series and guides

After I saw Michael Tigas's Dumb Phone app, which turns an iPhone into a minimalistic, distraction-free phone, it sparked an inspiration.
I wasn't entirely sold on the text-only interface rendered by the Dumb Phone app, but the idea made sense. I'm no stranger to picking up my phone in the middle of work and mindlessly jumping from app to app, and a setup like this could help.
Nevertheless, I figured I could replicate a similar experience using my phone's built-in focus modes in a few easy steps, for free.
In this blog post, I'll show you how to set your iPhone to mimic a work-friendly device that turns your phone into a tool rather than a distraction.
Let's start by:
Understanding the requirements
Over the last few months, I've seen many examples of people turning otherwise cluttered and distracting iPhones into simplified devices that fit their workflow.
While each implementation had its perks and shortcomings, here are some of the aspects that made sense to me:
- Limiting the number of visible apps on the screen.
- Silencing notifications from distracting apps.
- Replacing the wallpaper to a minimal one to make the overall workspace look clean.
- Optionally, make the entire screen greyscale to make the phone screen less inviting.
Visualising the above changes, a minimal, focused iPhone screen should look something like this:
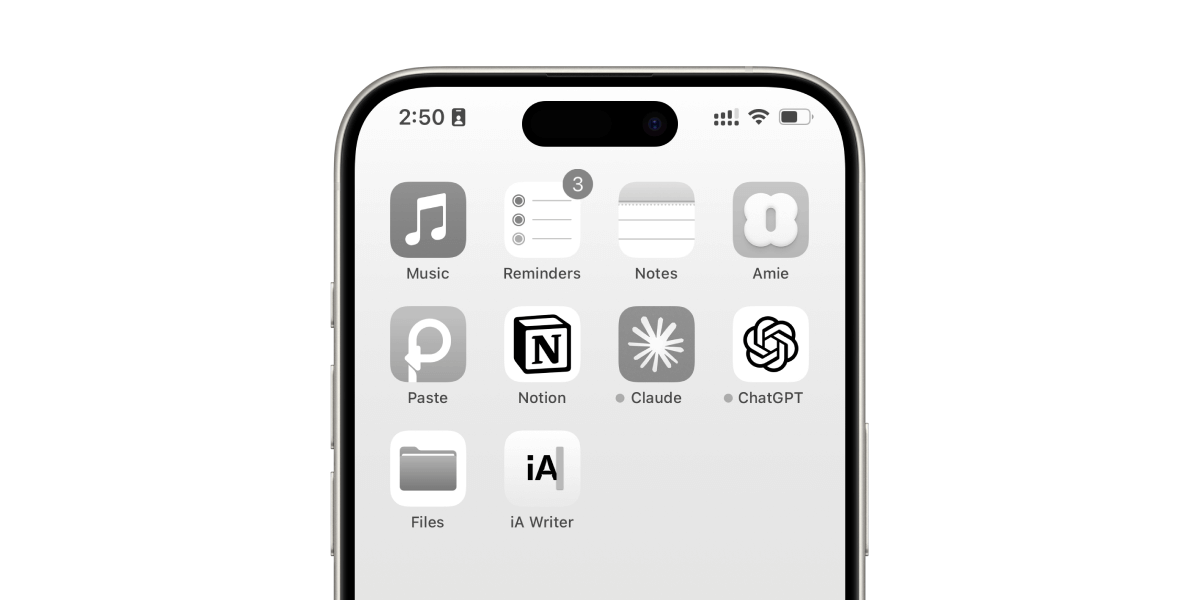
This works in reducing distractions and doom-scrolling social media feeds because it creates a calm, clean and sandboxed space where:
- Only the apps you work with are visible upfront.
- A minimalistic wallpaper, combined with a greyscale filter, makes the phone look like an e-Ink device primed for work and not play.
- No useless notifications to steal your attention from the task at hand.
Ever since I designed and used this minimal workspace on my phone, I've noticed that I'm less prone to opening social media apps or mindlessly scrolling through my emails.
Sure, I could pull down the spotlight search bar, type the app name, and launch the Mail app or Threads, but these added steps create enough friction for me not to do it at all.
Most of us are accustomed to defaulting to these distracting apps during work because they're effortless to access — only a few habitual taps away. Making access even a bit challenging goes a long way toward curbing this bad habit.
So, let's recreate this minimal workspace using iOS's built-in focus modes and a bit of Shortcuts magic.
We'll lay down the foundation by:
Tweaking the Work focus
Every iPhone comes with a few pre-made focus modes like Do Not Disturb, Personal, Work, etc.
We can tweak the Work focus to work beyond its predefined settings, creating a minimal workspace when turned on and reverting to our existing workspace when it's turned off.
Let's start by opening Settings and tapping on Focus to access all focus modes:
Tapping on Work focus from the list reveals its current configuration:
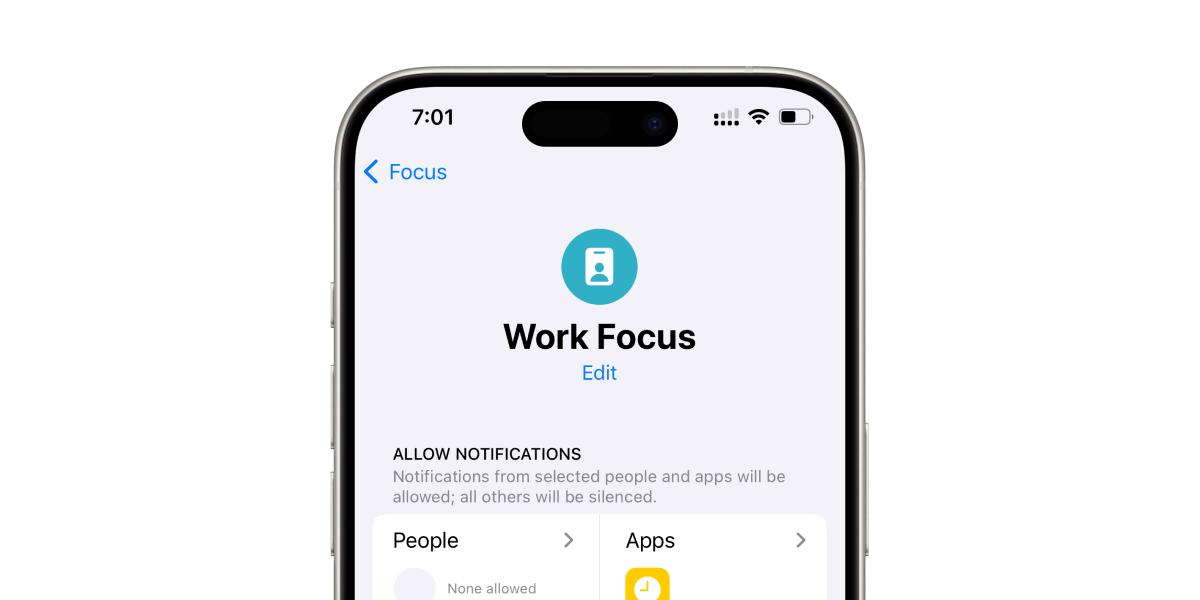
Now, a focus mode on iOS allows us to do a couple of things:
- Limit who we receive notifications from.
- Customise our phone's lock screen and home screen.
- Change how other apps like Safari behave in this focus mode.
Since notifications are the biggest source of distractions, let's prune that branch first.
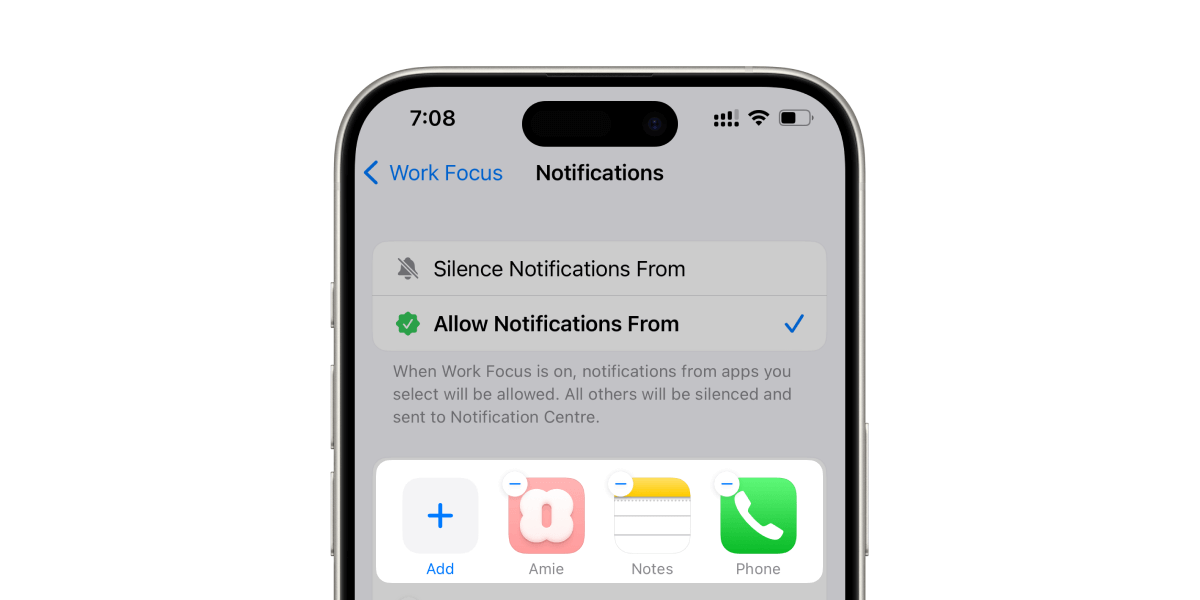
Tap on the Apps section under Allow Notifications to choose the apps you want to receive notifications from when the focus mode is turned on.
Since we're designing a focus mode that helps you work, pick apps essential to your work, such as Calendar, Reminders, Phone, etc.
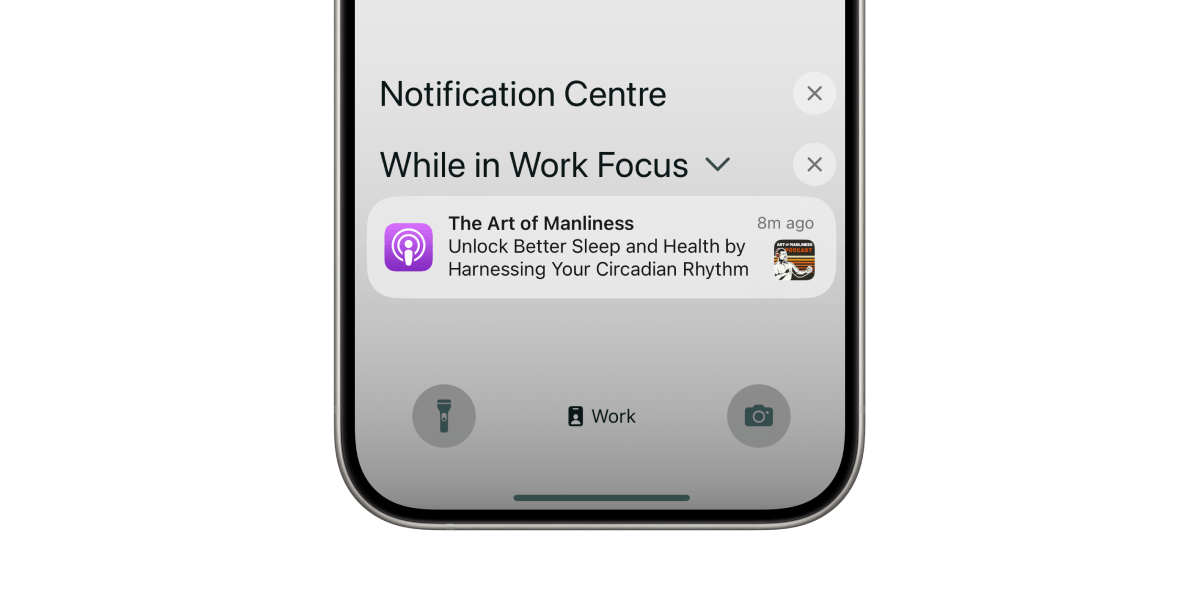
With this filtered list, notifications from every other app will still land on your phone, but they'll not wake it up or cause it to ring. Instead, they'll silently get collected in the notification centre like this:
Now, although it's not a work-related app, I have an app which sends approval notifications when someone visits my home or when a delivery person arrives.
Since requests from this app are time-critical as I need to approve or reject requests when they come, I've included this app in my list to receive notifications from.
See if you have similar apps which might not be directly related to work, but you need notifications from them even when you're working.
Now that we've taken care of distracting notifications let's move on to the second biggest source of distraction — your phone's home screen.
Under the Customise Screens section, focus mode allows us to choose a lock screen and home screen that complement the focus mode we're trying to create.
Let's start with the lock screen:
Tapping on the lock screen preview opens a picker where you can create a minimal lock screen layout:
Tap on Create a New Lock Screen to open the lock screen options:
Here, instead of choosing a wallpaper, I used the Colour option to create a lock screen out of a solid colour:
This is less distracting than a photo wallpaper, and since we'll be using the same background as the home screen background, it serves the purpose of recreating a minimal workspace.
I prefer light mode, so I chose a white colour for my lock screen. Choose a colour you prefer looking at many times a day.
Once you've chosen a lock screen design, you can tap Set as Wallpaper Pair to make the same solid colour background your home screen wallpaper too:
Now, I prefer not to have lock screen widgets because I rarely use them. But you can pick a few that are handy to you. Maybe a calendar widget?
With the lock screen ready, let's move on to the next part of this setup — the home screen.
Right beside the lock screen preview, there's an option to choose how your home screen would look when the focus mode is on:
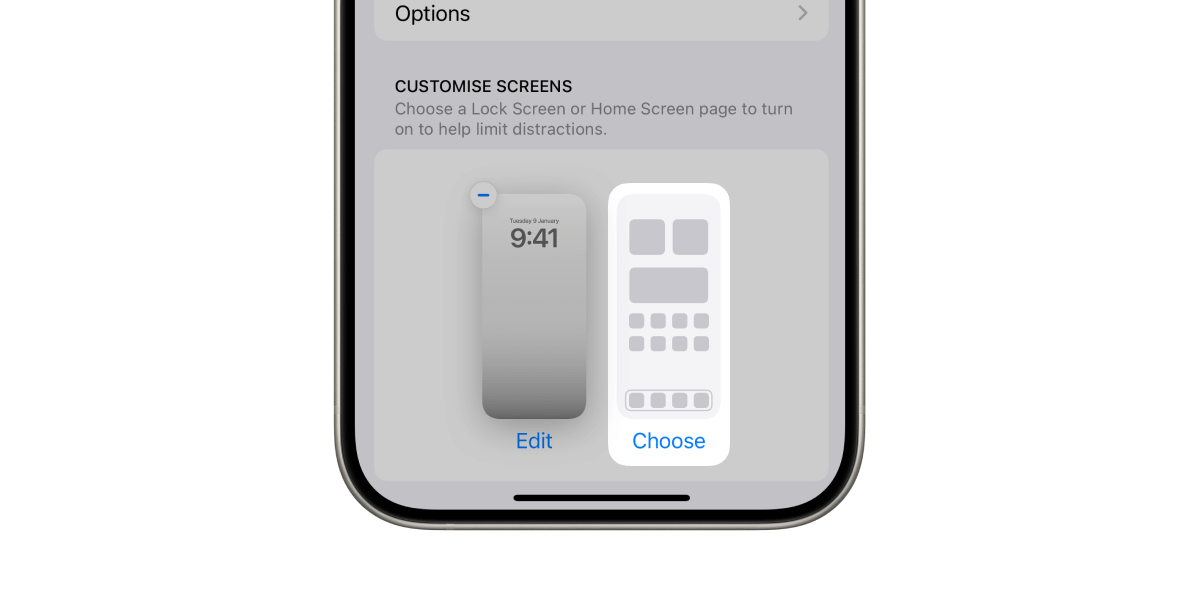
A powerful aspect of focus modes I like is that we can select which home screen pages are visible while a focus mode is active.
This is handy because if you have your work apps and widgets arranged on a single page, you can tap the Choose option to show all active home screen pages:
And then tick the page which has all of your work apps and untick everything else under the Choose from Your Pages section:
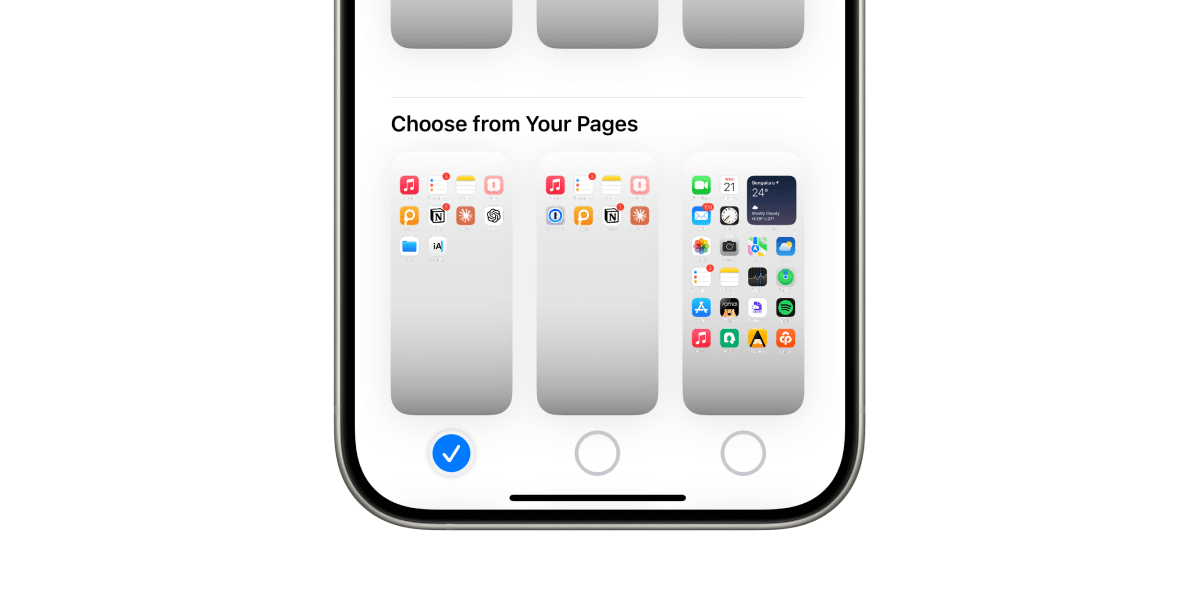
Now, when the Work focus is on, your home screen will only show this single page and hide everything else.
Unfortunately, my apps aren't neatly arranged on a single page; they're spread out. If you're like me, there's a way.
We can create a custom page which will only be visible when this focus mode is active by tapping a suggested home screen under the Create a New Page section, and then tapping Edit Apps:
Here, you can choose the apps you need for your work to show up on the page. Be mindful of which apps you choose here. Unnecessary apps can cause distraction and bring you back to square one.
I chose apps that I might explicitly need to open during work, such as Notes, Reminders, Notion, Music, etc.
I didn't keep apps like 1Password on this list because although I might need to access 1Password to log in somewhere during work, it usually auto-fills the password without explicitly opening the app.
The same goes for my housing society app, which asks me to approve or deny an entry. The approval comes as a notification, and I don't need to check the app for anything manually.
Once you're done choosing the apps for your focused home screen, tap Add to set this new page as your home screen when Work focus in turned on.
That's all we need to do to set up a minimal, focused work mode.
Turning on the Work focus from the Control Center changes the home screen to look like this:
Now, while we created a custom home screen page from within the focus, it's still a regular page.
So, you can long-press on an empty area on the screen to put the screen in edit mode:
Then, add the widgets you need via the + button on the top:
Or, drag and drop app icons to rearrange them accordingly:
Now, while this setup will be enough for most people, you can make your phone even less inviting by:
Making the entire screen greyscale
While I haven't noticed much difference in distractions when keeping my home screen full colour compared to greyscale, it makes the entire space look a bit more serious.
I get that e-Ink vibe from my phone when using it in a greyscale mode, which looks pretty good:

Now, the goal here is to automatically turn the phone screen greyscale when Work focus turns on and revert to full colour when it's off — because why browse photos and other media in greyscale?
Thankfully, the built-in Shortcuts app makes this workflow possible.
First, let's choose a Greyscale colour filter by going to Settings → Accessibility → Display & Text Size → Colour Filters:
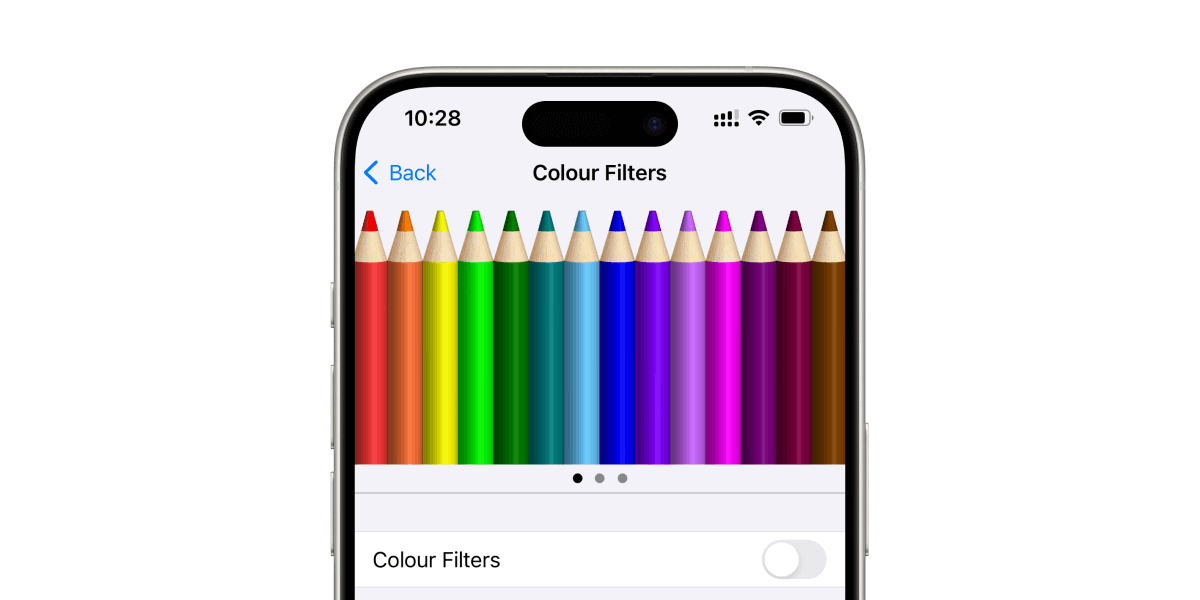
Once you turn on the colour filter switch, you'll see filter options that you can choose from:
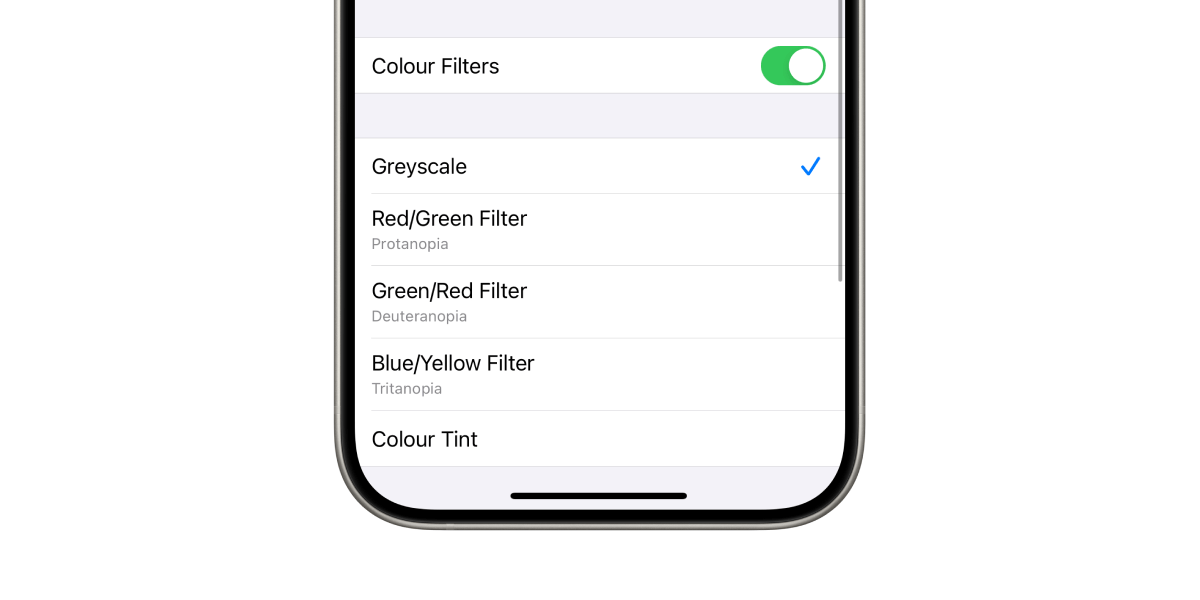
Choose Greyscale, and turn off the colour filter for now.
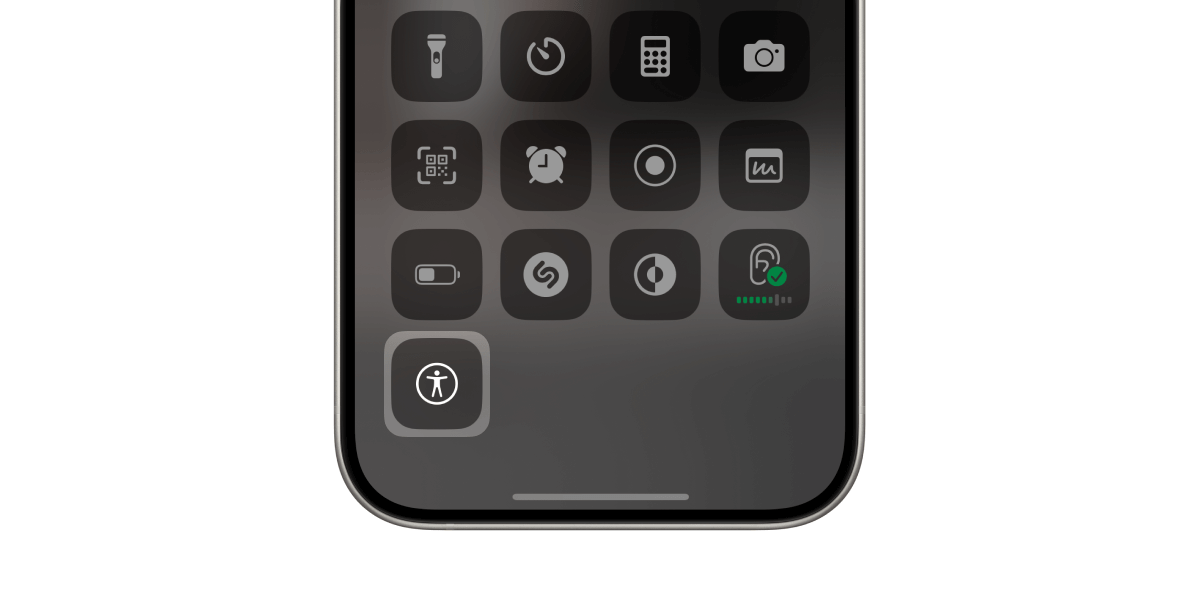
Now, you can switch to this greyscale mode by manually turning it on during your work sessions via Settings or through an Accessibility Shortcut in the Control Center:
But, we make this transition automatic by creating a shortcut in the Shortcuts app that toggles the greyscale mode when triggered.
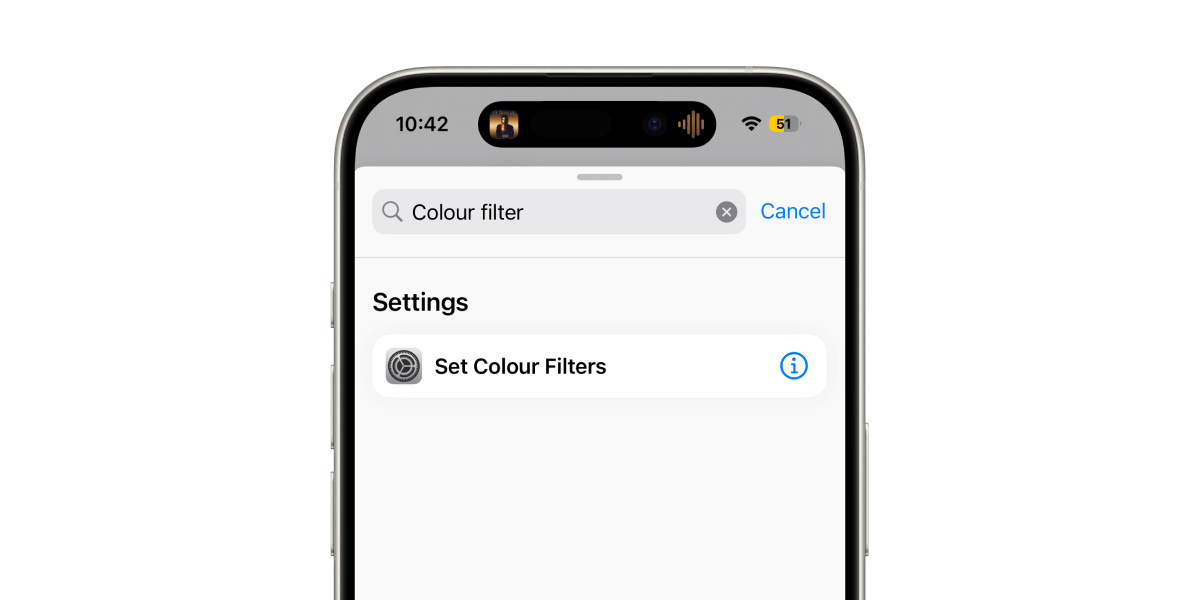
Create a new shortcut and tap Add Action to open a list of available shortcut actions.
Search for "colour filter", and choose the Set Colour Filters action from the list:
Tapping on the Turn field pops up options to choose Toggle instead of turn:
Once you've chosen Toggle as the action, give the shortcut a name and tap Done to save it.
Now that we have the shortcut ready, we need a way to connect it to our Work focus to trigger this shortcut every time the focus mode turns on or off.
Tap on the Automation tab in the Shortcuts app and add a new automation.
Choose the trigger "When turning Work on" to reveal more options like this:
Since we've designed our greyscale shortcut to toggle its state on when it runs, we can attach the same shortcut for both triggers — When Turning On and When Turning Off.
Now, we want this entire process to be automatic and without any user intervention, so let's choose Run Immediately to not get a confirmation prompt every time the Work focus mode turns on or off:
Tap Next to reveal a list of follow-up actions you can choose from.
The My Shortcuts section shows a few of your latest shortcuts, and the new Toggle Greyscale shortcut should appear here:
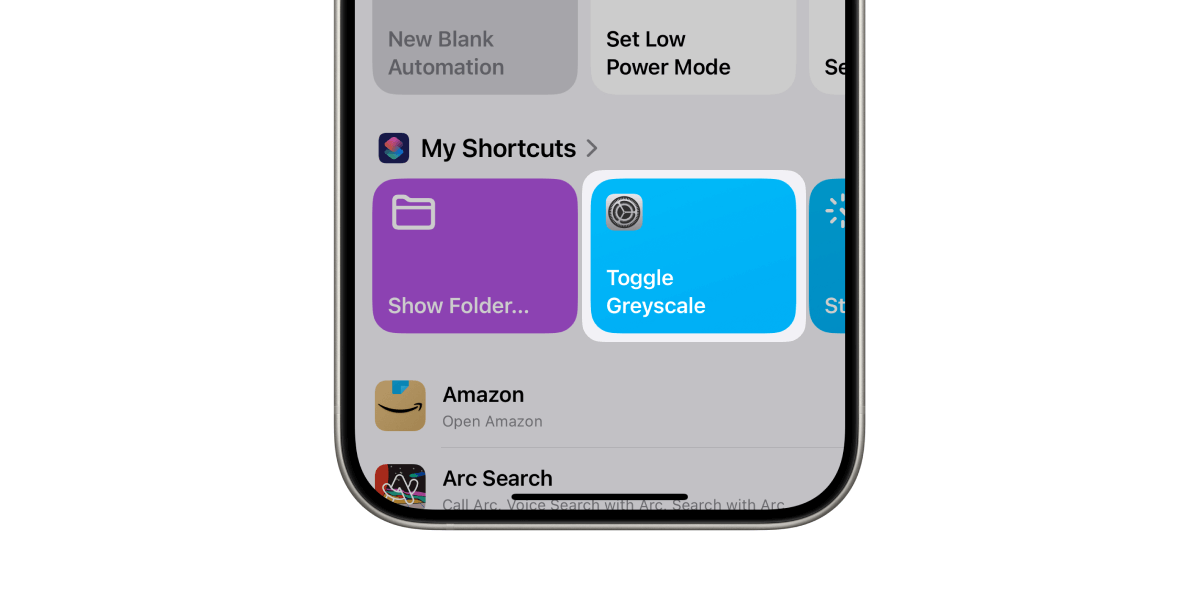
Tap on the shortcut to select it as your automation action.
And that's it.
Now, every time Work focus turns on, it'll not only reorganise the home screen but will also apply a greyscale filter to the screen.
But that's not all:
We can refine the workspace further by:
Adding focus filters
Browsers could be as much a distraction source as a helpful tool to get things done.
You switch over to your browser, see an open tab showing Reddit, and before you know it, you've spent 20 minutes scrolling memes rather than working.
Thankfully, like most modern browsers, Safari allows creating profiles, which are mini workspaces within the browser.
I have two profiles on my account, Personal and Hulry.
Hulry is what I usually use to browse work-related web apps and pages, and Personal for everything else.
So, returning to the Work focus configuration page, you can add a Focus Filter to select a Safari profile like this:
I chose the filter type as Profile and selected Hulry from the profiles list:
With this filter set, when I switch on Work focus and open Safari, it defaults to the Hulry profile.
This either gives me a fresh workspace where I can focus on websites I need to visit for work:
Or, resume my last work session if I had tabs opened in this profile:
Since I use this profile for work purposes, the residual tabs from the last session are work-related and not Amazon shopping pages.
Now, I had a few NFC stickers lying around from one of my last projects:
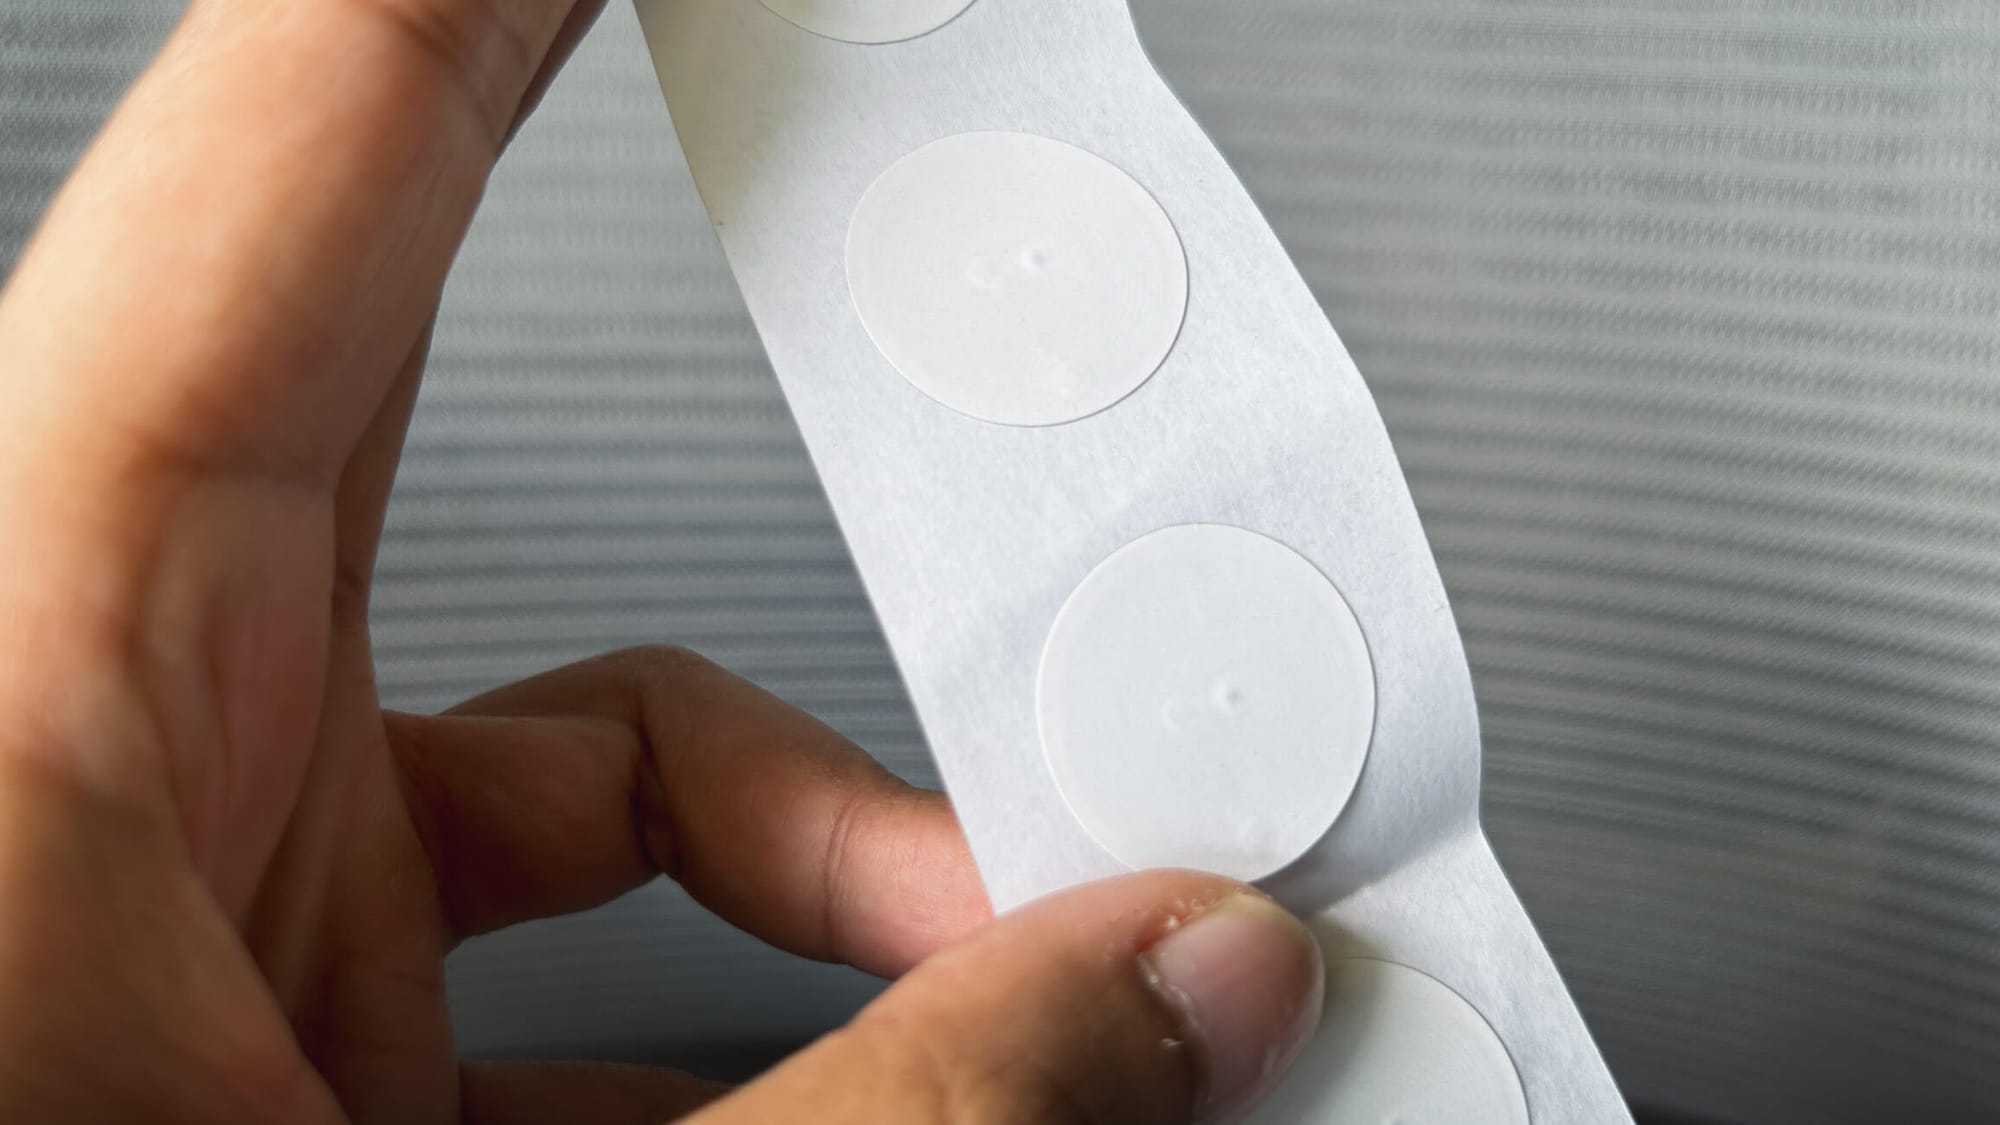
NFC stickers are cheap, stick on most smooth surfaces, and allow quick shortcut triggering by tapping the phone on a sticker.
If you can get some NFC stickers, you can make the transition to Work focus even smoother by setting up an automation to:
Turn on Work focus with a tap
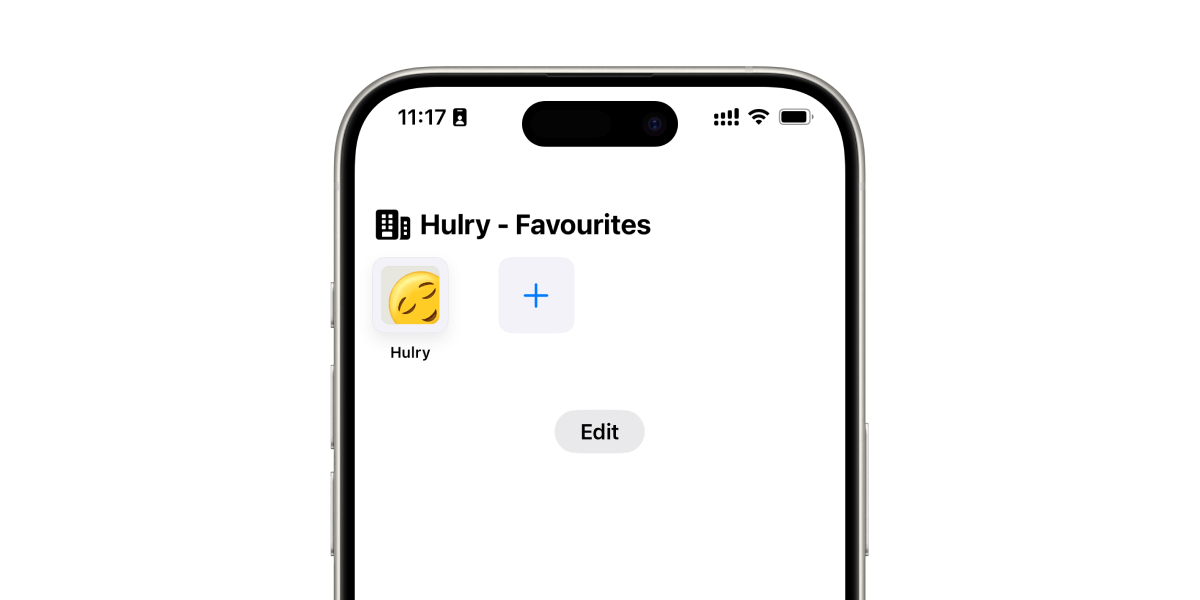
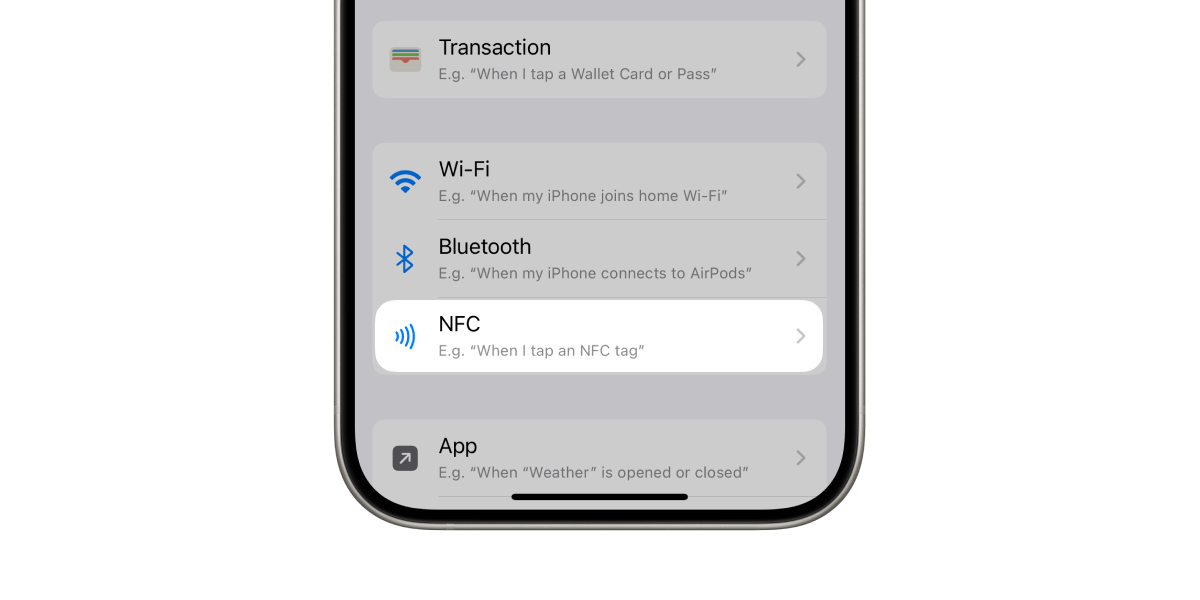
Returning to the Automation tab, let's create a new automation with the trigger as NFC:
Once you've scanned an NFC sticker by tapping the Scan option, you'll see an option to choose an action:
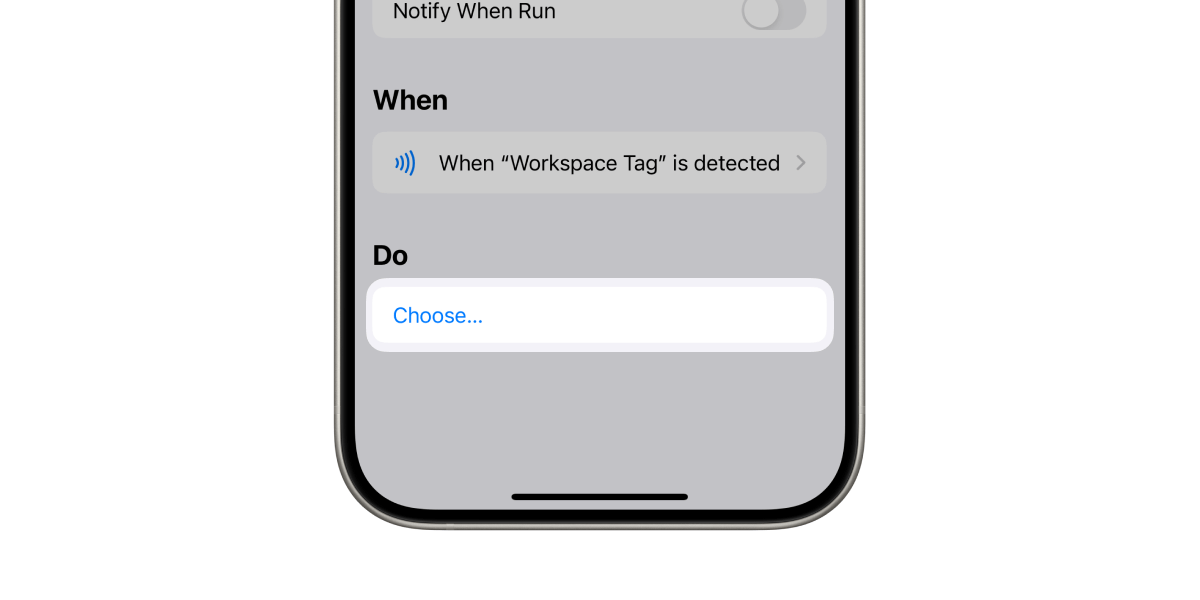
Tapping on New Blank Automation allows you to build a new action similar to creating a shortcut on the Shortcuts app:
Here, add an action to Set Focus.
If the selected focus mode is not the Work focus, you can tap on the focus mode field and select a focus from the list:
Tap on the Off field to switch the action to On.
Tap Done to mark the automation active, and now you can bring your phone near the scanned NFC sticker to quickly turn on Work focus without fiddling through Control Center options:
Nifty, isn't it?
With a few minutes of work, we've set up a pretty advanced automation that helps us reduce distractions when we work.
But before you go, here are a few tips to:
Squeeze the most benefits out of this setup
- Make it a habit. For the next few days, actively remember to turn on the Work focus mode when you start working. You might forget a few times, but it's okay. Try it again in your next work session. Over time, this will become a habit, and you'll automatically switch on Work focus when you're near your desk.
- Recalibrate your home screen apps. Notice which apps you open most during your work. Are they required for your work, or are you procrastinating through a work app? For example, Notion has both my personal and work materials. When stuck on something, I often impulsively open it and browse my travel plans and other random materials. I'll give it a few more days, but I might need to kick it off my focused home screen. Now, while you can't edit your custom home screen to swap out apps, you can remove your existing home screen from Work focus and create a new one with an updated list of apps.
- Your mileage may vary. While the setup is a good starting point for most people, you might find certain aspects unnecessary to your workflow. Feel free to tweak the entire setup accordingly. The greyscale mode not for you? Get rid of that automation.
Thanks for reading, and I hope this little setup will make your work sessions more productive.
If you've enjoyed this workflow, check out Hulry Plus, where I share member-only workflows, guides and more.